Complete Guide to Mt Kilimanjaro: Routes, Costs, Preparation & Summit Planning
Estimated reading time: 58 minutes
Mount Kilimanjaro is Africa’s highest mountain, reaching 5,895 metres (19,341 feet) at Uhuru Peak in northern Tanzania. You can climb Kilimanjaro without technical mountaineering skills, but you need the right route, enough days for acclimatization, proper preparation, suitable equipment, and an experienced mountain crew.
This Complete Guide explains how to plan your climb from start to finish. You will learn about the main Kilimanjaro routes, the best number of days to spend on the mountain, climbing costs, the best time to visit, physical preparation, altitude and acclimatization, camping and food, guides and porters, summit night, and mountain safety.
Choosing the right itinerary matters. A short climb may save time and money, but a longer route can give your body more time to adjust to altitude. Your fitness also matters, but good fitness alone cannot prevent altitude problems. Your pace, route profile, preparation, weather, and how your body responds to altitude all play a role.
Whether this is your first Kilimanjaro climb or you are comparing different routes, this guide gives you the practical information you need before booking. By the end, you will understand what the climb involves, what you should budget for, how to prepare, and how to choose a Kilimanjaro itinerary that matches your time, goals, and trekking experience.
Table of contents
- Complete Guide to Mt Kilimanjaro: Routes, Costs, Preparation & Summit Planning
- Quick Answer: Kilimanjaro at a Glance
- Where Is Mount Kilimanjaro?
- What Makes Climbing Kilimanjaro Difficult?
- How High Is Mount Kilimanjaro?
- Kilimanjaro’s Five Climate Zones
- Which Kilimanjaro Route Should You Choose?
- What Makes Climbing Kilimanjaro Difficult?
- Kilimanjaro Route Comparison
- How Many Days Do You Need to Climb Kilimanjaro?
- Best Time to Climb Kilimanjaro
- How Much Does It Cost to Climb Kilimanjaro?
- What Is Included in a Kilimanjaro Climbing Package?
- How to Prepare for Kilimanjaro
- Altitude, Acclimatization & Mountain Safety
- What Is a Typical Day on Kilimanjaro Like?
- What Changes on Summit Day?
- What Is Summit Night Like?
- Where Do You Sleep and What Do You Eat on Kilimanjaro?
- Guides, Porters & Responsible Kilimanjaro Trekking
- Complete Kilimanjaro Planning Timeline
- Complete Kilimanjaro Checklist
- Kilimanjaro Frequently Asked Questions
- Conclusion
- Read Also :
Quick Answer: Kilimanjaro at a Glance
Mount Kilimanjaro stands at 5,895 metres (19,341 feet) above sea level, making it the highest mountain in Africa. It sits in northern Tanzania near the Kenya border. You can climb Kilimanjaro without technical mountaineering skills, but altitude, long trekking days, changing weather, and summit night make proper preparation important.
| Question | Quick Answer |
|---|---|
| How high is Mount Kilimanjaro? | 5,895 metres (19,341 feet) |
| Where is Kilimanjaro? | Northern Tanzania, near the Kenya border |
| What is the highest point? | Uhuru Peak |
| Do you need climbing experience? | No technical mountaineering experience is required on the standard routes. |
| How many days does it take? | Most routes take about 5–9 days, depending on the route and itinerary. |
| What is the biggest challenge? | High altitude and your body’s ability to acclimatize. |
| Can beginners climb Kilimanjaro? | Yes. Beginners can climb with proper preparation, a suitable route, and an experienced mountain crew. |
| Which routes offer more acclimatization time? | Longer itineraries, such as Lemosho and Northern Circuit, allow a more gradual ascent. |
| Which route uses mountain huts? | Marangu Route |
| Which routes use tents? | Machame, Lemosho, Rongai, Umbwe, and Northern Circuit use mountain camps. |
| What does “pole pole” mean? | “Pole pole” means “slowly, slowly” in Swahili and describes the steady pace used on Kilimanjaro. |
| Do you need a guide? | Yes. Kilimanjaro climbs must follow the park’s guiding requirements. |
| Can you climb Kilimanjaro all year? | Yes, but weather conditions vary considerably throughout the year. |
| What should you prepare first? | Choose the right route and duration, then prepare your fitness, equipment, travel documents, and acclimatization plan. |
Where Is Mount Kilimanjaro?
Mount Kilimanjaro is in northern Tanzania, close to the border with Kenya, in East Africa. The mountain lies inside Kilimanjaro National Park, about 80 kilometres (50 miles) from Arusha and roughly 50 kilometres (31 miles) from Moshi.
Kilimanjaro stands near the equator, but its high elevation creates much colder conditions near the summit. The mountain rises from Tanzania’s lower agricultural areas to Uhuru Peak at 5,895 metres (19,341 feet) above sea level.
Most international climbers reach Kilimanjaro through Kilimanjaro International Airport (JRO). The airport sits between Arusha and Moshi, making it convenient for travelers heading to the mountain. From there, your trekking operator can arrange a transfer to your hotel and later to the trailhead.
The mountain has three volcanic cones: Kibo, Mawenzi, and Shira. Kibo contains Uhuru Peak, the highest point on Kilimanjaro and the highest point in Africa.
Kilimanjaro’s location also makes it possible to combine a mountain trek with other experiences in northern Tanzania. After your climb, you can explore the surrounding area or continue your journey to other destinations in the region.
Mount Kilimanjaro Location at a Glance
| Location Detail | Information |
|---|---|
| Country | Tanzania |
| Region | Northern Tanzania |
| Continent | Africa |
| Mountain range | Kilimanjaro Massif |
| National park | Kilimanjaro National Park |
| Highest point | Uhuru Peak |
| Elevation | 5,895 m (19,341 ft) |
| Nearest major towns | Moshi and Arusha |
| Main international airport | Kilimanjaro International Airport (JRO) |
| Nearby country | Kenya |
If you are planning to climb Kilimanjaro, Moshi is the main trekking base, while Arusha also serves as an important starting point for travelers visiting northern Tanzania.
What Makes Climbing Kilimanjaro Difficult?
Climbing Kilimanjaro is difficult mainly because your body must adapt to high altitude while you hike for several days and then tackle a demanding summit night. You do not need technical mountaineering skills, but you still need preparation, patience, and the right itinerary. Understanding the challenges before your trek helps you prepare for the mountain instead of underestimating it.
1. High Altitude
Altitude is the biggest challenge on Kilimanjaro. The trail climbs from the lower slopes to 5,895 metres at Uhuru Peak, where the air contains much less oxygen than at sea level. Your body needs time to adjust as you gain elevation.
This is why a longer itinerary can make a major difference. A slower ascent gives your body more time to adapt before summit day. Your guide will also monitor how you feel throughout the trek and adjust the pace when necessary.
Good fitness does not guarantee that your body will adapt to altitude well. A strong hiker can still struggle at high elevation, while someone with moderate fitness may handle the altitude better. Proper acclimatization matters just as much as physical preparation.
2. Several Days of Continuous Hiking
Kilimanjaro does not challenge you with one long hike alone. Most climbs involve several consecutive days on the trail, with each day bringing more elevation and different terrain.
You may walk for several hours, reach camp, rest, eat, sleep, and then repeat the process the following day. Your legs can become tired, especially on longer itineraries.
Training with regular walking and longer hikes helps your body become comfortable with this routine. However, you also need to learn how to conserve energy rather than trying to walk fast.
3. The Demands of Summit Night
Summit night creates a completely different experience. Climbers usually leave camp during the night and walk for several hours toward Uhuru Peak. The darkness, cold temperatures, steep sections and altitude make this part of the trek especially demanding.
You need patience because the pace becomes deliberately slow. Your guide sets a steady rhythm so you can preserve energy for the final push to the summit.
Reaching Uhuru Peak feels rewarding because you have combined several days of preparation and hiking into one final effort.
4. Changing Weather and Terrain
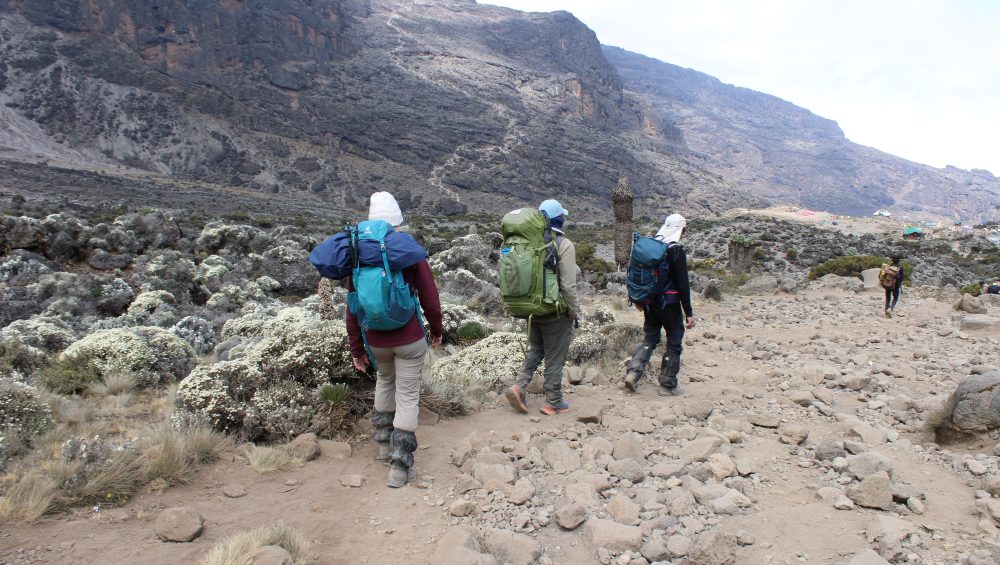
Kilimanjaro takes you through several environments, so the trail does not feel the same from the first day to the summit. You can start your trek in a warm forest and eventually reach a cold, rocky high-altitude environment.
Rain, wind, sunshine, cold temperatures and muddy trails can all affect your hiking experience. The terrain also changes from forest paths to rocky trails, open moorland and steep sections near the summit.
That means you need layers, suitable footwear and equipment that can handle changing conditions.
The Key to Handling Kilimanjaro’s Challenges
You do not need to be an elite athlete to climb Kilimanjaro. Instead, focus on choosing an appropriate route, allowing enough days for acclimatization, training consistently, walking at a steady pace, carrying suitable gear and listening to your mountain crew.
The mountain rewards preparation more than rushing.
How High Is Mount Kilimanjaro?
Mount Kilimanjaro is 5,895 metres (19,341 feet) above sea level, making it the highest mountain in Africa. Its highest point, Uhuru Peak, sits on the Kibo volcanic cone.
Kilimanjaro rises dramatically from the surrounding plains of northern Tanzania. The large difference in elevation creates major changes in temperature, vegetation, landscape, and air pressure as you climb.
At the lower slopes, the environment feels warm and supports agriculture and dense vegetation. Higher up, the trail passes through rainforest, heath and moorland, alpine desert, and finally the cold summit zone.
Kilimanjaro Elevation at a Glance
| Point | Approximate Elevation |
|---|---|
| Lower mountain | 800-1,800 m |
| Rainforest | 1,800-2,800 m |
| Heath and moorland | 2,800-4,000 m |
| Alpine desert | 4,000-5,000 m |
| Stella Point | 5,739 m (18,829 ft) |
| Uhuru Peak | 5,895 m (19,341 ft) |
Why Does Kilimanjaro’s Height Matter?
The mountain’s height creates the main physical challenge of the climb: altitude.
As you gain elevation, air pressure decreases and your body has less oxygen available with each breath. You may notice heavier breathing, tiredness, headaches, or other symptoms as you climb higher.
Your physical fitness alone cannot predict how your body will respond to altitude. That is why a sensible route, gradual ascent, steady pacing, rest, and careful monitoring matter throughout the trek.
The summit also brings much colder conditions than the lower slopes. Even if you start your climb in warm weather, temperatures near Uhuru Peak can fall well below freezing.
How High Is Kilimanjaro Compared With Other African Mountains?
Kilimanjaro stands higher than any other mountain in Africa. Its 5,895-metre elevation makes it one of the world’s most recognizable high-altitude trekking destinations.
Unlike many mountains of similar height, Kilimanjaro does not require technical climbing equipment on its standard trekking routes. The main challenge comes from the altitude, long trekking days, changing weather, and demanding summit ascent.
For climbers, reaching 5,895 metres at Uhuru Peak means standing at the highest natural point in Africa.
Kilimanjaro’s Five Climate Zones
Kilimanjaro has five distinct climate zones, and each zone brings a noticeable change in vegetation, temperature, landscape, and trekking conditions. As you climb from the lower slopes toward Uhuru Peak, the warm cultivated land gradually changes into rainforest, heath and moorland, alpine desert, and finally the cold summit zone.
This rapid change makes Kilimanjaro unusual. Within a single climb, you can walk through environments that feel completely different from one another.
1. Cultivation Zone
Approximate elevation: 800 to 1,800 metres
The cultivation zone covers the lower slopes of Kilimanjaro. Local communities farm this fertile area, with crops such as bananas, coffee, maize, and other plants growing around the mountain.
The weather here usually feels warm compared with the upper mountain. Depending on your route, you may pass through farmland and local communities before reaching the national park boundary.
As you gain elevation, farms gradually give way to thicker natural vegetation.
2. Rainforest Zone
Approximate elevation: 1,800 to 2,800 metres
The rainforest creates a dramatic change in scenery. Tall trees, moss, ferns, vines, and dense vegetation surround the trail, while the air becomes cooler and more humid.
This zone receives considerable rainfall, which helps create the lush environment. You may also hear birds and, depending on your route and conditions, spot wildlife such as monkeys.
The trail can become muddy after rain, so good footwear and rain protection are important.
3. Heath and Moorland Zone
Approximate elevation: 2,800 to 4,000 metres
Above the rainforest, the landscape opens into heath and moorland. Tall trees become less common, and you start seeing grasses, shrubs, giant heathers, and distinctive high-altitude plants.
Giant lobelias and other plants adapted to the mountain environment can appear along some sections of the trail.
Temperatures also become cooler as you climb. The open landscape provides wider views of the mountain and surrounding areas, while the increasing elevation makes your walking pace more important.
This is where many climbers begin to notice the effects of altitude more clearly.
4. Alpine Desert Zone
Approximate elevation: 4,000 to 5,000 metres
The alpine desert looks very different from the forest below. Vegetation becomes sparse, and volcanic rocks, gravel, and exposed ground dominate the landscape.
Daytime conditions can feel surprisingly warm under strong sunlight, while temperatures can drop sharply after sunset. The air also contains much less oxygen than at lower elevations.
At this altitude, conserve your energy and maintain the slow, steady pace recommended by your guide. The environment becomes increasingly harsh as you approach the summit.
5. Arctic Summit Zone
Approximate elevation: 5,000 to 5,895 metres
The Arctic summit zone represents the final environment on Kilimanjaro. Almost no vegetation survives at this elevation, and the landscape becomes rocky, dry, cold, and highly exposed.
Temperatures can fall below freezing, particularly during the night and early morning. Strong winds can make conditions feel even colder.
This is where you complete the final ascent toward Stella Point and then continue around the crater rim toward Uhuru Peak at 5,895 metres (19,341 feet).
The combination of extreme elevation, cold, steep terrain, and reduced oxygen makes this the most demanding climate zone of the climb.
Kilimanjaro’s Five Climate Zones at a Glance
| Climate Zone | Approx. Elevation | What You Experience |
|---|---|---|
| Cultivation Zone | 800-1,800 m | Farms, villages, warm conditions |
| Rainforest | 1,800-2,800 m | Dense forest, moisture, wildlife |
| Heath & Moorland | 2,800-4,000 m | Open vegetation, giant heathers, cooler air |
| Alpine Desert | 4,000-5,000 m | Rocky terrain, sparse vegetation, thin air |
| Arctic Summit Zone | 5,000-5,895 m | Cold, exposed terrain and very little vegetation |
Why Are Kilimanjaro’s Climate Zones Important?
The five zones show how quickly conditions change as you climb. You can begin the trek in a warm agricultural environment and finish several days later in a cold, high-altitude landscape.
Each zone requires a slightly different approach to trekking. Lower sections may focus on staying comfortable in warm or wet conditions, while higher sections require more attention to warmth, pacing, hydration, energy conservation, and altitude.
Understanding these zones also helps you prepare your clothing and equipment. Instead of packing for one type of weather, you need a layering system that works across the mountain’s changing environments.
Kilimanjaro is not just a climb to a summit; it is a journey through five remarkable ecological and climatic zones
Which Kilimanjaro Route Should You Choose?
The best Kilimanjaro route depends on your time, trekking experience, budget, preferred scenery, and how much time you want to give your body to adjust to altitude. There is no single route that works best for everyone.
If reaching Uhuru Peak is your main goal, do not choose a route only because it costs less or takes fewer days. A longer itinerary can give you more time to acclimatize and enjoy the mountain.
| Route | Typical days | Best for | Main advantage | Main consideration |
|---|---|---|---|---|
| Machame | 6 to 7 | Scenic trekking | Beautiful and varied landscapes | Steeper sections |
| Lemosho | 7 to 9 | First-time climbers | Gradual approach and good acclimatization time | Takes longer |
| Marangu | 5 to 6 | Hut preference | Sleeps in mountain huts | Shorter options give less acclimatization time |
| Rongai | 6 to 7 | Quieter trekking | Northern approach with a different mountain experience | Less variety in scenery |
| Umbwe | 6 | Experienced trekkers | Direct and challenging | Steep ascent and limited acclimatization time |
| Northern Circuit | 8 to 9 | More acclimatization time | Long, gradual approach | Requires more time and budget |
Which Route Is Best for First-Time Climbers?
Lemosho is one of the strongest choices for a first Kilimanjaro climb, especially on a 7 to 9-day itinerary. The route gives you a gradual approach, varied scenery, and more time to adjust to altitude.
The Northern Circuit also suits beginners who have enough time for a longer trek. Its 8 to 9-day itinerary gives you a gradual journey around the mountain before the summit attempt.
Which Route Has the Best Scenery?
Lemosho and Machame stand out for scenery.
Lemosho takes you through a quieter western approach before joining the southern side of the mountain. Machame offers dramatic landscapes and a classic Kilimanjaro trekking experience.
If photography and changing landscapes matter to you, compare these two routes first.
Which Route Is Best for Acclimatization?
Longer itineraries generally give you more time to adjust to altitude. The Northern Circuit and longer Lemosho programs provide more days on the mountain than short itineraries.
Remember that no route can guarantee that you will avoid altitude sickness. Your body responds to altitude differently from another climber.
Which Route Is Best if You Prefer Huts?
Marangu is the main choice if you want to sleep in mountain huts instead of camping in tents.
You still need to prepare for long walking days and high altitude. Hut accommodation does not make the climb easy.
Which Route Is Best for Experienced Trekkers?
Umbwe offers a direct and demanding ascent. Its steep profile makes it more suitable for trekkers who already have strong mountain experience and understand the demands of high-altitude trekking.
It is not the route I would recommend simply because you want to finish Kilimanjaro quickly.
Which Route Should You Choose?
Use this simple guide:
- First Kilimanjaro climb: Lemosho
- More time for acclimatization: Northern Circuit
- Beautiful scenery and classic trek: Machame
- Mountain huts: Marangu
- Quieter northern approach: Rongai
- Experienced trekker looking for a tougher route: Umbwe
Our simple recommendation
If you have enough time, choose a longer itinerary rather than the shortest possible climb. For many first-time climbers, 7 to 9 days on Lemosho or 8 to 9 days on the Northern Circuit provide a better balance of trekking, acclimatization, and summit preparation.
The right route should fit you, not simply the route with the lowest price or fewest days.
What Makes Climbing Kilimanjaro Difficult?
Climbing Kilimanjaro is difficult mainly because of the high altitude, long trekking days, changing weather, and demanding summit climb. You do not need technical mountaineering skills for the standard routes, but your body still needs to adjust to the mountain’s increasing elevation. Good preparation, a suitable route, a steady pace, and enough time for acclimatization can make the climb more manageable.
1. High Altitude
Altitude is the biggest challenge for many climbers. Kilimanjaro rises to 5,895 metres (19,341 feet) at Uhuru Peak, where the air contains much less available oxygen than at sea level.
As you climb higher, you may notice that breathing becomes harder and normal walking requires more effort. Your body needs time to adapt, which makes acclimatization an important part of your itinerary.
Being physically fit does not guarantee an easy response to altitude. Each person’s body reacts differently, so even experienced hikers can experience altitude-related problems.
2. Long Days on the Trail
Kilimanjaro involves several consecutive days of hiking. Depending on your route, you may spend many hours walking each day before reaching your next camp.
The challenge comes from repeating this routine while gradually gaining elevation. Your legs and feet can become tired, especially during longer trekking days and the final descent.
Regular walking and hiking before your trip can help you become more comfortable with spending several hours on your feet.
3. Summit Day Is the Hardest Part
The summit attempt usually creates the biggest physical and mental challenge of the entire climb.
Most climbers start during the night and walk toward Uhuru Peak in darkness. The temperature can fall below freezing, the terrain becomes steeper, and the high altitude makes each step more demanding.
The slow pace can also test your patience. Your guide will normally encourage you to walk pole pole, meaning slowly and steadily, so you can conserve energy for the summit and descent.
4. Changing Weather
Kilimanjaro passes through several climate zones, so weather conditions change as you gain elevation.
You may experience warm temperatures near the lower slopes, rain in the rainforest, cooler conditions in the moorland, strong sunlight in the alpine desert, and freezing temperatures near the summit.
Rain, wind, clouds, and cold can make the trail more challenging. Good clothing and a proper layering system help you handle these changes.
5. Different Types of Terrain
The trail does not remain the same throughout the climb. Depending on your route, you can walk through forest paths, rocky trails, open moorland, volcanic terrain, and steep sections near the summit.
The descent can also put extra pressure on your knees and legs after the summit attempt.
Comfortable, well-tested hiking boots and trekking poles can help you manage uneven sections of the trail.
6. Limited Recovery Time
Kilimanjaro does not give you a full day of rest after every hiking day. Most itineraries involve walking on consecutive days.
You need to eat, drink, rest, sleep, and prepare for another day of trekking while your body continues adapting to altitude.
This is one reason choosing the right number of days matters. A longer itinerary can provide a more gradual ascent and give you additional time on the mountain.
7. Mental Challenge
Kilimanjaro also tests your patience and determination.
There may be moments when the trail feels slow, the weather changes, or your body feels tired. Summit night can feel particularly demanding because you start before sunrise and continue for several hours at high altitude.
The key is to focus on the next section of trail rather than thinking about the entire distance to the summit. Follow your guide’s pace, take scheduled breaks, eat and drink regularly, and communicate if something does not feel right.
Is Kilimanjaro Too Difficult for Beginners?
No. Many beginners successfully climb Kilimanjaro, especially when they choose an appropriate itinerary and prepare properly.
You do not need previous technical climbing experience for the standard trekking routes. However, you should take the altitude seriously and avoid choosing an itinerary simply because it has the lowest price or fewest days.
For a first climb, a longer route can give you more time to adjust to altitude and experience the mountain at a controlled pace.
What Makes Kilimanjaro Manageable?
You can make the climb more manageable by focusing on the things you can control:
- Choose an itinerary with enough acclimatization time.
- Train consistently before your trip.
- Walk at a slow and steady pace.
- Follow your guide’s instructions.
- Eat and drink regularly.
- Bring suitable clothing and footwear.
- Get enough rest at camp.
- Tell your guide about any symptoms or unusual changes in how you feel.
- Put safety ahead of reaching the summit.
Kilimanjaro rewards patience rather than speed. You do not need to race toward Uhuru Peak. You need to prepare well, climb steadily, adapt to the altitude, and make sensible decisions throughout the trek.
Kilimanjaro Route Comparison
The best Kilimanjaro route depends on your time, trekking experience, preferred scenery, budget, and how much time you want for acclimatization. Kilimanjaro has several established routes, and each one offers a different experience. Longer routes generally give you more time to adjust to altitude, while shorter routes require a faster ascent.
Kilimanjaro Routes at a Glance
| Route | Typical Days | Scenery | Difficulty | Acclimatization | Best For |
|---|---|---|---|---|---|
| Lemosho | 7-9 days | Excellent | Moderate | Very good | First-time climbers |
| Machame | 6-7 days | Excellent | Challenging | Good | Scenic trekking |
| Northern Circuit | 8-9 days | Excellent | Moderate | Excellent | More acclimatization time |
| Rongai | 6-7 days | Very good | Moderate | Good | Quieter trekking |
| Marangu | 5-6 days | Very good | Moderate | Fair to good | Climbers who prefer huts |
| Umbwe | 6 days | Excellent | Very challenging | Limited | Experienced trekkers |
Lemosho Route
Lemosho is one of the best choices for first-time Kilimanjaro climbers. The route approaches the mountain from the west and gives you beautiful scenery, a gradual start, and several itinerary options.
The longer 8- or 9-day versions allow more time for acclimatization. You also experience different landscapes as the route crosses the mountain toward the southern slopes.
Best for: First-time climbers, scenic trekking, and travelers with enough time for a longer climb.
Machame Route
Machame is a popular choice for climbers who want dramatic scenery and a classic Kilimanjaro trekking experience. The route includes varied landscapes and challenging sections, including the Barranco area.
The 6-day version moves at a faster pace, while the 7-day itinerary gives you more time on the mountain.
Best for: Scenic trekking, active hikers, and climbers who want a well-known route.
Northern Circuit Route
The Northern Circuit gives you one of the longest and most gradual approaches to Uhuru Peak. The route travels around the quieter northern side of Kilimanjaro before joining the summit section.
Its 8- or 9-day itineraries provide plenty of time for gradual altitude gain and allow you to experience parts of the mountain that receive fewer trekkers.
Best for: Climbers who have enough time and want to prioritize acclimatization and a quieter experience.
Rongai Route
Rongai approaches Kilimanjaro from the northern side near the Kenya border. It offers a different perspective of the mountain and generally sees fewer trekkers than Machame.
The landscape changes as you cross toward the southern side of Kilimanjaro for the summit attempt.
Best for: Climbers looking for a quieter route and a different approach to the mountain.
Marangu Route
Marangu is the only major Kilimanjaro route that uses permanent mountain huts instead of camping tents. This makes it a popular choice for travelers who prefer hut accommodation.
However, sleeping in huts does not make the climb easier. The shorter 5- or 6-day itineraries can give your body less time to adjust to altitude.
Best for: Climbers who prefer huts and want a straightforward trail experience.
Umbwe Route
Umbwe is one of the steepest and most direct approaches to Kilimanjaro. The route gains elevation quickly and includes demanding sections early in the trek.
Because of its steep profile and limited acclimatization time on shorter itineraries, Umbwe suits experienced trekkers who understand the demands of high-altitude trekking.
Best for: Experienced trekkers looking for a more challenging ascent.
Which Kilimanjaro Route Should You Choose?
There is no single route that is best for everyone. Use your priorities to narrow down your choice:
- Best for first-time climbers: Lemosho
- Best for more acclimatization time: Northern Circuit
- Best for dramatic scenery: Lemosho or Machame
- Best for a quieter approach: Rongai or Northern Circuit
- Best for mountain huts: Marangu
- Best for experienced trekkers: Umbwe
- Best balance of time and acclimatization: 7-day Machame or 7 to 8-day Lemosho
If you have enough time and budget, consider a longer itinerary rather than choosing the shortest climb available. More days can give you a more gradual ascent and a less rushed experience.
The right Kilimanjaro route is not simply the cheapest or shortest one. It is the route that matches your experience, schedule, priorities, and ability to adapt to altitude.
How Many Days Do You Need to Climb Kilimanjaro?
Most Kilimanjaro climbs take 5 to 9 days, depending on the route and itinerary. While a shorter climb can reduce the cost and time needed for your trip, adding extra days can make the ascent more gradual and provide more time for your body to adapt to high altitude.
There is no perfect number of days for every climber. The right itinerary depends on your chosen route, previous trekking experience, fitness, schedule and how well you adapt to altitude.
5 Days on Kilimanjaro
A 5-day climb is a fast itinerary and usually gives you less time to acclimatize. It can suit experienced, physically prepared trekkers who understand the demands of high-altitude trekking, but it is generally not the first choice for someone climbing Kilimanjaro for the first time.
If your main goal is to save time or money, a 5-day itinerary may look attractive. However, reducing the number of days also means spending less time allowing your body to adjust to the altitude.
6 Days on Kilimanjaro
A 6-day itinerary offers a little more time on the mountain than a 5-day climb, but it can still involve a relatively quick ascent depending on the route.
It can be a reasonable option for trekkers with limited time, but route selection becomes particularly important. A well-designed 6-day itinerary can be very different from another 6-day itinerary because elevation profiles and acclimatization opportunities vary between routes.
7 Days on Kilimanjaro
Seven days is a popular middle ground for climbers who want to balance trip length, cost and acclimatization. It gives you more time on the mountain without requiring the longer commitment of an 8- or 9-day expedition.
For many trekkers, a 7-day itinerary provides a good balance between having enough time for the climb and keeping the overall trip manageable.
8 Days on Kilimanjaro
An 8-day itinerary gives you more time to ascend gradually and experience the mountain without rushing through the route.
This can be a strong choice for first-time climbers who have enough time in Tanzania and want to prioritize acclimatization and a more comfortable trekking pace. The extra day also gives the itinerary more flexibility compared with a very short climb.
9 Days on Kilimanjaro
A 9-day itinerary is one of the longest standard options and allows for a slower ascent with more time for acclimatization.
The extra time does not guarantee that you will reach Uhuru Peak, but it can reduce the pressure of having to gain altitude quickly. For trekkers who have the time and budget, a longer itinerary can be worth considering, especially when the route provides a well-planned acclimatization profile.
Is Saving One or Two Days Worth It?
This is one of the most important questions to ask before booking Kilimanjaro.
Usually, saving one or two days should not be the only reason to choose a faster itinerary. The price difference may look attractive, but the additional days can provide more time for acclimatization and a less rushed trekking experience.
Think of it this way:
- 5 days: Fast and demanding; best considered by well-prepared, experienced trekkers.
- 6 days: Shorter option, but route and acclimatization profile matter greatly.
- 7 days: Good balance between time, cost and acclimatization.
- 8 days: More gradual and generally a strong choice for first-time climbers.
- 9 days: Allows the most time among these options for a gradual ascent.
If you are choosing between a shorter and longer itinerary, consider what you are gaining from the extra day, not simply what you are paying for it. On Kilimanjaro, an extra day can mean more time to adjust to altitude, enjoy the scenery and trek at a controlled pace.
For this reason, Nihapa Tours recommends choosing the itinerary that gives you an appropriate acclimatization profile rather than automatically choosing the shortest option.
Best Time to Climb Kilimanjaro
The best time to climb Kilimanjaro is during the drier months, especially from January to mid-March and from late June to October. These periods usually offer better trail conditions, clearer mountain views, and more comfortable trekking conditions than the rainy seasons. However, Kilimanjaro has its own weather patterns, and conditions can change quickly as you gain altitude.
When Are the Main Dry Seasons?
Kilimanjaro has two main climbing seasons:
- January to mid-March: Generally warm and relatively dry, with good conditions for trekking.
- Late June to October: The longer dry season, with generally drier trails and good visibility.
The mountain also receives rain during other months. Late March to May usually brings the long rainy season, while November often brings the shorter rainy season.
Which Months Are Best for First-Time Climbers?
For a first Kilimanjaro climb, January, February, July, August, September, and early October are strong choices.
If you want the best balance of weather and trekking conditions, February, September, and early October can be particularly appealing. The mountain can still experience rain or clouds during the dry season, so no month can guarantee perfect weather.
Kilimanjaro Weather by Season
| Period | General Conditions | Crowd Level | Best For |
|---|---|---|---|
| January to February | Generally dry and warm at lower elevations | Moderate to high | Clear views and comfortable trekking |
| March | Rain gradually increases | Lower | Flexible travelers |
| April to May | Main rainy season | Low | Experienced trekkers seeking quieter trails |
| June | Conditions improve as rain decreases | Moderate | Quieter transition into dry season |
| July to August | Mostly dry and cool | High | Reliable trekking conditions |
| September | Dry with good visibility | Moderate to high | Strong overall conditions |
| October | Generally dry, rain may increase later | Moderate | Weather and crowd balance |
| November | Short rainy season | Low | Quiet trekking with higher weather risk |
| December | Conditions generally improve | Moderate to high | End-of-year climbs |
Is It Possible to Climb Kilimanjaro During the Rainy Season?
Yes, you can climb Kilimanjaro during the rainy season, but the trek can become more challenging.
Rain can make lower trails muddy and slippery, while clouds can reduce visibility. You may also experience wetter conditions in the rainforest zone.
Some climbers choose the rainy season because the trails are quieter and prices may be more attractive. However, first-time climbers often prefer the drier seasons because they offer more predictable trekking conditions.
Read More About : Cilimb Kilimanjaro During the Rainy Season
What Is the Best Month for Kilimanjaro?
There is no single perfect month for everyone.
Choose your climbing period based on what matters most to you:
- Best overall conditions: February, July, August, September
- Best for dry trails: July to September
- Best for warmer conditions: January and February
- Best for fewer crowds: June or October
- Best for a quieter adventure: March, November, or the rainy season
- Best for first-time climbers: January, February, July, August, September, or October
Keep in mind that temperatures change dramatically with altitude. A warm morning in Arusha does not mean the summit will feel warm. Uhuru Peak can remain extremely cold even during the dry season.
Does the Route Change the Best Time to Climb?
Yes. Your route can influence how weather affects your experience.
Lemosho and Machame cross several climate zones and include long sections on the western and southern sides of the mountain. Rongai approaches from the northern side, which can have different rainfall patterns from the southern slopes.
Your operator should consider the season when recommending a route and itinerary.
Our Recommendation
If you have flexible travel dates, choose a drier climbing period and allow enough days for acclimatization. For many travelers, a 7- to 9-day itinerary during the dry season offers a good combination of gradual altitude gain, enjoyable trekking conditions, and time to experience Kilimanjaro without rushing.
Weather is only one part of planning your climb. Route selection, itinerary length, acclimatization, preparation, pacing, and a responsible mountain crew also play important roles in your experience.e best month is only one part of a successful Kilimanjaro plan. Route choice, itinerary length, acclimatization, preparation, pacing and the quality of your guiding team also matter.
How Much Does It Cost to Climb Kilimanjaro?
Climbing Kilimanjaro usually costs about US$2,000 to US$3,500 per person for a properly organized guided trek in 2026. The final price depends on the route, number of days, group size, accommodation, services, and whether you choose a private or group climb.
A cheaper package may look attractive, but price alone should not determine your choice. Your climbing fee pays for much more than access to the mountain. It also covers park fees, guides, porters, food, camping equipment, transportation, and the logistics needed to support you throughout the trek.
What Determines the Cost of Climbing Kilimanjaro?
Several factors affect the final price of your climb.
1. Route and number of days
Longer routes usually cost more because you spend more nights on the mountain. A 9-day Northern Circuit or Lemosho trek requires more food, crew time, park fees, camping nights, and logistics than a shorter itinerary.
2. Group size
Joining a group can reduce the cost per person because the operating expenses are shared among several climbers. A private trek normally costs more because you have a dedicated mountain crew and greater flexibility.
3. Accommodation
Most routes use mountain camps with tents, while the Marangu Route uses permanent mountain huts. Your package price should clearly state what accommodation you will use.
4. Mountain crew
Your guides, porters, and cooks form an important part of your climbing team. A responsible operator needs enough staff to support the group properly throughout the trek.
5. Park fees
Kilimanjaro National Park charges mandatory fees for climbers. These can include conservation or entrance fees, camping or hut fees, rescue fees, and applicable taxes. Longer itineraries can therefore have higher park-related costs.
6. Transfers and hotel accommodation
Your package may include transportation between your hotel and the mountain gate, along with accommodation before or after your trek. Check these details carefully when comparing quotations.
Typical Kilimanjaro Price Range
| Type of Climb | Approximate Cost Per Person | What It Usually Means |
|---|---|---|
| Budget group climb | US$2,000-$2,400 | Basic service with shared costs |
| Standard group climb | US$2,400-$3,000 | More comprehensive service and support |
| Private climb | US$2,800-$3,500+ | Private crew and greater flexibility |
| Premium/private expedition | US$3,500+ | Higher accommodation and additional services |
These figures provide a general planning range rather than a fixed quotation. Prices vary between operators and change according to the route, dates, group size, accommodation, and services included.
What Does a Kilimanjaro Package Usually Include?
A standard climbing package can include:
- Kilimanjaro National Park fees
- Mountain guides
- Porters
- Mountain cook on camping routes
- Meals during the trek
- Drinking water
- Camping or hut accommodation
- Tents and camping equipment
- Mountain-gate transfers
- Pre-climb briefing
- Mountain rescue fees
- Hotel accommodation when listed in the package
Always check the exact inclusion list before booking. Two operators can advertise similar prices while providing different services.
What Is Not Usually Included?
You should normally budget separately for:
- International flights
- Tanzania visa
- Travel insurance
- Personal trekking equipment
- Equipment rental, if required
- Tips for guides, porters, and cooks
- Personal expenses
- Extra hotel nights
- Drinks and souvenirs
Travel insurance remains important even when your package includes a mountain rescue fee. A park rescue charge does not replace travel insurance that covers medical treatment, evacuation, and other eligible travel risks.
Why Is Kilimanjaro Expensive?
Kilimanjaro requires a large amount of organization behind the scenes.
Before you start hiking, your operator needs to arrange park registration, crew members, food, camping equipment, transportation, accommodation, permits, and route logistics. Your mountain team then supports you throughout the trek.
Park fees also make up a significant part of the overall cost. These mandatory charges mean that a legitimate Kilimanjaro climb cannot operate at an extremely low price without cutting other costs somewhere.
Should You Choose the Cheapest Kilimanjaro Package?
Not necessarily.
A very low price can mean fewer crew members, lower-quality equipment, limited services, or costs that appear later as additional charges.
Instead of asking only “How much does Kilimanjaro cost?”, ask “What am I getting for the price?”
Before booking, compare:
- Number of trekking days
- Route and itinerary
- Group size
- Number of guides and porters
- Food and drinking water
- Camping equipment
- Hotel nights
- Transfers
- Park fees
- Safety equipment
- Emergency procedures
- Crew welfare practices
- Additional costs
A transparent quotation should make these details easy to understand.
Is a Longer Kilimanjaro Route Worth the Extra Cost?
For many climbers, yes.
An additional day means extra accommodation, food, crew time, and park-related costs, so the price naturally increases. However, a longer itinerary can also give you more time to gain altitude gradually and experience the mountain without rushing.
If your budget allows it, compare the total value of the itinerary rather than choosing the shortest climb simply because it costs less.
How Much Should You Budget for the Whole Trip?
Your Kilimanjaro climbing package represents only part of your Tanzania travel budget.
You should also consider your flights, visa, travel insurance, equipment, tips, airport transfers, hotel nights, meals outside the trek, and any activities you plan before or after climbing.
If you plan to combine your Kilimanjaro trek with another Tanzania experience, such as a safari or Zanzibar holiday, include those costs separately.
Final Advice on Kilimanjaro Cost
A good Kilimanjaro package should give you a clear price and clearly explain what that price covers. Do not choose an operator based only on the cheapest quotation.
Look at the route, number of days, mountain crew, safety practices, accommodation, food, park fees, and overall service. Paying a fair price for a well-organized trek can give you better preparation, stronger support, and a more responsible experience on the mountain.
For a personalized price, give WeWild Travel your preferred travel dates, number of climbers, and route or number of days. We can then recommend an itinerary that matches your plans and provide a clear quotation.
Park Fees
Tanzania National Parks Authority (TANAPA) charges mandatory fees for entering and using Kilimanjaro National Park. These costs form a significant part of your climbing package and increase with longer itineraries.
Depending on the route, the park-related costs can include entry or conservation charges, camping or hut fees, rescue fees and applicable taxes. Camping routes such as Machame and Lemosho use designated campsites, while Marangu uses mountain huts. Current published 2026 guides place the park-related cost for a typical 7-day camping climb at roughly US$900-$1,100, although the exact amount depends on the current tariff, route and calculation method.
Because park tariffs can change, ask your operator for the current fee structure rather than relying on an old figure found online.
Read More : Kilimanjaro Park Fees
What Is Included in a Kilimanjaro Climbing Package?
A Kilimanjaro climbing package normally covers the main services you need during the trek, including park fees, mountain guides, porters, meals, accommodation on the mountain, camping equipment, drinking water, and transport to and from the trailhead. The exact inclusions depend on the route, number of trekking days, group size, and tour operator.
Before you book, always check the inclusion and exclusion list carefully. A cheaper package may leave out services that another operator includes in the price.
What Is Usually Included?
A well-organized Kilimanjaro climbing package commonly includes:
- Kilimanjaro National Park fees and other applicable park charges
- Professional mountain guides to lead and support your trek
- Porters to carry camping equipment, food, and group supplies
- Mountain cook on camping routes
- Breakfast, lunch, and dinner during the trek
- Drinking water throughout the climb
- Mountain tents on camping routes
- Dining tent and camping equipment
- Mountain hut accommodation on the Marangu Route
- Transportation between your hotel and the Kilimanjaro trailhead
- Pre-trek briefing before you start climbing
- Mountain safety and emergency support
- Rescue fees required by the park
- Hotel accommodation before or after the trek when your selected package includes it
What Is Not Usually Included?
You normally need to budget separately for expenses outside the trekking package, such as:
- International flights
- Tanzania visa
- Travel insurance
- Personal trekking gear
- Equipment rental, if not included
- Tips for guides, porters, and cooks
- Personal expenses
- Extra hotel nights
- Meals outside the agreed itinerary
- Drinks and other personal purchases
Does Every Route Include the Same Services?
No. Your route changes some of the services you receive.
For example, Marangu uses mountain huts, while Lemosho, Machame, Rongai, Umbwe, and the Northern Circuit normally use camping accommodation. Longer routes also require more nights on the mountain, which can increase the overall package price.
Private climbs may also include additional services or more flexible arrangements compared with group climbs.
What Should You Check Before Booking?
Do not compare Kilimanjaro packages by price alone. Ask the operator exactly what your payment covers.
Check:
- How many trekking days are included?
- How many hotel nights are included?
- Are all current park fees included?
- How many guides and porters will join the trek?
- Are meals and drinking water included?
- Are tents, dining equipment, and other camping supplies included?
- Are transfers to and from the mountain included?
- Are rescue fees included?
- What equipment can you rent if you need it?
- Which expenses will you pay separately?
A clear quotation should show these details before you make your booking.
Why Does This Matter?
Two Kilimanjaro operators can advertise similar prices but provide very different packages. One may include airport transfers, extra hotel nights, better camping equipment, or a larger mountain crew, while another may charge these services separately.
At WeWild Travel, we aim to make our Kilimanjaro packages easy to understand so you know what you are paying for before your trek begins. Your final package depends on your route, trekking duration, group size, and selected services.
The best Kilimanjaro package is not necessarily the cheapest one. Choose a package that clearly covers the services, safety support, crew, accommodation, meals, and logistics you need for your climb.n.
How to Prepare for Kilimanjaro
To prepare for Kilimanjaro, focus on regular walking, hiking, cardiovascular fitness, comfortable equipment, and getting used to spending several hours on your feet. You do not need to become an elite athlete, but you should arrive ready for consecutive trekking days, changing weather, steep sections, and high altitude.
Good preparation also means choosing a suitable route, allowing enough days for acclimatization, and understanding what your body may experience during the climb.
1. Build Your Fitness Gradually
Start training several weeks or months before your trek. Regular exercise can help you handle the long walking days more comfortably.
Focus on activities such as:
- Hiking
- Long walks
- Stair climbing
- Incline walking
- Cycling
- Jogging, if it suits you
- Step-ups
- Squats and lunges
- Core-strength exercises
Increase the duration and difficulty gradually instead of trying to do very hard workouts immediately before your trip.
2. Practise Long Walks and Hiking
Kilimanjaro involves several consecutive days of walking, so regular hiking provides useful preparation.
If possible, include hills, stairs, or uneven trails in your training. Start with shorter walks and gradually work toward longer sessions.
You should also practise walking at a comfortable pace. Kilimanjaro guides commonly use the phrase “pole pole,” meaning “slowly, slowly.” A steady pace helps you conserve energy during the climb.
3. Prepare for Consecutive Trekking Days
One long hike does not fully prepare you for Kilimanjaro. You will normally walk on several days in a row, with limited recovery time between stages.
When possible, practise back-to-back walking days. For example, complete a longer hike one day and a moderate walk the next day.
This helps you understand how your legs and feet feel when you start another day of trekking.
4. Break In Your Hiking Boots
Do not wait until you reach Tanzania to discover that your boots feel uncomfortable.
Wear your hiking boots during training walks before the climb. Use the same socks you plan to wear on Kilimanjaro.
Pay attention to rubbing, pressure points, or discomfort. Giving yourself time to solve these problems can make a big difference during the trek.
5. Practise With Your Daypack
Take some training walks with the daypack you plan to use on Kilimanjaro.
Carry practical items such as water, snacks, a rain jacket, warm layers, sunscreen, and personal essentials. Keep the weight reasonable because porters normally carry the main camping and group equipment on supported climbs.
Training with your daypack also helps you adjust the straps and find a comfortable fit.
6. Prepare for Changing Weather
Kilimanjaro passes through several climate zones, so conditions can change significantly during the climb.
You may experience warm conditions in the lower areas, rain in the forest, cooler temperatures higher up, and freezing conditions near the summit.
Pack clothing in layers so you can add or remove items as conditions change. Your gear should also protect you from rain, wind, cold, and strong sunlight.
7. Understand Altitude
Fitness alone does not determine how your body responds to altitude.
Kilimanjaro reaches 5,895 metres (19,341 feet) at Uhuru Peak, and the reduced oxygen at high elevation can affect climbers in different ways.
Choose an itinerary that gives you enough time to acclimatize. During the trek, walk slowly, follow your guide’s instructions, and tell your guide if you feel unwell.
Never try to hide altitude-related symptoms because you want to reach the summit.
8. Prepare Your Mind for a Slow Pace
Kilimanjaro rewards patience.
You may normally walk quickly, but your guide will encourage a slower pace as you gain altitude. Summit night can feel especially demanding because you climb in darkness, cold conditions, and at very high elevation.
Prepare yourself for slow progress, regular breaks, and long trekking days. Focus on one section of the trail at a time rather than thinking about the entire climb.
9. Test Your Equipment Before the Trek
Do not wait until your first day on Kilimanjaro to test your equipment.
Check your:
- Hiking boots
- Hiking socks
- Daypack
- Rain jacket
- Warm layers
- Gloves
- Hat
- Headlamp
- Water bottles or hydration system
- Sleeping bag
- Trekking poles
Testing your equipment beforehand gives you time to replace anything that does not work or feel comfortable.
10. Get Medical Advice When Necessary
If you have a medical condition, take regular medication, or have concerns about high-altitude travel, speak with a qualified healthcare professional before your trek.
A healthcare professional can help you understand whether high-altitude travel suits your circumstances and whether you need any specific precautions.
A Simple Kilimanjaro Preparation Plan
Your preparation does not need to be complicated. Build your fitness gradually, walk regularly, practise longer hikes, use your trekking equipment before the trip, and include some consecutive walking days.
Most importantly, arrive ready to walk slowly, conserve energy, listen to your guide, and communicate honestly about how you feel.
Good preparation cannot guarantee a successful summit, but it can help you approach Kilimanjaro with greater confidence and a better understanding of what the mountain demands.
Altitude, Acclimatization & Mountain Safety
Altitude is one of the biggest challenges on Mount Kilimanjaro. As you climb higher, the air contains less available oxygen, so your body needs time to adjust. This process is called acclimatization.
Kilimanjaro reaches 5,895 metres (19,341 feet) at Uhuru Peak, so altitude can affect climbers regardless of their fitness or previous hiking experience. People also respond differently to high altitude, which means you cannot predict your response simply from how fit you are.
What Does Altitude Mean?
Altitude refers to the height of a place above sea level. As elevation increases, the air pressure decreases and your body receives less oxygen with each breath.
At lower elevations, your body works normally without needing to make major adjustments. Higher on Kilimanjaro, however, you may notice that walking becomes harder, your breathing increases and your body needs more time to adapt.
Altitude sickness can affect people who are otherwise healthy and physically fit. Being strong or experienced on the trail does not make you immune to altitude illness.
Why Does Acclimatization Matter?
Acclimatization gives your body time to adapt to reduced oxygen availability.
A well-planned Kilimanjaro itinerary increases altitude progressively rather than rushing toward the summit. Longer routes can provide more opportunities for gradual ascent and additional nights on the mountain.
This is one reason we do not recommend choosing a Kilimanjaro itinerary based only on the lowest price or fewest number of days. The route profile and time available for acclimatization matter.
Gradual Ascent
Your body needs time to adjust as you gain elevation. The CDC recommends gradual ascent for high-altitude travel and advises against moving too quickly to higher sleeping elevations.
On Kilimanjaro, your itinerary should therefore allow your guide to manage the pace and elevation gain carefully.
A longer itinerary does not guarantee that you will summit, but it can give your body more time to adapt than a very rapid ascent.
Pacing: Pole Pole Matters
Your walking speed can make a major difference to how manageable the trek feels.
Kilimanjaro guides often encourage a slow, steady pace, particularly as you climb higher. Walking too quickly can make the day unnecessarily exhausting.
The goal is not to reach camp as fast as possible. The goal is to maintain a sustainable pace, conserve energy and give your body time to adjust.
Your guide may slow the group down even when you feel capable of walking faster. That is part of managing the trek rather than a sign that you are not fit enough.
Hydration
Drink regularly throughout the trek and follow your guide’s advice about fluids.
Dehydration can make a difficult trekking day harder, but drinking excessive amounts of water is not a substitute for proper acclimatization. Avoid treating hydration as a guarantee against altitude illness.
Your food and fluid intake should also take account of the weather, exercise level and conditions on the mountain.
Monitoring Your Condition
Your mountain crew should pay attention to how you are coping as you gain altitude.
Tell your guide if you develop symptoms such as:
- Headache
- Unusual tiredness
- Loss of appetite
- Nausea or vomiting
- Dizziness
- Difficulty sleeping
- Unusual shortness of breath
- Problems with coordination
- Confusion
These symptoms can have different causes, so a guide should assess the situation rather than assuming that every symptom means altitude sickness. The CDC and Wilderness Medical Society both emphasize the importance of recognizing altitude-illness symptoms and preventing further ascent when symptoms are present.
When Should a Climber Stop or Descend?
Do not continue climbing simply because you have already paid for the trek or because you are close to the summit.
If altitude symptoms develop, the climber should tell the guide immediately. A person with altitude illness should not continue ascending while symptoms remain. If symptoms become severe or worsen, descent may be necessary.
Serious warning signs include confusion, loss of coordination, severe weakness, or significant breathing problems. These can indicate a dangerous form of altitude illness and require urgent action.
The Wilderness Medical Society recommends descent for suspected high-altitude cerebral edema and high-altitude pulmonary edema, with descent remaining the key treatment when these conditions occur.
A responsible mountain team should therefore be willing to change the plan, stop the ascent or descend when a climber’s safety requires it.
Safety Comes Before the Summit
Reaching Uhuru Peak is the goal, but it should never come at the expense of your health.
Choose an itinerary that allows sensible acclimatization, follow your guide’s pacing instructions, communicate any symptoms early and take changes in your condition seriously.
A good Kilimanjaro climb is not about pushing through every problem. It is about knowing when to continue, when to rest and when descending is the safest decision.
Medical note: This section provides general travel information, not individual medical advice. If you have a medical condition, take medication, or have concerns about high-altitude travel, speak with a qualified healthcare professional before your Kilimanjaro trek. The CDC recommends that travelers with certain pre-existing conditions seek medical advice before traveling to high elevations.
What Is a Typical Day on Kilimanjaro Like?
A typical day on Kilimanjaro starts early, followed by breakfast, several hours of walking at a steady pace, a lunch break, and an afternoon arrival at the next camp. Your exact schedule depends on the route, altitude, and stage of the climb, but most days follow a simple rhythm: wake up, eat, trek, rest, eat again, and prepare for the next day.
The pace on Kilimanjaro is intentionally slow. Guides often encourage climbers to walk “pole pole,” meaning slowly in Swahili. This helps you conserve energy and gives your body more time to adjust to the increasing altitude.
Morning: Wake Up and Get Ready
Most mornings begin around 6:00-7:00 a.m., although summit night starts much earlier. After waking up, you pack your day bag, organize your sleeping area, wash up, and have breakfast.
Your guide will usually explain the day’s route, expected walking time, altitude gain, and planned breaks before you leave camp.
During the Trek: Walking and Breaks
After breakfast, you begin walking toward the next camp. Kilimanjaro trekking is not a race. The group normally moves at a comfortable pace, with regular short breaks to drink water, have a snack, and enjoy the surroundings.
The landscape changes as you gain altitude. Depending on your route and elevation, you may walk through forest, moorland, alpine desert, and eventually the high-altitude summit zone.
Afternoon: Arrive at Camp and Rest
After several hours of trekking, you arrive at the day’s camp. Your crew helps with the camp arrangements while you settle in, eat, drink, and rest.
There is usually time to enjoy the scenery, talk with your guides and fellow climbers, or simply recover from the day’s walk. On some routes, an acclimatization hike may take place after reaching camp before returning for dinner.
Evening: Dinner and Preparation
Dinner is an important part of the evening. A typical mountain meal provides carbohydrates, protein, vegetables, and plenty of fluids to support your energy needs.
After dinner, your guide will normally discuss the following day’s trek. You can then prepare your clothing and daypack before getting enough rest.
Summit Day Is Different
Summit day follows a much different schedule. Climbers normally leave camp during the night so they can reach Uhuru Peak, the highest point of Mount Kilimanjaro, around sunrise or in the morning.
The climb is slower and more demanding because of the altitude and cold. After reaching the summit, you descend to a lower camp to recover.
What Makes a Day on Kilimanjaro Special?
A day on Kilimanjaro is more than simply walking from one camp to another. You experience changing landscapes, dramatic mountain views, local Tanzanian guiding expertise, and the unique atmosphere of spending several days above the clouds.
The routine may sound simple, but that consistency is what helps you manage your energy and adapt to the mountain. Walk slowly, stay hydrated, listen to your guide, eat well, and focus on one stage at a time.
What Changes on Summit Day?
Summit day is different from every other day on Kilimanjaro because you start trekking during the night, climb to the mountain’s highest altitude, reach Uhuru Peak, and then descend to a lower camp for recovery. The day is physically demanding, but the slow pace, careful planning, and support from your mountain crew help you manage the climb.
An Early Start
Instead of waking up around the usual morning time, you normally leave your high camp around midnight or in the early hours of the morning. Your guide will give you a specific departure time based on your route, weather conditions, and planned summit schedule.
Before leaving, you have a light meal and prepare your warm clothing, headlamp, water, snacks, and other essentials.
The Climb to Uhuru Peak
The ascent begins in darkness. You walk slowly and steadily because the combination of steep terrain, cold temperatures, and high altitude makes the summit section more challenging than the lower parts of the trek.
Your guide sets a comfortable pace and regular breaks allow you to drink, eat small snacks, and check how you are feeling.
As the sky begins to brighten, you approach the summit area. Reaching Uhuru Peak at 5,895 meters (19,341 feet) marks the highest point of Mount Kilimanjaro and the highest point in Africa.
After Reaching the Summit
After spending some time at the summit, you begin the descent. Going downhill may feel easier than the ascent, but it still requires care because you have already spent several hours trekking at high altitude.
You continue down to a lower camp, where you can eat, drink, rest, and recover. Depending on your itinerary, you may spend the night there before continuing toward the mountain’s lower slopes the following day.
Why Summit Day Requires Good Preparation
The key to summit day is preparation rather than speed. Getting enough rest before the summit attempt, staying hydrated, eating regularly, dressing appropriately for the cold, and following your guide’s instructions all matter.
Your guide also monitors the group throughout the climb. If someone becomes unwell, the team can assess the situation and decide on the safest course of action.
Summit day can be one of the most memorable parts of a Kilimanjaro climb. The long night, changing light, high-altitude landscape, and moment of reaching Uhuru Peak create an experience that is very different from the days spent trekking through the lower mountain zones.
What Is Summit Night Like?
Summit night is the most demanding part of a Kilimanjaro climb. You usually leave your high-altitude camp around midnight or in the early morning and climb through the darkness toward Uhuru Peak. The pace is slow and steady, with short breaks along the way, until you reach the summit around sunrise or later in the morning.
Before Leaving Camp
The evening before the summit attempt is different from a normal trekking day. You usually have an early dinner and try to rest as much as possible before your guide gives you the final briefing.
Your guide will explain the departure time, route, weather conditions, and what you need to carry. You should have your warm layers, headlamp, water, snacks, and other essentials ready before going to sleep.
Starting the Night Climb
Most climbers begin the ascent between midnight and 1:00 a.m. The exact time depends on the route, camp location, weather, and the group’s planned schedule.
The mountain is usually quiet and dark at this time. Your headlamp provides the light for the trail while your guide leads the group at a controlled pace.
You do not need to rush. The goal is to conserve energy and keep moving steadily as you gain altitude.
Climbing Through the Darkness
The summit section is steep and physically demanding. You may take frequent short breaks to drink water, eat a snack, and recover your breathing.
Your guide monitors the group throughout the ascent and adjusts the pace when necessary. Because the altitude is high, paying attention to how you feel is important.
As the night progresses, the temperature can remain very cold, so appropriate clothing and protection from the wind are essential.
Reaching the Summit Around Sunrise
After several hours of climbing, the sky gradually begins to brighten. Depending on your pace and conditions, you may reach Uhuru Peak at 5,895 meters (19,341 feet) around sunrise.
Standing at the highest point of Mount Kilimanjaro can be a memorable moment after several days of trekking. You can take photographs, enjoy the views, and celebrate your achievement before beginning the descent.
Descending After the Summit
The summit is only part of the day. After leaving Uhuru Peak, you descend to a lower camp where you can eat, drink, and rest.
The descent is usually much quicker than the ascent, but it still requires care because you have already spent many hours trekking at high altitude.
Your guide will continue to monitor the group and help maintain a safe pace throughout the descent.
What Makes Summit Night Different?
Summit night combines an early start, darkness, cold temperatures, steep terrain, and high altitude. However, you are not expected to climb quickly. A steady pace, good preparation, regular hydration, and close communication with your guide are more important than speed.
For many climbers, the changing sky, first light over the mountain, and arrival at Uhuru Peak make summit night one of the most memorable parts of the entire Kilimanjaro experience.nt.
Where Do You Sleep and What Do You Eat on Kilimanjaro?
On Kilimanjaro, where you sleep depends on the route you choose. Most routes use mountain camps with sleeping tents, while the Marangu Route uses permanent mountain huts. Meals are prepared by the mountain crew and normally include a combination of carbohydrates, protein, vegetables, fruit, and drinks to help you maintain energy throughout the trek.
Where Do You Sleep?
On camping routes such as Machame, Lemosho, Rongai, Umbwe, Shira, and Northern Circuit, you sleep in tents at designated mountain camps. Your crew normally sets up the tents before or shortly after you arrive, giving you a place to rest after the day’s trek.
A typical sleeping tent contains sleeping spaces and enough room for your personal gear. Depending on your package, you may share a tent with another climber or have a private tent.
Camping conditions become more basic as you climb higher. There are no luxury hotel facilities on the mountain, and facilities at the camps vary by altitude and route. Toilets are generally basic, although some camps have improved facilities.
On the Marangu Route, climbers sleep in permanent mountain huts rather than camping tents. The huts provide shared sleeping rooms with bunk beds, making this route different from the camping routes.
What Do You Eat on Kilimanjaro?
Food on Kilimanjaro is designed to keep you fueled during long days of trekking. Meals are usually prepared by your mountain cook and served at camp or in a dedicated dining tent, depending on the route and climbing package.
Breakfast commonly includes foods such as porridge, eggs, bread, fruit, and hot drinks. Lunch may be served at camp or as a packed meal, depending on the day’s itinerary. Dinner is usually a more substantial meal and can include rice, pasta, potatoes, vegetables, meat, soup, or other filling dishes.
Fresh fruit, snacks, and hot drinks can also help you maintain your energy and fluid intake throughout the day.
Can You Get Vegetarian or Special Meals?
Yes. Most climbing operators can accommodate common dietary requirements when you provide the information before the climb. Vegetarian, vegan, and other dietary preferences should be discussed during the booking process so the kitchen team can plan suitable meals.
If you have specific food allergies or dietary restrictions, tell your operator in advance rather than waiting until you arrive on the mountain.
What About Drinking Water?
Your crew provides or helps arrange drinking water during the climb, but you should carry enough water in your daypack for each day’s trek. Your guide can advise you about your daily water needs based on the route, weather, and altitude.
Staying hydrated is an important part of managing the physical demands of trekking at high altitude.
What Is Life at Camp Like?
Life at camp is simple and focused on rest and preparation. After arriving, you can wash up, change clothes, eat, relax, and prepare your equipment for the following day.
You will usually spend the evening with your climbing group and mountain crew before going to sleep early. On summit night, the routine changes because you leave camp during the night for the ascent toward Uhuru Peak.
The combination of basic accommodation, warm meals, and a supportive mountain crew creates a comfortable routine despite the remote environment. You do not need luxury facilities to enjoy Kilimanjaro; you mainly need a safe place to sleep, nutritious food, enough water, and good preparation for the next day’s trek.ore you arrive in Tanzania.
Guides, Porters & Responsible Kilimanjaro Trekking
Your Kilimanjaro guide leads the climb, while porters and other mountain crew members help carry equipment, prepare camp, and support the group throughout the trek. Responsible trekking means treating this team fairly, respecting local communities and the mountain environment, and choosing a tour operator that follows ethical trekking practices.
What Does a Kilimanjaro Guide Do?
Your guide is responsible for leading the group along the route and helping you understand what to expect each day. Before setting out, the guide normally explains the day’s trek, expected conditions, breaks, and important safety considerations.
Guides also monitor how climbers are coping with the altitude and changing conditions. Their experience with the mountain can be particularly valuable when weather, trail conditions, or a climber’s condition requires a change of plan.
A good guide does more than lead the way. They can also introduce you to the mountain’s landscapes, explain local culture and traditions, and help make the trek a safe and meaningful experience.
What Do Porters Do?
Porters are an important part of most Kilimanjaro climbing teams. They carry shared camping equipment, food, kitchen supplies, and other group gear, allowing climbers to carry a lighter personal daypack.
Porters often travel ahead of the group to help prepare the next camp. Their work supports the entire trekking operation, from setting up camp to helping move essential supplies between mountain camps.
Because porters play such an important role, responsible operators should provide fair working conditions, appropriate equipment, adequate food, and reasonable loads.
Why Responsible Trekking Matters
Kilimanjaro is a protected natural environment, and every climbing group has a responsibility to reduce its impact. Responsible trekking includes following designated trails, disposing of waste properly, avoiding damage to vegetation, and respecting wildlife and other climbers.
It also means recognizing the people who make each climb possible. Choosing an ethical local operator helps support guides, porters, cooks, and other Tanzanian mountain workers while contributing to the local tourism economy.
How Can You Trek Responsibly?
You can contribute to responsible Kilimanjaro trekking by:
- Choosing a reputable local tour operator with clear porter and crew policies.
- Treating guides, porters, cooks, and other crew members with respect.
- Following your guide’s instructions and staying on designated trails.
- Taking your rubbish with you and avoiding unnecessary waste.
- Using water responsibly and avoiding single-use plastic where practical.
- Respecting other climbers and the communities around Kilimanjaro.
- Asking questions about how your operator supports its mountain crew before booking.
Your Mountain Crew Is Part of the Experience
A Kilimanjaro climb is a team effort. The guide provides leadership and mountain knowledge, while porters and cooks support the daily operation of the trek. When everyone works together and treats one another with respect, the experience becomes better for both climbers and the people who make the journey possible.
For WeWild Travel, responsible trekking should mean more than simply reaching Uhuru Peak. It should also mean respecting the mountain, supporting the Tanzanian people who work on it, and leaving the environment as clean as possible for future climbers.
Complete Kilimanjaro Planning Timeline
Planning a Kilimanjaro climb is easiest when you break the preparation into stages, starting several months before your trek and continuing until you arrive at the mountain. Booking your route, preparing physically, arranging travel, checking your equipment, and understanding the climb in advance can make the experience much smoother.
3-6 Months Before Your Climb
This is a good time to choose your route and decide how many days you want to spend on the mountain. Longer itineraries generally give you more time to acclimatize and enjoy the trek at a comfortable pace.
Once you have chosen your itinerary, confirm your travel dates and book your climb with a reputable tour operator.
You should also arrange your international flights and check the entry requirements that apply to your nationality.
2-3 Months Before
Start building your fitness and walking routine if you have not already done so. Focus on regular walking or hiking, gradually increasing the distance and including hills or stairs where possible.
This is also a good time to review your equipment. Make sure you have suitable hiking boots, warm layers, rain protection, a comfortable daypack, and other essential trekking gear.
Avoid leaving important equipment purchases until the last week. You want enough time to test your boots and make sure everything fits comfortably.
1 Month Before
Review your complete packing list and confirm that you have everything required for your route and travel plans.
Contact your tour operator to reconfirm your itinerary, arrival details, airport transfer, accommodation, and any special dietary requirements.
You should also review your travel documents, travel insurance, and any health or entry requirements relevant to your trip.
1 Week Before
Keep your preparation simple. Avoid suddenly increasing your training because you are close to departure.
Check your luggage, organize your documents, charge your electronics, and separate the equipment you will need during the trek from items that can remain at your hotel.
If you are staying in Arusha or Moshi before the climb, use this time to rest and make any final preparations with your mountain team.
During the Kilimanjaro Trek
Once the climb begins, your main priority changes from preparation to following the mountain routine.
Walk at a steady pace, drink regularly, eat your meals, listen to your guide, and allow your body time to adjust to the increasing altitude.
Each day normally involves trekking to a higher camp, resting, eating, and preparing for the following stage. Your guide will explain the day’s plan and monitor the group throughout the climb.
Summit Day
Summit day requires a different schedule. You normally leave your high camp during the night and begin the slow ascent toward Uhuru Peak.
After reaching the summit, you begin the descent toward a lower camp where you can rest and recover. From there, the trek continues down the mountain according to your itinerary.
After the Climb
After completing your descent, most climbers return to their hotel for a shower, proper rest, and a well-earned meal.
If you have additional time in Tanzania, you can use the following days to relax in Arusha or explore other destinations before your flight home.
Your Kilimanjaro Planning Checklist
Good planning does not mean trying to control everything on Kilimanjaro. Instead, arrive prepared, understand what the trek involves, and give yourself enough time to enjoy the journey. Taking the climb one day at a time allows you to focus on the experience rather than worrying about every detail.
Complete Kilimanjaro Checklist
A complete Kilimanjaro checklist should cover your travel documents, trekking equipment, clothing, personal items, health preparation, and everything you need for life on the mountain. Preparing these items before you travel helps you avoid last-minute problems and lets you focus on enjoying your climb.
Before You Book
- Choose your Kilimanjaro route and number of trekking days.
- Select suitable climbing dates.
- Compare reputable tour operators and their packages.
- Confirm what is included and excluded from the price.
- Check your passport validity and Tanzania entry requirements.
- Arrange suitable travel insurance.
- Confirm airport transfers and pre- and post-climb accommodation.
Clothing and Trekking Gear
- Comfortable, broken-in hiking boots
- Hiking socks and spare pairs
- Moisture-wicking base layers
- Warm insulating layers
- Waterproof jacket and trousers
- Trekking trousers
- Warm hat and sun hat
- Gloves and warmer summit gloves
- Sunglasses
- Headlamp with spare batteries
- Comfortable daypack
- Backpack rain cover
- Trekking poles
- Water bottles or a hydration system
- Sleeping bag suitable for mountain temperatures
Personal Items
- Sunscreen
- Lip balm with sun protection
- Personal toiletries
- Small towel
- Wet wipes
- Hand sanitizer
- Personal medication
- Small first-aid supplies
- Reusable water bottle
- Camera or phone
- Power bank
- Headphones or other small personal items
Documents and Travel Essentials
- Passport
- Tanzania visa or required entry documentation
- Flight tickets
- Travel insurance details
- Accommodation confirmation
- Kilimanjaro booking confirmation
- Emergency contact information
- Copies of important travel documents
Keep important documents and valuables somewhere secure and easily accessible during your journey.
Before Leaving for the Mountain
- Check your complete equipment.
- Test your headlamp and power bank.
- Make sure your hiking boots are comfortable.
- Organize your daypack.
- Confirm your climbing itinerary with your operator.
- Tell your operator about dietary requirements or important personal needs.
- Meet your guide and ask any final questions.
- Get plenty of rest before the trek begins.
During the Climb
- Carry the items you need for the day’s trek.
- Drink water regularly.
- Eat your meals and snacks.
- Walk at a steady pace.
- Follow your guide’s instructions.
- Keep your personal belongings organized.
- Protect yourself from the sun and changing weather.
- Keep the mountain clean by carrying your waste with you.
Summit Night Checklist
Summit night requires a few additional preparations because you will start trekking in darkness and face colder conditions at high altitude.
Before leaving camp, make sure you have:
- Headlamp with fresh or fully charged batteries
- Warm base layers
- Insulating jacket
- Waterproof outer layer
- Warm gloves
- Warm hat
- Sunglasses for the descent
- Water
- High-energy snacks
- Trekking poles if you use them
- Small personal essentials
Your guide will normally give you a final briefing and explain what to expect before the summit attempt.
Final Kilimanjaro Checklist
Travel: Passport ✓ | Entry requirements ✓ | Flights ✓ | Insurance ✓
Clothing: Hiking boots ✓ | Layers ✓ | Rain gear ✓ | Warm clothing ✓ | Gloves ✓
Equipment: Daypack ✓ | Headlamp ✓ | Water system ✓ | Trekking poles ✓ | Sleeping bag ✓
Personal: Toiletries ✓ | Sunscreen ✓ | Medication ✓ | Phone/camera ✓ | Power bank ✓
Before the trek: Itinerary confirmed ✓ | Equipment checked ✓ | Guide briefing completed ✓ | Rested ✓
You do not need to bring everything you own to Kilimanjaro. The goal is to pack carefully, prioritize essential equipment, and make sure you are prepared for changing temperatures, rain, cold conditions, and several days of trekking at altitude.the trailhead. Choose carefully, prepare gradually, check your equipment, understand your itinerary and communicate with your mountain team throughout the trek.
Kilimanjaro Frequently Asked Questions
Kilimanjaro is physically demanding because of long hiking days, steep sections, cold temperatures and high altitude. You do not need technical climbing skills, but good preparation helps.
Yes. Many first-time trekkers climb Kilimanjaro successfully. Choose a suitable route, allow enough time for acclimatization and follow your guide’s advice.
Most climbs take between 5 and 9 days. Longer itineraries generally provide more time for gradual acclimatization.
Lemosho and the Northern Circuit are popular choices because they offer longer itineraries and varied scenery.
Longer routes generally provide more time to adjust to altitude, but the actual profile depends on the itinerary and daily elevation changes.
Dry-season months such as January, February, July, August and September are popular. Each month has different weather and crowd conditions.
A guided climb can cost around US$2,000-$3,500 or more, depending on the route, duration, group size and services included.
No. You need hiking fitness rather than technical mountaineering experience.
Yes. Kilimanjaro requires climbers to trek with an authorized guide.
Tell your guide immediately. The team can assess your condition and decide whether you should rest, stop ascending or descend.
Conclusion
Climbing Mount Kilimanjaro is more than reaching Uhuru Peak. It is a journey that requires the right route, realistic preparation, good acclimatization and a responsible mountain team.
Before booking, consider how many days you can spend on the mountain, the season you prefer, your fitness level and the type of trekking experience you want. Compare operators carefully and look beyond the cheapest price. A clear itinerary, experienced mountain crew, responsible porter practices and strong safety procedures all matter.
With proper preparation, Kilimanjaro is an achievable goal for many trekkers, including first-time climbers. However, no route, training plan or operator can guarantee that every climber will reach the summit. Weather, altitude and individual health can affect the outcome.
Take time to prepare, choose your itinerary carefully and understand what your package includes. Then you can focus less on the logistics and more on experiencing the forests, high-altitude landscapes, sunrise and unforgettable moments on Africa’s highest mountain.
Ready to plan your Kilimanjaro adventure? Explore WeWild Travel’s Kilimanjaro routes and choose an itinerary that matches your time, experience and goals.