Kissing Rock on Mount Kilimanjaro: Location, Meaning, Difficulty, and Safety Guide
Estimated reading time: 14 minutes
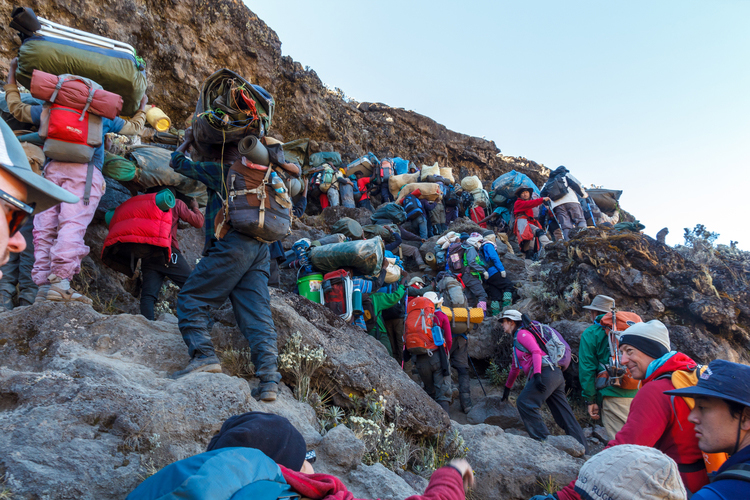
The Kissing Rock on Mount Kilimanjaro is a narrow and famous section on the Barranco Wall where climbers must move very close to a large rock face to pass safely. At this point, the trail becomes tight, so hikers often press their bodies against the rock for balance. Because of this movement, it looks like they are “kissing” or hugging the rock. As a result, this spot has become one of the most memorable moments on the Kilimanjaro climb.
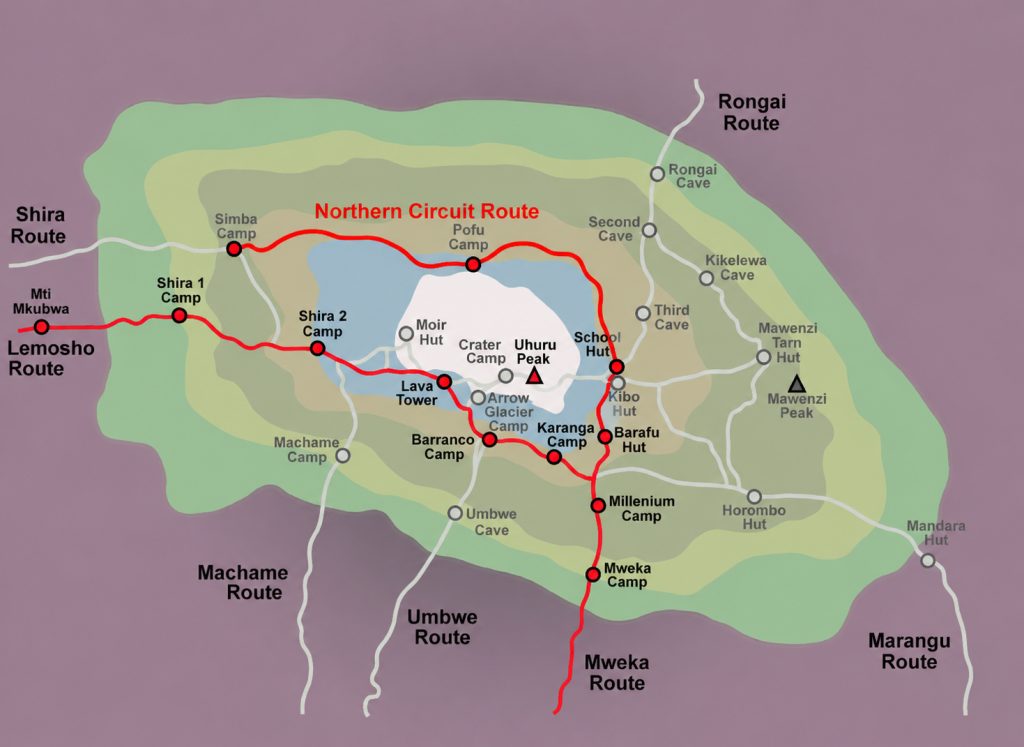
In addition, the Kissing Rock sits on one of the most scenic and exciting parts of the mountain route. Most climbers reach it while moving from Barranco Camp toward Karanga Camp on popular routes such as Machame and Lemosho. Therefore, it forms an important highlight of the Barranco Wall experience.
Furthermore, although the section looks challenging at first sight, it is not dangerous for most climbers. With proper guidance, steady movement, and the famous Tanzanian trekking advice “polepole” (slowly, slowly), hikers pass it safely. Guides also assist climbers when needed, which makes the section manageable even for beginners.
In summary, the Kissing Rock is not just a physical passage on the mountain. Instead, it is a symbolic and exciting moment that combines adventure, scenery, and achievement during the climb to Africa’s highest peak.
The Kissing Rock on Kilimanjaro sits on the Barranco Wall, where the trail narrows and forces climbers to move very close to a large rock face. Hikers press their hands and bodies against the rock to keep balance while they step forward. Because of this movement, people describe the moment as “kissing” or hugging the rock.
Simple Explanation for Climbers
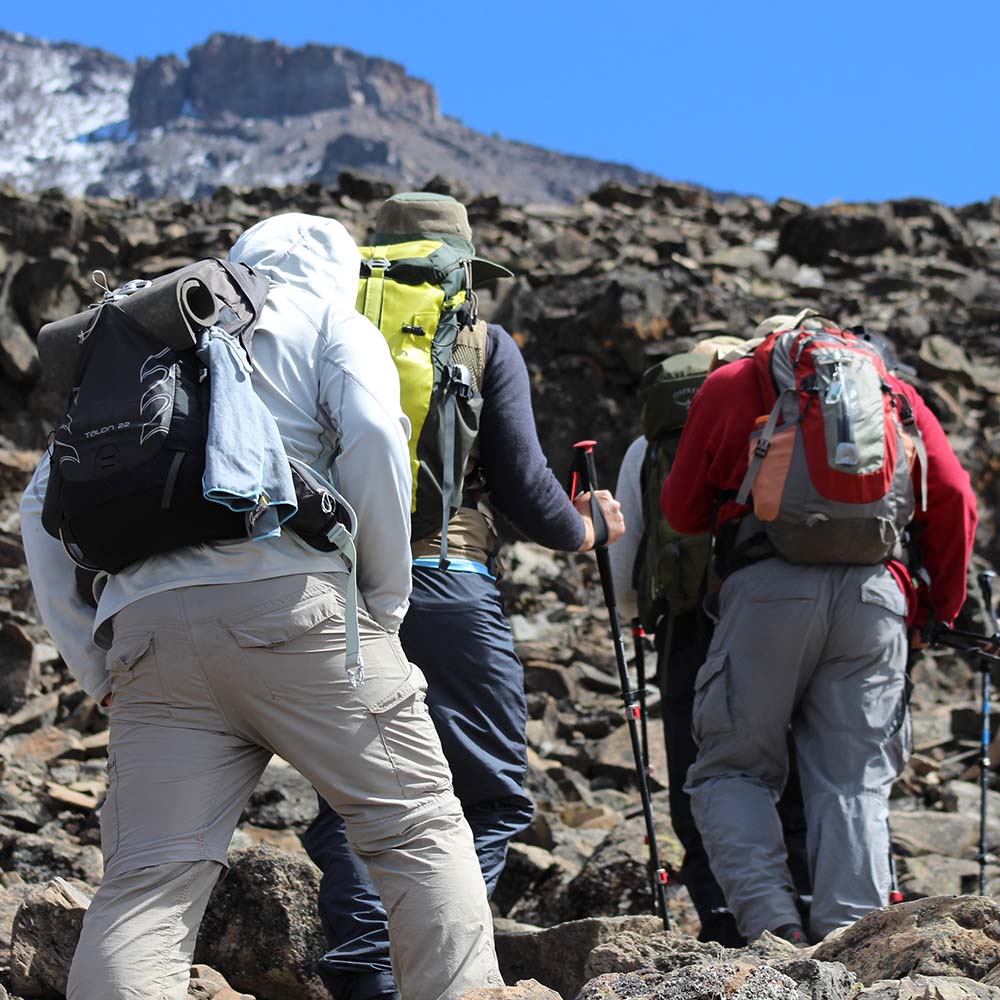
Climbers reach the Kissing Rock when they climb the steep Barranco Wall section on the way to Karanga Valley. The path becomes narrow, and the rock blocks part of the walking space. So, hikers use their hands on the rock and carefully step along the edge.
In addition, guides often walk beside climbers and point out safe foot placements. This support helps beginners feel more confident. Most people pass this section slowly and safely without any technical climbing skills.
Why It Is a Famous Spot on the Barranco Wall
The Kissing Rock stands out because it creates a unique climbing moment on Mount Kilimanjaro. Unlike other parts of the route, climbers must get very close to the rock surface. This creates a mix of excitement, focus, and fun.
Furthermore, many trekkers talk about this spot after their climb because it feels like a small adventure inside the bigger journey to the summit. Social media photos also make it more popular, as climbers often share their “Kissing Rock moment” with friends.
What Climbers Experience at the Kissing Rock
Climbers feel a mix of concentration and excitement when they reach the Kissing Rock. They slow down, watch every step, and use both hands for balance. The air feels thinner at this altitude, so they also control their breathing carefully.
After they pass the narrow section, many hikers feel a strong sense of achievement. They realize they handled one of the most iconic parts of the Barranco Wall. In addition, the surrounding views of Mount Kilimanjaro make the moment even more memorable and rewarding.
Where Is the Kissing Rock Located?
The Kissing Rock sits on the Barranco Wall on Mount Kilimanjaro. Climbers meet this section when they move from Barranco Camp toward Karanga Valley on the southern slopes of the mountain. The trail narrows here, so hikers pass very close to a rock face while climbing upward.
Location on the Barranco Wall
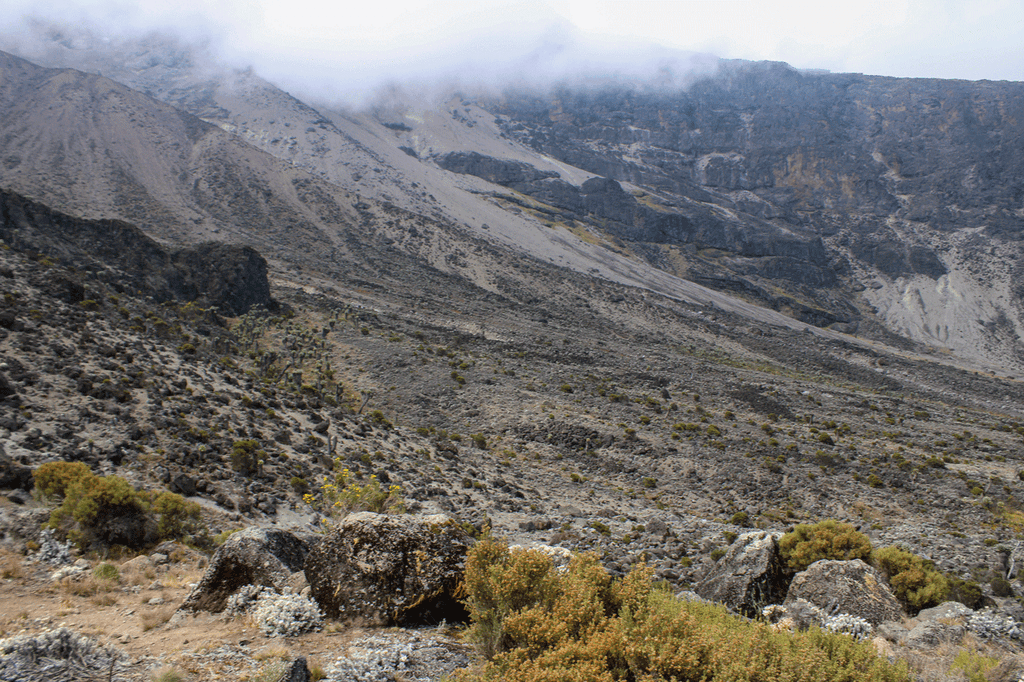
Climbers find the Kissing Rock along the Barranco Wall section, just after leaving Barranco Camp. The path climbs steeply on volcanic rock and follows a zigzag route. At one point, a large rock protrudes into the trail and reduces walking space. As a result, hikers move carefully along the edge while holding the rock for balance.
Elevation and Route Details (Machame, Lemosho, Umbwe)
The Kissing Rock lies at an altitude of about 3,900 to 4,000 meters above sea level, depending on the exact path taken. Climbers on the Machame Route, Lemosho Route, and Umbwe Route all pass through this section when they cross the Barranco Wall.
In addition, this part of the climb forms a key connection between Barranco Camp and Karanga Camp. Most trekkers reach it after a few hours of steady uphill hiking, so fatigue and altitude already play a role in the experience.
How It Fits into the Kilimanjaro Climb
The Kissing Rock forms part of the Barranco Wall ascent, which stands as one of the most important challenges on the way to Uhuru Peak. Climbers do not use ropes here, but they rely on hands, foot placement, and guide instructions to move safely.
Furthermore, this section tests balance and confidence rather than technical climbing skill. After passing it, climbers continue toward higher camps as they approach the summit phase of the Kilimanjaro trek.
Why Is It Called the Kissing Rock?
It is called the Kissing Rock because climbers must pass very close to a large rock on the Barranco Wall. The trail narrows at this point, so hikers lean in and sometimes press their bodies against the rock to move forward. From a distance, this position looks like they are kissing or hugging the rock.
The Meaning Behind the Name
The name comes from the visual shape of the movement, not from any cultural ritual. When climbers squeeze past the rock, they stay very close to it for balance. Because of this, observers started calling it the “Kissing Rock” as a descriptive nickname.
Why Climbers “Hug” or “Kiss” the Rock
Climbers hug the rock because the path becomes tight and uneven on this section of the Barranco Wall. They use their hands on the rock surface to stay stable and step carefully along the edge. Therefore, the movement looks like an embrace or a kiss.
Local Guides’ Explanation of the Name
Local guides explain that the name comes from how climbers position themselves while crossing the narrow section. They also point out that it is not an official geological name. Instead, it became popular because trekkers and guides use it to describe this unique and memorable moment on the climb.
Is the Kissing Rock Dangerous?
The Kissing Rock on Mount Kilimanjaro does not pose serious danger for most climbers. It sits on the Barranco Wall, where hikers move carefully along a narrow path and use their hands for balance. Although the section looks dramatic, it mainly requires focus and steady movement rather than technical climbing skills.
Safety Level on the Barranco Wall
The Barranco Wall, including the Kissing Rock, has a safe and well-defined trail. Climbers follow a clear path that guides them upward step by step. In addition, experienced guides lead the group and show where to place hands and feet.
Because of this support, most hikers cross the section without difficulty. However, climbers must move slowly and avoid rushing, especially at high altitude where fatigue can reduce balance.
Accident Facts and Real Risks on Kilimanjaro
Serious accidents at the Kissing Rock remain extremely rare. Most risks on Kilimanjaro come from altitude sickness, not from climbing sections like the Barranco Wall.
In general, climbers may face minor risks such as slipping if they rush or lose focus. Therefore, guides always encourage careful movement and proper pacing. The key risk factor comes from fatigue, not the rock itself.
Why It Is Considered a Safe Section
The Kissing Rock is considered safe because it does not require ropes, climbing gear, or technical experience. The path stays stable, and guides supervise every group closely.
Furthermore, climbers move one at a time through the narrow part, which reduces crowding and improves safety. As a result, most trekkers complete this section confidently and continue their climb toward Karanga Valley without issues.
How Hard Is the Barranco Wall and Kissing Rock Section?
The Barranco Wall, including the Kissing Rock section, feels challenging at first sight, but most climbers complete it without technical climbing skills. The trail demands focus, balance, and slow movement rather than strength or equipment. As a result, many trekkers describe it as exciting rather than dangerous.
Difficulty Level for Beginners
Beginners can complete the Barranco Wall and Kissing Rock section successfully with proper guidance. The path stays clear, and climbers use their hands for balance while stepping carefully on stable rock surfaces.
In addition, guides support climbers throughout the section and show safe routes step by step. Because of this support, even first-time hikers on Kilimanjaro pass this area safely when they move slowly and follow instructions.
Comparison with Other Kilimanjaro Sections
Compared to other parts of Kilimanjaro, the Barranco Wall feels more technical but not the hardest. For example, summit night feels much more difficult because of extreme altitude, cold, and exhaustion.
Meanwhile, the Kissing Rock section focuses more on balance and confidence. Therefore, climbers often find it easier than long summit ascents, even though it looks intimidating from a distance.
Physical and Mental Challenge Explained
The main challenge at the Barranco Wall comes from body coordination and mental focus. Climbers must watch every step, use their hands for stability, and move slowly along narrow paths.
In addition, altitude affects energy levels, so hikers feel slower and more careful. Mentally, some climbers feel nervous at first, but confidence grows quickly as they progress. As a result, most people describe this section as a rewarding challenge rather than a difficult obstacle.
How to Safely Pass the Kissing Rock
Climbers pass the Kissing Rock on Kilimanjaro safely when they move carefully, follow instructions, and stay focused. This section does not require ropes or technical climbing skills. Instead, it depends on balance, patience, and good guidance from experienced mountain guides.
Step-by-Step Climbing Technique
Climbers start by approaching the narrow section slowly and observing the path ahead. They place one hand on the rock for support and test each step before moving forward.
In addition, hikers keep their body close to the rock surface to improve balance. They move one foot at a time and avoid rushing. As a result, they maintain stability even on the narrow edge of the Barranco Wall.
Role of Professional Guides
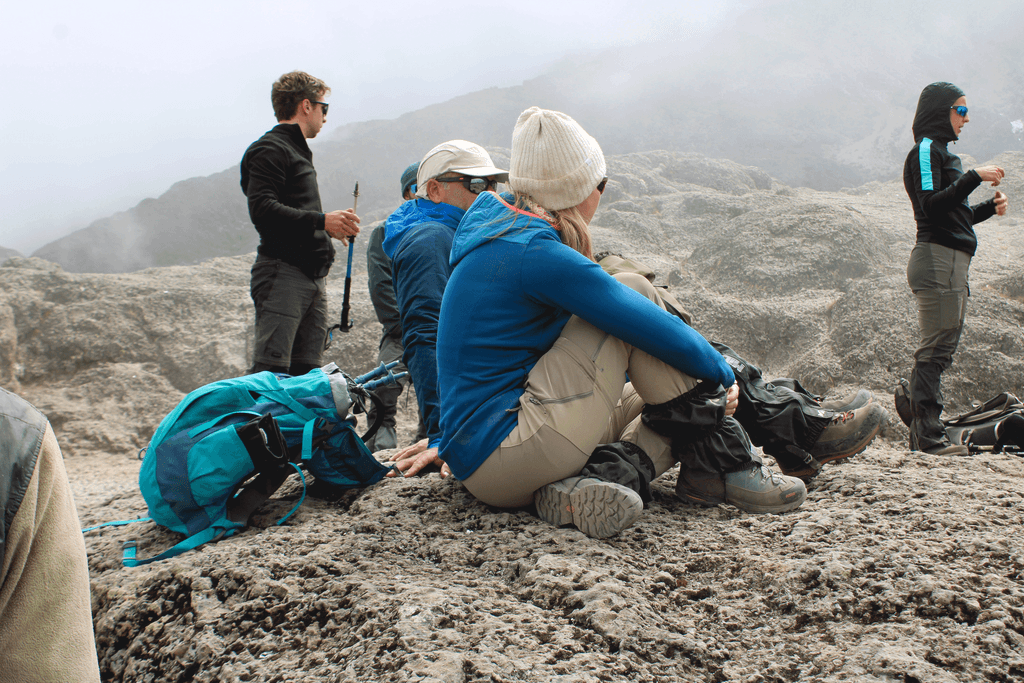
Professional guides play a key role in helping climbers pass the Kissing Rock safely. They walk close to the group, point out safe steps, and support climbers who feel unsure.
Furthermore, guides control the pace of the group and manage spacing so that each climber moves safely through the narrow section. Their experience reduces risk and builds confidence, especially for first-time trekkers.
Why You Must Move “Polepole”
“Polepole” means “slowly, slowly” in Swahili, and it represents the most important rule on Kilimanjaro. Climbers must move slowly to maintain balance, conserve energy, and adjust to high altitude.
In addition, slow movement reduces mistakes on uneven ground. When climbers rush, they increase the risk of slipping or losing focus. Therefore, moving polepole helps ensure both safety and success on the Barranco Wall and beyond.
Which Kilimanjaro Routes Include the Kissing Rock?
The Kissing Rock appears on routes that cross the Barranco Wall, one of the most famous sections of Mount Kilimanjaro. Climbers meet it during the ascent from Barranco Camp to Karanga Valley. Therefore, only routes that pass through this section include the Kissing Rock experience.
Machame Route Experience
The Machame Route includes the Kissing Rock because it climbs the Barranco Wall after Barranco Camp. Climbers start the day with a steady uphill trek, then reach the narrow wall section where they pass close to the rock face.
In addition, this route offers a popular and scenic climbing experience. Many hikers enjoy the challenge of the Barranco Wall because it adds excitement without requiring technical skills.
Lemosho Route Experience
The Lemosho Route also includes the Kissing Rock when it joins the southern circuit of Kilimanjaro. Climbers pass through the Barranco Wall after several days of gradual altitude gain.
Furthermore, hikers on this route often feel well-acclimatized by the time they reach the section. As a result, they usually handle the Kissing Rock more comfortably compared to shorter routes.
Umbwe Route Experience
The Umbwe Route reaches the Kissing Rock as it connects to the Barranco Wall on the southern slopes. This route feels steeper and more direct in earlier stages, so climbers may arrive at the wall feeling more challenged.
However, once they reach the Kissing Rock, they follow the same safe path as other routes. Guides still lead the way, and climbers pass the section using careful steps and steady movement.
What Does It Feel Like to Cross the Kissing Rock?
Crossing the Kissing Rock feels exciting, focused, and a little bit intense for most climbers. The trail narrows, so hikers slow down and concentrate on every step. At the same time, they use their hands to hold the rock and keep balance while moving forward. Because of this, the moment feels like a small challenge inside the bigger journey to the summit of Mount Kilimanjaro.
First-Time Climber Experience
First-time climbers often feel nervous when they see the narrow section ahead. The rock looks close, and the path seems tight at first sight. However, as they start moving, they realize the section is manageable and safe with proper guidance.
In addition, guides stay nearby and show exactly where to place hands and feet. This support helps beginners build confidence quickly. After a few steps, most climbers relax and focus on steady movement instead of fear.
Views from the Barranco Wall
The Kissing Rock sits on one of the most scenic parts of Kilimanjaro, so climbers enjoy wide mountain views while crossing it. The Barranco Wall rises above deep valleys, and the landscape opens up in every direction.
Furthermore, the volcanic cliffs and surrounding clouds create a dramatic atmosphere. As climbers move slowly along the wall, they often pause briefly to take in the scenery before continuing upward.
Why Climbers Remember This Moment
Climbers remember the Kissing Rock because it combines challenge, excitement, and achievement in one short section. The movement feels different from normal hiking, so it stands out in their memory.
In addition, many trekkers talk about this moment after the climb because it feels like a symbolic milestone. After passing it, they feel more confident about continuing toward higher camps and eventually reaching Uhuru Peak.
Frequently Asked Questions About the Kissing Rock
This section answers the most common questions climbers ask about the Kissing Rock on Mount Kilimanjaro. These quick answers help beginners understand what to expect before reaching the Barranco Wall.
What is the Kissing Rock on Kilimanjaro?
The Kissing Rock is a narrow section on the Barranco Wall where climbers pass very close to a large rock face. They use their hands for balance and step carefully through a tight path. Because of this movement, people call it the “Kissing Rock.”
Is the Kissing Rock scary?
The Kissing Rock can look scary at first because the trail appears narrow and steep. However, most climbers find it manageable once they start moving. In addition, guides support every step, so confidence grows quickly during the climb.
Has anyone died at the Kissing Rock?
No, the Kissing Rock itself does not have a record of fatalities. Most serious risks on Kilimanjaro come from altitude sickness, not from the Barranco Wall. Therefore, this section remains safe when climbers follow guide instructions and move carefully.
How long does the Barranco Wall take?
The Barranco Wall usually takes about 1 to 2 hours to complete, depending on the group’s pace and weather conditions. Climbers move slowly because the path narrows in some areas, including the Kissing Rock section.
Do you need ropes to pass it?
No, climbers do not need ropes to pass the Kissing Rock or the Barranco Wall. The trail is a hiking route, not a technical climb. However, climbers must use their hands for balance and follow their guide’s instructions for safety.
Final Thoughts: Why the Kissing Rock Is a Highlight of the Kilimanjaro Climb
The Kissing Rock stands out as one of the most memorable moments on Mount Kilimanjaro because it combines challenge, scenery, and achievement in a short but exciting section of the Barranco Wall. Climbers do not need technical skills, yet they still feel a real sense of adventure while passing through the narrow rock face.
In addition, this section adds variety to the Kilimanjaro experience. Instead of only walking uphill, hikers interact closely with the mountain by using their hands, adjusting their steps, and focusing on balance. As a result, the moment feels more engaging and personal than many other parts of the climb.
Furthermore, the Kissing Rock gives climbers a confidence boost. After passing it safely, many hikers feel stronger and more prepared for the higher and more demanding sections ahead. Therefore, it becomes a small but important milestone on the journey to Uhuru Peak.
In conclusion, the Kissing Rock remains a highlight because it turns a simple section of trail into a memorable story that climbers often share long after they return home.
Barranco Wall Kilimanjaro: Is It Dangerous, Difficult, and Worth the Climb?
Estimated reading time: 21 minutes
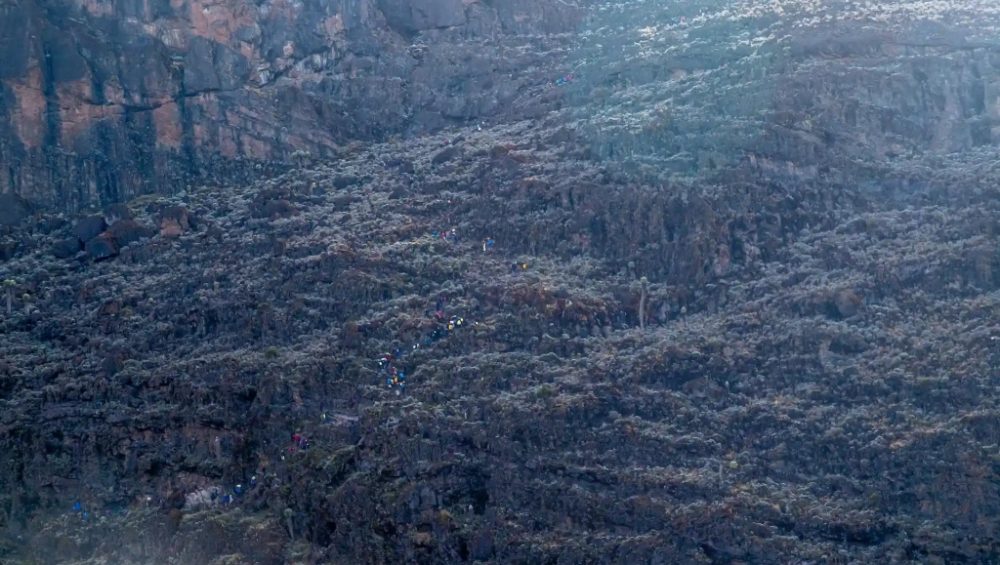
Kilimanjaro’s Barranco Wall is one of the most famous and visually striking sections on Mount Kilimanjaro, and many climbers feel both excited and nervous when they first see it from Barranco Camp. The wall looks steep and intimidating, which often raises concerns about safety and difficulty.
However, the climb becomes more manageable once trekkers start moving with experienced guides. The route does not require ropes or technical climbing skills. Instead, hikers use their hands for balance and follow a clear path through the rocky terrain.
In addition, Kilimanjaro’s Barranco Wall offers a rewarding experience that combines adventure, scenery, and achievement. As climbers ascend, they gain confidence and enjoy one of the most memorable highlights on the journey to Uhuru Peak.
The Barranco Wall is one of the most iconic and misunderstood features on Mount Kilimanjaro. At first glance, it looks like a towering cliff that requires technical climbing skills, but that is not the case. In reality, it is a steep scramble that thousands of trekkers climb safely every year with the support of experienced guides. Although the ascent can feel challenging, most climbers find it much easier than they expected once they begin climbing.
Quick Answer for Climbers
The Barranco Wall is a rocky escarpment that rises above Barranco Camp on the southern side of Mount Kilimanjaro. Climbers typically tackle it in the morning as they travel toward Karanga Camp. Although the wall looks almost vertical from below, the actual route follows a natural path through the rocks. Therefore, most trekkers complete the ascent without special climbing equipment or previous mountaineering experience.
Where Is the Barranco Wall Located?
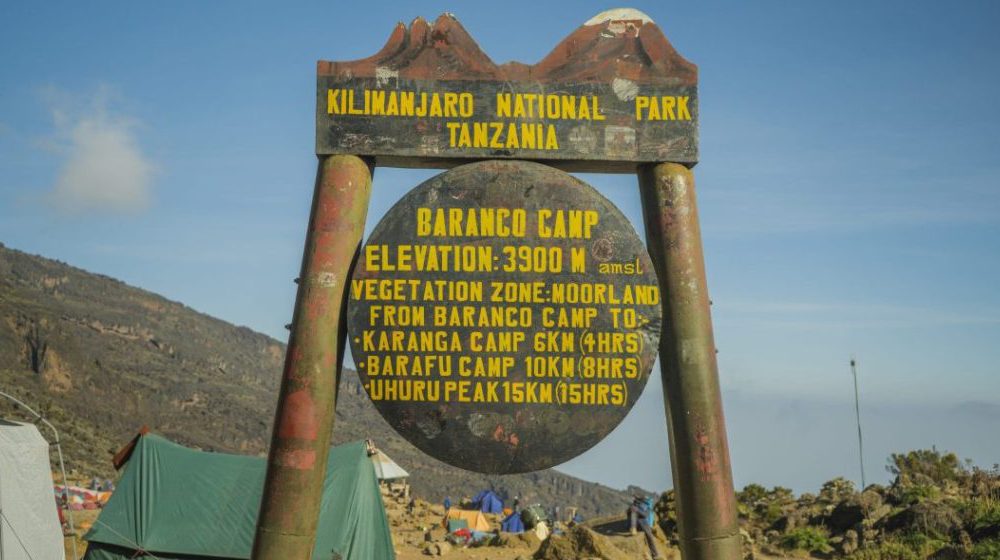
The Barranco Wall stands above Barranco Camp at an altitude of approximately 3,950 meters (12,960 feet) on Mount Kilimanjaro. Climbers encounter it after spending the night at Barranco Camp and before continuing to Karanga Camp. In addition, the wall forms part of the Southern Circuit, which many of Kilimanjaro’s most popular routes follow.
Trekkers on the Machame Route, Lemosho Route, and Umbwe Route all climb the Barranco Wall. Because of its location, the wall serves as an important connection between the western and southern sections of the mountain.
Why Is the Barranco Wall Famous?
The Barranco Wall is famous because it offers one of the most exciting and rewarding experiences on Mount Kilimanjaro. From Barranco Camp, the wall appears almost vertical, making many climbers feel nervous before the ascent. However, most trekkers quickly discover that it is a steep scramble rather than a technical rock climb, and they complete it safely with the guidance of experienced mountain guides.
The climb also rewards hikers with breathtaking views of the Barranco Valley, the Karanga Valley, glaciers, and Kilimanjaro’s southern slopes. Along the way, climbers pass the famous Kissing Rock, where they briefly move close to the rock face before continuing upward. Reaching the top of the wall gives many trekkers a strong sense of achievement, making it one of the most memorable highlights of the entire Kilimanjaro climb.
How High Is the Barranco Wall?
The Barranco Wall rises above Barranco Camp on the southern side of Mount Kilimanjaro and forms one of the most visible climbing sections on the route toward the summit. Although it looks extremely tall from below, the actual climb follows a natural path that reduces the steepness and makes the ascent more manageable for trekkers.
Barranco Wall Elevation
The Barranco Wall sits at an altitude of about 3,900 to 4,200 meters above sea level, depending on the exact route and GPS tracking. Climbers reach this elevation after sleeping at Barranco Camp, which already places them in a high-altitude environment. As a result, hikers often feel the thinner air before they even start the climb.
Height of the Climb
The visible vertical rise of the Barranco Wall measures roughly 257 meters (about 840 feet) from the base near Barranco Camp to the upper plateau. However, climbers do not scale this height in a straight vertical line. Instead, the trail zigzags through rock sections, which reduces the direct climbing intensity and makes the wall more of a scrambling route than a true rock climb.
How Long Is the Ascent?
Most climbers take between 1 and 2 hours to complete the Barranco Wall ascent, depending on group speed, weather conditions, and crowd levels on the trail. Slow and steady movement helps hikers maintain balance and adjust to altitude. In addition, guided groups often pause at narrow sections, including the famous Kissing Rock, which can slightly extend the total time.
Why Is the Barranco Wall Called the Breakfast Wall?
The Barranco Wall takes its name from the Barranco Valley and Barranco Camp, which lie directly below it. The word barranco is Spanish and means “ravine,” “gorge,” or “steep-sided valley.” Early explorers and mapmakers used the term to describe the deep valley carved into Kilimanjaro’s southern slopes, and the towering rock face above it naturally became known as the Barranco Wall.
The Origin of the Nickname
The nickname “Breakfast Wall” comes from climbers and guides who describe the routine on this section of Kilimanjaro. Hikers wake up at Barranco Camp, eat breakfast, and then immediately head toward the base of the wall. Therefore, the name connects directly to the daily trekking schedule rather than any official geographic label.
In addition, guides use the term to make the climb feel less intimidating. By turning a steep-looking section into something associated with a normal meal routine, they help climbers feel more relaxed before the ascent.
Why Climbers Tackle It in the Morning
Climbers usually tackle the Barranco Wall in the morning because weather conditions stay more stable at that time. Morning temperatures feel cooler, visibility stays clearer, and wind conditions remain calmer compared to later in the day.
Furthermore, trekking schedules on Kilimanjaro follow a structured plan. Groups leave camp after breakfast to maintain steady progress toward the next campsite. As a result, most climbers naturally reach the Barranco Wall during the morning hours.
What to Expect After Breakfast
After breakfast, climbers prepare for a steady uphill hike that leads directly into the base of the Barranco Wall. The journey begins with open trail walking before transitioning into steeper rock sections.
In addition, hikers often feel energized right after eating, but the altitude quickly becomes noticeable as they climb higher. Therefore, climbers must pace themselves, stay hydrated, and move slowly to conserve energy for the rest of the day’s trek toward Karanga Valley.
Is the Barranco Wall Dangerous?
The Barranco Wall on Mount Kilimanjaro looks intimidating at first glance, but most climbers complete it safely without technical climbing skills. The trail follows a clear path, and guides lead hikers step by step. Therefore, the section feels more challenging than dangerous for the majority of trekkers.
Why It Looks More Dangerous Than It Really Is
The Barranco Wall appears dangerous because it rises steeply above Barranco Camp and shows exposed rock faces from a distance. From below, climbers often assume they need ropes or climbing experience.
However, the reality feels different on the ground. The route follows natural ledges and zigzag paths that reduce steep exposure. In addition, climbers move slowly in guided groups, which increases safety and control throughout the ascent.
The Real Risks on the Barranco Wall
The main risks on the Barranco Wall do not come from the rock itself but from human factors. Climbers may slip if they rush, lose focus, or fail to follow instructions. Fatigue and altitude can also reduce balance and concentration.
In addition, crowding on narrow sections can slow movement, so climbers must stay patient. However, guides manage spacing and pace to keep the group safe. When hikers move carefully and follow instructions, the risk level stays low.
Has Anyone Died on the Barranco Wall?
No reliable records show deaths caused directly by the Barranco Wall section itself. Most serious incidents on Kilimanjaro relate to altitude sickness, especially on higher sections of the mountain, not on this wall.
Furthermore, guides closely supervise this part of the climb, and groups move one section at a time through narrow areas like the Kissing Rock. As a result, climbers complete the Barranco Wall safely every day when they follow proper trekking procedures.
How Difficult Is the Barranco Wall?
The Barranco Wall feels challenging for many climbers at first sight, but most trekkers complete it without technical climbing skills. The route demands balance, patience, and steady movement rather than strength or equipment. Therefore, the difficulty level stays moderate for most people attempting Kilimanjaro.
Difficulty Level for Beginners
Beginners can climb the Barranco Wall successfully when they follow guide instructions and move at a slow pace. The trail includes narrow sections and uneven rock surfaces, so hikers must watch every step carefully.
In addition, guides support climbers throughout the ascent and point out safe handholds and foot placements. Because of this guidance, even first-time trekkers on Kilimanjaro usually pass the Barranco Wall without major difficulty.
Physical Challenge vs Technical Challenge
The Barranco Wall creates more of a physical and mental challenge than a technical one. Climbers use their hands for balance, step over rocks, and maintain focus throughout the climb. However, the route does not require ropes, harnesses, or climbing experience.
Furthermore, altitude affects energy levels, so hikers may feel slower and more careful as they climb. The mental challenge often comes from the steep appearance of the wall rather than the actual difficulty of the terrain.
Is It Harder Than Summit Night?
The Barranco Wall is significantly easier than summit night on Kilimanjaro. Summit night involves extreme altitude, freezing temperatures, and long hours of continuous climbing, which creates a much tougher experience.
In contrast, the Barranco Wall takes only a short period to complete and focuses mainly on balance and steady movement. Therefore, most climbers describe it as an exciting mid-route challenge rather than one of the hardest sections of the mountain.
What Does It Feel Like to Climb the Barranco Wall?
Climbing the Barranco Wall feels exciting, slightly intimidating at first, and highly rewarding once you reach the top. Many climbers describe it as one of the most memorable sections of Mount Kilimanjaro because it combines exposure, movement, and stunning scenery in a short but intense experience.
First Impressions from Barranco Camp
From Barranco Camp, the wall looks steep and almost vertical. As a result, many climbers feel nervous before they start the ascent. The size of the rock face creates a strong visual impression, especially in the early morning light.
However, guides quickly calm those fears by explaining the route and setting a slow, steady pace. In addition, seeing other climbers successfully moving upward builds confidence before the climb begins.
The Climb Step by Step
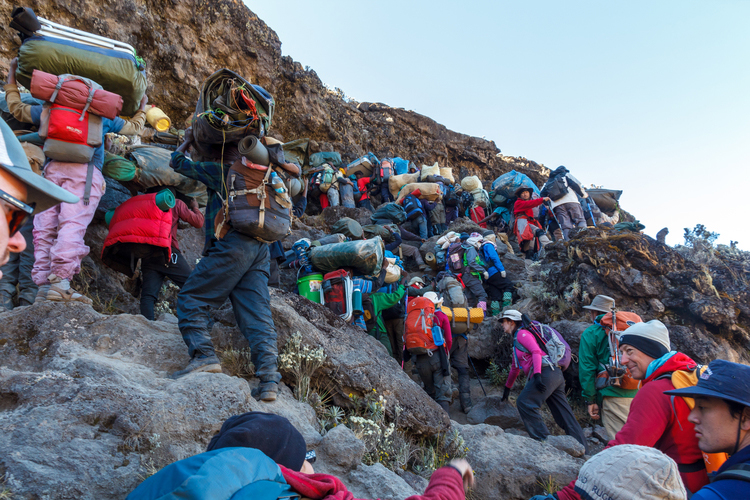
The ascent starts with a gradual walk that soon transitions into rocky terrain. Climbers use their hands for balance while stepping carefully on uneven surfaces. Because the path narrows in some areas, hikers move in a single line and follow their guide closely.
Furthermore, the famous Kissing Rock section adds a unique moment where climbers pass very close to the rock face. Although it looks tricky, the movement stays controlled and safe when climbers focus on each step and avoid rushing.
Reaching the Top of the Wall
Reaching the top of the Barranco Wall brings a strong sense of achievement. The trail opens up into wide views of valleys, glaciers, and the surrounding Kilimanjaro landscape.
In addition, many climbers pause here to rest, take photos, and reflect on the climb they just completed. The feeling shifts quickly from effort to excitement because this section marks a key milestone on the way toward Karanga Valley and ultimately Uhuru Peak.
The Famous Kissing Rock on the Barranco Wall
The Kissing Rock stands as one of the most talked-about spots on the Barranco Wall of Mount Kilimanjaro. Climbers reach this narrow section during the ascent from Barranco Camp to Karanga Valley. Although it looks unusual at first, the passage remains part of a safe and well-established hiking route.
What Is the Kissing Rock?
The Kissing Rock is a narrow rock formation where the trail runs very close to a large rock face. Climbers pass through this point by using their hands for balance while stepping carefully along a tight path.
In addition, the section does not require ropes or climbing gear. Instead, hikers rely on steady movement and guide support to pass safely through this short but memorable part of the Barranco Wall.
Why Is It Called the Kissing Rock?
The name comes from the way climbers move through the narrow section. As hikers press close to the rock for balance, their bodies often lean in and touch the surface. From a distance, this position looks like a kiss or a hug against the rock.
Furthermore, guides and trekkers started using the nickname to describe the visual experience in a simple and memorable way. Over time, the term became widely used among climbers on Kilimanjaro.
Is the Kissing Rock Safe?
The Kissing Rock is safe for most climbers when they follow guide instructions and move slowly. The trail remains stable, and there are no technical climbing requirements in this section.
However, climbers must stay focused because the path feels narrow and uneven. In addition, guides manage the pace and spacing to prevent crowding. As a result, thousands of trekkers pass this section every year without serious incidents.
Can Beginners Climb the Barranco Wall?
Beginners can climb the Barranco Wall successfully because it does not require technical mountaineering skills. The route looks intimidating from a distance, but the actual path follows a natural trail with steady footing and clear direction. With proper guidance and a slow pace, most first-time Kilimanjaro climbers complete this section safely.
Do You Need Climbing Experience?
You do not need any prior climbing experience to pass the Barranco Wall. The section does not use ropes, harnesses, or climbing equipment. Instead, climbers walk and scramble on rock while using their hands for balance.
In addition, the trail stays well-marked and guides lead every group step by step. Because of this support, even beginners with no hiking background can handle the ascent when they follow instructions and move carefully.
Can People with a Fear of Heights Do It?
People with a fear of heights can still climb the Barranco Wall, although they may feel nervous at first. The narrow sections and exposed views create a strong visual impact, especially before starting the climb.
However, the fear usually decreases once climbers begin moving. In addition, guides provide reassurance and control the pace, which helps reduce anxiety. When hikers focus on each step instead of looking down, they often complete the section without major difficulty.
How Guides Help Climbers
Professional guides play a key role in helping climbers cross the Barranco Wall safely. They lead the way, choose the safest steps, and keep the group moving at a controlled pace.
Furthermore, guides assist climbers in narrow areas by offering hand support or clear instructions on foot placement. They also manage spacing to avoid congestion on tight sections like the Kissing Rock. As a result, climbers feel more confident and stay safe throughout the ascent.
How to Safely Climb the Barranco Wall
Climbers can cross the Barranco Wall safely when they follow simple techniques and stay attentive throughout the ascent. Although the section looks steep from below, the route stays manageable when hikers move carefully and trust their guides.
Follow Your Guide’s Instructions
Guides lead every group through the Barranco Wall and choose the safest path on the rock. Therefore, climbers must listen closely and follow every instruction without hesitation.
In addition, guides know where to place hands and feet on difficult sections. When hikers trust their guidance, they reduce mistakes and move through narrow areas like the Kissing Rock more confidently.
Move Polepole (Slowly)
“Polepole” means slowly in Swahili, and it represents the most important rule on Kilimanjaro. Climbers must move at a controlled pace to maintain balance and conserve energy.
Furthermore, slow movement helps hikers adjust to altitude and reduces the risk of slipping. When climbers avoid rushing, they complete the Barranco Wall more safely and comfortably.
Use Proper Foot Placement
Proper foot placement plays a key role in crossing the Barranco Wall. Climbers should test each step before putting full weight on it and always look for stable rock surfaces.
In addition, using both hands for balance improves stability on uneven sections. When hikers focus on careful movement, they navigate narrow areas like the Kissing Rock with greater control.
Stay Calm and Focused
Climbers must stay calm and maintain focus throughout the ascent. Nervous movements or panic can lead to mistakes on narrow sections of the wall.
Moreover, taking deep breaths and concentrating on one step at a time helps reduce fear and improves coordination. As a result, calm and focused climbers complete the Barranco Wall more smoothly and enjoy the experience more fully.
How to Safely Climb the Barranco Wall
Climbing the Barranco Wall becomes safe and manageable when hikers use the right approach and stay alert. Although the wall looks steep from Barranco Camp, the trail follows a natural path that guides climbers upward step by step. Therefore, success depends more on behavior than physical strength.
Follow Your Guide’s Instructions
Guides lead the entire group and choose the safest route through rocky sections. For this reason, climbers must listen carefully and follow every instruction without rushing ahead.
In addition, guides know where the trail narrows and where extra caution is needed. When hikers trust their guidance, they move through difficult spots like the Kissing Rock with more confidence and fewer mistakes.
Move Polepole (Slowly)
“Polepole,” meaning slowly in Swahili, plays a key role in safe climbing on Kilimanjaro. Climbers must keep a steady, controlled pace to maintain balance and avoid fatigue.
Furthermore, slow movement allows the body to adjust to altitude and reduces slipping on uneven rock. As a result, hikers complete the Barranco Wall more safely and with less stress.
Use Proper Foot Placement
Careful foot placement helps climbers stay stable on rocky terrain. Hikers should test each step before committing weight and choose solid rock surfaces whenever possible.
In addition, using hands for balance improves control in narrow sections. When climbers focus on each movement, they pass tricky areas like the Kissing Rock more smoothly.
Stay Calm and Focused
Calm thinking improves safety throughout the Barranco Wall. Panic or rushed movements can increase the chance of mistakes on narrow paths.
Therefore, climbers should breathe steadily and focus on one step at a time. In addition, maintaining concentration helps hikers build confidence and enjoy the experience rather than fear it.
Which Kilimanjaro Routes Include the Barranco Wall?
Several popular Kilimanjaro routes include the Barranco Wall because they follow the southern circuit of the mountain. Climbers encounter this section after spending the night at Barranco Camp, before continuing toward Karanga Valley. As a result, the Barranco Wall becomes a shared experience for multiple trekking routes.
Machame Route
The Machame Route includes the Barranco Wall as part of its standard itinerary. Climbers reach Barranco Camp after several days of ascent, then tackle the wall the following morning.
In addition, this route offers a gradual acclimatization profile, which helps hikers feel more prepared for the climb. Therefore, most trekkers on the Machame Route handle the Barranco Wall with steady confidence and enjoy the experience as a highlight of the journey.
Lemosho Route
The Lemosho Route also passes through the Barranco Wall after joining the southern circuit. Climbers spend more days on the mountain before reaching this section, which improves acclimatization.
Furthermore, hikers on Lemosho often feel stronger and more adjusted to altitude by the time they reach Barranco Camp. As a result, many find the Barranco Wall more manageable and less intimidating compared to shorter routes.
Umbwe Route
The Umbwe Route reaches the Barranco Wall after a steeper and more direct ascent in the early days of the climb. Because of this fast elevation gain, climbers may feel more challenged when they arrive at Barranco Camp.
However, the wall itself follows the same safe trail used by other routes. In addition, guides provide full support, so climbers complete the section using the same steady, step-by-step approach regardless of the route they choose.
Barranco Wall vs Other Kilimanjaro Challenges
The Barranco Wall is one of the most memorable sections on Mount Kilimanjaro, but it is not the hardest part of the climb. When climbers compare it with other challenges like Lava Tower and summit night, clear differences appear in difficulty, altitude impact, and physical demand.
Barranco Wall vs Lava Tower
The Barranco Wall focuses on balance, movement, and short bursts of scrambling on rock. Climbers use their hands for support, but the section remains relatively short and controlled.
In contrast, Lava Tower presents a longer and more exhausting challenge at higher altitude. Hikers often feel the effects of thin air more strongly there. Therefore, while Barranco Wall feels more technical, Lava Tower feels more physically draining due to elevation.
Barranco Wall vs Summit Night
The Barranco Wall takes only a short time to complete and allows climbers to move during daylight with clear visibility. As a result, most hikers treat it as an exciting daytime challenge.
Summit night, however, creates a completely different experience. Climbers ascend for many hours in darkness, extreme cold, and very high altitude. In addition, fatigue builds over time, making summit night the toughest section of the entire Kilimanjaro climb.
Which Section Feels Harder?
Summit night feels significantly harder than the Barranco Wall for almost all climbers. The main reason comes from altitude, cold temperatures, and long continuous effort.
Meanwhile, the Barranco Wall feels more like a short adventure that requires focus and balance rather than endurance. Therefore, most trekkers describe it as one of the most enjoyable challenges, while summit night remains the most demanding part of the journey.
10 Interesting Facts About the Barranco Wall
The Barranco Wall on Mount Kilimanjaro surprises many climbers because it combines dramatic scenery, simple scrambling, and unique hiking culture. Although it looks intimidating from Barranco Camp, it holds many interesting details that make the climb more memorable.
Fast Facts Every Climber Should Know
The Barranco Wall rises about 257 meters above Barranco Camp, yet the trail avoids vertical climbing.
Climbers do not need ropes or technical equipment to cross the wall safely.
Most trekkers complete the section in 1 to 2 hours depending on pace and weather.
The wall forms part of the Southern Circuit, which many Kilimanjaro routes follow.
Machame, Lemosho, and Umbwe routes all include this famous section.
The Kissing Rock sits within the Barranco Wall and creates one of its most photographed moments.
Guides call this section safe when climbers follow instructions and move slowly.
The wall often feels harder from below than it actually is during the climb.
Climbers use both hands and feet for balance in several sections of the ascent.
The Barranco Wall offers some of the best views of Kilimanjaro’s valleys and volcanic landscape.
As a result, the Barranco Wall remains one of the most talked-about highlights of the entire Kilimanjaro trekking experience.
Frequently Asked Questions About the Barranco Wall
This section answers the most common questions climbers ask before they reach the Barranco Wall on Mount Kilimanjaro. These quick answers help hikers understand what to expect and how to prepare.
Is the Barranco Wall dangerous?
The Barranco Wall is not considered dangerous for most climbers. It looks steep from Barranco Camp, but the trail follows a safe and well-used route. In addition, guides lead every group carefully, which reduces risk and improves safety throughout the climb.
How difficult is the Barranco Wall?
The Barranco Wall feels moderately difficult because it requires balance and focus rather than technical skills. Climbers use their hands for support in some sections, but the route does not need ropes or climbing experience. Furthermore, most hikers find it easier than summit night, even though it looks more intimidating at first.
Can beginners climb the Barranco Wall?
Yes, beginners can climb the Barranco Wall without prior experience. The path stays clear, and guides provide step-by-step instructions throughout the ascent.
In addition, the climb remains short and manageable, which helps first-time trekkers build confidence as they progress.
What is the Kissing Rock?
The Kissing Rock is a narrow section of the Barranco Wall where climbers pass very close to a rock face. Because hikers lean in for balance, it looks like they are “kissing” the rock.
As a result, this spot became one of the most famous and photographed moments on Kilimanjaro.
Do you need ropes to climb it?
No, climbers do not need ropes or technical equipment to pass the Barranco Wall. The route follows a natural hiking path with stable rock sections. However, climbers must use careful foot placement and follow guide instructions to move safely through narrow areas.
How long does the climb take?
Most climbers take about 1 to 2 hours to complete the Barranco Wall. The exact time depends on group size, weather conditions, and individual pace. In addition, slow movement helps improve safety and allows climbers to adjust to altitude.
Which routes include the Barranco Wall?
The Barranco Wall appears on several popular Kilimanjaro routes, including the Machame Route, Lemosho Route, and Umbwe Route. Therefore, many trekkers experience this section as part of their standard ascent to Uhuru Peak.
Is the Barranco Wall worth it?
Yes, the Barranco Wall is worth it for most climbers. It offers exciting scrambling, stunning views, and a strong sense of achievement. In addition, it adds variety to the Kilimanjaro climb, making the journey more memorable and rewarding overall.
Final Thoughts: Why the Barranco Wall Is One of Kilimanjaro’s Most Memorable Experiences
The Barranco Wall stands out as one of the most unforgettable parts of climbing Mount Kilimanjaro because it blends challenge, scenery, and emotion in a single section. Although it looks intimidating from Barranco Camp, climbers quickly realize that the route feels more like an adventure than a technical climb.
In addition, the wall creates a strong sense of achievement. Every step forward requires focus and balance, yet the path remains safe and well-guided. As climbers progress, they gain confidence and enjoy one of the most engaging sections on the entire mountain.
Furthermore, the Barranco Wall offers breathtaking views that stretch across valleys and volcanic landscapes. This combination of movement, scenery, and progress toward higher camps makes the experience truly special.
In conclusion, the Barranco Wall remains memorable because it transforms a simple hiking section into a rewarding milestone. Many climbers finish it feeling stronger, more confident, and more excited for the journey ahead to Uhuru Peak.
Top 10 Hardest and Most Dangerous Mountains to Climb in the World
Estimated reading time: 24 minutes
The world’s tallest and most dangerous mountains attract climbers because they offer a rare mix of challenge, beauty, and risk. These peaks test human strength, skill, and mental endurance in ways few other adventures can match. From freezing temperatures to thin air, every step on these mountains demands focus and preparation.
Mountains become dangerous mainly because of extreme altitude, unpredictable weather, steep terrain, and the constant risk of avalanches or falling ice. As climbers go higher, oxygen levels drop, which makes breathing harder and slows the body down. Sudden storms can also hit without warning, turning a difficult climb into a life-threatening situation. Some mountains also have technical sections that require rope skills, ice climbing, and experience in harsh conditions.
Despite these dangers, people still climb these peaks because they want adventure, personal achievement, and the chance to stand on some of the highest points on Earth. Many climbers also aim to push their limits, break records, or complete the challenge of the world’s highest mountains. For some, it is a lifelong dream that represents courage and determination.
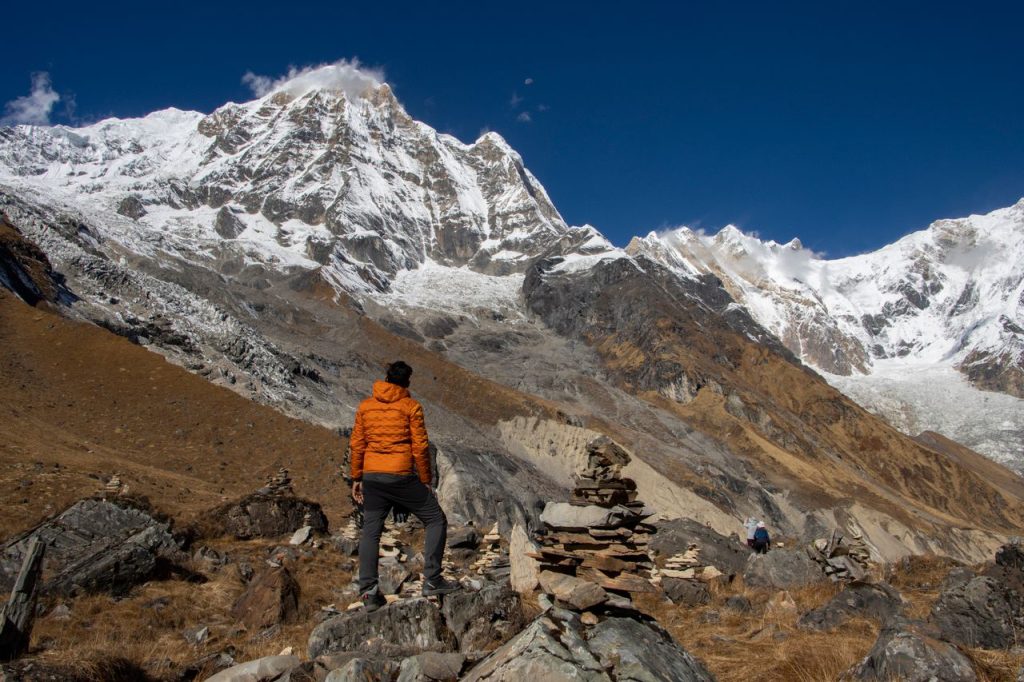
Famous extreme peaks like Annapurna I, K2, and Mount Everest show both the beauty and the danger of high-altitude climbing. These mountains stand as powerful symbols of nature’s strength and remind climbers that respect and preparation matter more than ambition alone.
Mountains become dangerous because of a combination of natural forces and extreme environmental conditions that put climbers under constant pressure. As altitude increases, the body struggles more, weather becomes less predictable, and the margin for error becomes very small. These factors work together and make high mountains some of the most challenging places on Earth.
Altitude Sickness
High altitude reduces oxygen levels in the air. As climbers go higher, the body receives less oxygen with every breath, which affects physical and mental performance. Many climbers start to feel headaches, nausea, dizziness, loss of appetite, and extreme fatigue. Movement becomes slow and difficult, and even simple tasks require a lot of effort. If climbers do not acclimatize properly, altitude sickness can become severe and even life-threatening. This is why most high-altitude climbs require gradual ascent and rest days.
Weather Conditions
Weather on high mountains changes very fast and often without warning. A clear sky can turn into a snowstorm within minutes. Strong winds can hit suddenly and make it hard to stand or move safely. Heavy snowfall reduces visibility and covers climbing routes, which increases the risk of getting lost or making mistakes. Low temperatures also freeze equipment and reduce the body’s ability to function properly, making every step more difficult and dangerous.
Technical Difficulty
Some mountains require advanced climbing skills and proper equipment. Climbers often face steep rock walls, icy slopes, and narrow ridges where balance and precision are critical. They use ropes, ice axes, harnesses, and crampons to move safely across these sections. In technical areas, one small mistake can lead to serious injury or fatal falls, especially in high-altitude conditions where reaction time becomes slower.
Avalanche Risk
Avalanches are one of the most dangerous threats in mountain climbing. They happen when snow, ice, or rock suddenly breaks loose and rushes down the slope at high speed. Climbers often cannot predict when an avalanche will occur, especially in unstable snow conditions. The force of an avalanche can bury climbers under heavy snow in seconds, making survival very difficult.
Isolation
Many of the world’s most dangerous mountains sit in remote and hard-to-reach locations. Rescue teams cannot reach climbers quickly if something goes wrong. Weather conditions, distance, and rough terrain often delay emergency response. This isolation increases the risk level because climbers must rely on their own skills, equipment, and teamwork until help arrives.
Top 10 Deadliest Mountains in the World
This section presents the world’s most dangerous mountains based on real climbing risks such as fatality rates, extreme weather, technical difficulty, and rescue challenges. These mountains are not ranked by height alone, but by the actual danger climbers face during expeditions.
Some mountains are included because they have very high death rates even among experienced climbers. Others appear on this list because they combine multiple risks such as steep technical sections, unpredictable storms, and long exposure to extreme altitude. Above 8,000 meters, the human body enters a survival zone where oxygen levels drop dramatically, and every decision becomes critical.
We also consider how difficult it is to rescue climbers in emergencies. Many of these peaks are located in remote regions where helicopters cannot reach, and weather conditions often delay rescue attempts. This increases the overall danger level significantly.
This list helps readers understand which mountains challenge human survival the most and why only highly experienced climbers attempt them.
1. Annapurna I (Nepal)
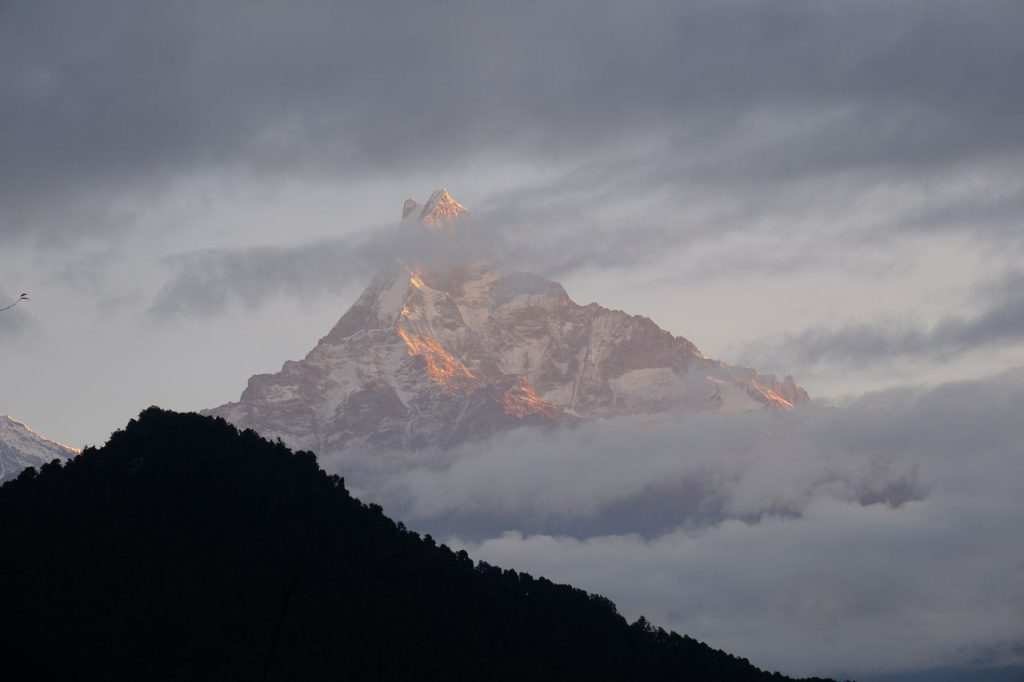
Annapurna I stands as one of the most dangerous mountains in the world and often ranks at the top of fatality lists. It rises to 8,091 meters in Nepal and challenges climbers with extreme natural risks that go beyond technical difficulty. Unlike some other high peaks, Annapurna does not forgive small mistakes, which makes it especially feared among mountaineers.
The main danger on Annapurna comes from its unstable snow and ice structure. Large sections of the mountain sit on steep slopes where snow does not stay stable for long. This creates a constant avalanche risk that can strike without warning. Even experienced climbing teams struggle to predict when conditions will change, which increases the danger level significantly.
Another major challenge is the steep and complex terrain. Climbers must navigate sharp ridges, deep snow, and icy walls that require both strength and precision. The weather also changes quickly, bringing heavy snowfall and strong winds that reduce visibility and make movement very slow.
What makes Annapurna even more dangerous is its high fatality rate compared to other eight-thousand-meter peaks. Historically, a large percentage of climbers who attempted the summit did not return safely. Even with modern gear and improved weather forecasting, the mountain continues to claim lives.
Despite its danger, Annapurna still attracts elite climbers who seek the ultimate challenge in mountaineering. It represents both beauty and risk, making it one of the most respected and feared mountains in the world.
2. K2 (Pakistan / China)
K2 is the second-highest mountain in the world at 8,611 meters, and climbers widely call it the “Breathtaking Mountain” because of its extreme difficulty and harsh climbing conditions. Unlike Mount Everest, K2 demands a much higher level of technical skill, and it offers very little room for error.
One of the biggest dangers on K2 is its steep and technical terrain. Climbers face long sections of ice walls, narrow ridges, and exposed climbing routes where balance and precision are critical. The most famous and dangerous section is the “Bottleneck,” a narrow couloir beneath massive hanging ice blocks that can collapse at any time.
Weather conditions on K2 also change rapidly and often become severe without warning. Strong winds, heavy snowfall, and sudden storms make it extremely difficult for climbers to continue safely. Many expeditions fail because of poor weather windows that close too quickly.
K2 also sits in a very remote location between Pakistan and China, which makes rescue operations extremely difficult. If an emergency happens at high altitude, help cannot arrive quickly, forcing climbers to rely on themselves in life-threatening situations.
The mountain also has a high fatality rate compared to most other peaks above 8,000 meters. Many experienced climbers consider K2 more dangerous than Everest because it combines extreme technical difficulty with unpredictable weather and limited support infrastructure.
Despite these dangers, K2 remains one of the most respected achievements in mountaineering, attracting only the most skilled and prepared climbers in the world.
3.Nanga Parbat (Pakistan)
Nanga Parbat rises to 8,126 meters and ranks as one of the most dangerous mountains in the world. Climbers often call it the “Killer Mountain” because it has claimed many lives throughout mountaineering history. Its massive size, extreme weather, and difficult terrain make it a serious challenge even for expert climbers.
One of the biggest dangers on Nanga Parbat comes from its huge vertical walls, especially the famous Rupal Face. This face rises about 4,600 meters from base to summit and stands as one of the tallest mountain walls on Earth. Climbers must move through steep ice, loose rock, and exposed sections where a single mistake can become fatal.
Weather conditions on Nanga Parbat also change very quickly. Strong winds, heavy snow, and sudden storms can appear without warning and trap climbers at high altitude. These unpredictable conditions reduce visibility and make climbing routes more dangerous and harder to follow.
Another major challenge is the isolation of the mountain. Nanga Parbat sits in a remote region of Pakistan, far from fast rescue support. If an emergency happens during the climb, help often takes a long time to arrive, which increases the risk for climbers.
Because of these combined factors extreme terrain, unstable weather, and isolation Nanga Parbat remains one of the deadliest peaks in the world. Only highly skilled and well-prepared climbers attempt this mountain, and even then, success is never guaranteed.
4.Kangchenjunga (Nepal / India)
Kangchenjunga stands at 8,586 meters and ranks as the third-highest mountain in the world. It lies on the border between Nepal and India and remains one of the most remote and least climbed eight-thousanders. Climbers respect this mountain not only for its size but also for its serious dangers.
One of the main challenges on Kangchenjunga comes from its long and isolated approach. Teams must travel through remote terrain before even reaching the higher camps, which makes logistics and rescue support very difficult. If an emergency happens, help cannot arrive quickly due to distance and weather limitations.
The mountain also presents very demanding technical climbing sections. Near the summit, climbers face steep ice slopes, narrow ridges, and unstable snow conditions. These areas require careful movement and strong experience in high-altitude climbing. The low oxygen level at this height makes every step slower and more exhausting.
Weather conditions on Kangchenjunga also add to the risk. Strong winds, deep snow, and sudden storms often reduce visibility and increase the chance of accidents. Climbers must carefully choose short weather windows to attempt the summit safely.
Another important factor is tradition. Many climbers stop just short of the true summit out of respect for local beliefs, which also reflects how challenging and respected this mountain is.
Because of its isolation, technical difficulty, and harsh weather, Kangchenjunga remains one of the most dangerous and least forgiving mountains in the world.
5. Baintha Brakk (The Ogre) – Pakistan
Baintha Brakk, also known as “The Ogre,” rises to 7,285 meters in the Karakoram range of Pakistan. Even though it is lower than many eight-thousand-meter peaks, it is considered one of the hardest and most dangerous mountains in the world because of its extreme technical difficulty.
The main challenge on Baintha Brakk comes from its steep and complex rock structure. Climbers face near-vertical granite walls mixed with unstable ice sections. These conditions require advanced rock and ice climbing skills, and every move demands precision and full focus. One small mistake can lead to a serious fall because the routes offer very little protection.
Weather conditions on The Ogre also increase the danger. Strong winds, sudden snowstorms, and freezing temperatures often hit the mountain without warning. These harsh conditions make climbing slow and dangerous, especially on exposed sections where climbers cannot find shelter.
Another major risk comes from the mountain’s isolation. Baintha Brakk sits deep in a remote part of the Karakoram range, far from rescue support. If an accident happens, evacuation becomes extremely difficult and sometimes impossible within a safe time frame.
The mountain has a very low success rate, and only a few expeditions in history have managed to reach the summit. This shows how technically demanding and unpredictable it is compared to other peaks.
Because of its extreme technical difficulty, unpredictable weather, and remote location, Baintha Brakk remains one of the most feared climbing challenges in the world.
6. The Eiger (Switzerland)
The Eiger stands at 3,967 meters in the Swiss Alps, but its danger level makes it one of the most feared mountains in the world. Its height is not extreme compared to the Himalayas, but its north face creates one of the toughest climbing challenges in alpine history.
The most dangerous part of The Eiger is its North Face, also known as the “Mordwand” or “Murder Wall.” This face rises about 1,800 meters and combines steep rock, ice, and constant falling debris. Climbers face rockfalls and ice collapse throughout the climb, which creates unpredictable danger at every section.
Weather on The Eiger changes very quickly. Strong winds, sudden snowstorms, and freezing temperatures can appear without warning. These conditions often reduce visibility and make it very difficult for climbers to find safe routes or continue their ascent.
The mountain also has complex route-finding challenges. Many sections look similar, and climbers can easily take the wrong path in poor visibility. This increases the risk of accidents and delays, especially when weather conditions worsen quickly.
Another major risk comes from warming temperatures in the Alps. Ice melts faster, which increases rockfall activity and makes climbing conditions even more unstable than in the past.
Because of its technical difficulty, unstable conditions, and dangerous North Face, The Eiger remains one of the most respected and deadly climbing challenges in the world, even for highly experienced alpine climbers.
7. Cerro Torre (Argentina / Chile)
Cerro Torre rises to 3,128 meters in the Patagonian Andes between Argentina and Chile. Climbers consider it one of the most difficult and dangerous peaks in the world because of its extreme weather and highly technical climbing conditions, even though it is not very high compared to Himalayan mountains.
The biggest challenge on Cerro Torre comes from its weather. Strong winds constantly hit the mountain, and storms can develop very quickly. These winds often reach extreme speeds and make it almost impossible for climbers to maintain balance or continue safely. Weather windows for climbing stay very short and unpredictable.
Another major difficulty comes from the mountain’s shape. Cerro Torre features steep granite walls covered with unstable ice formations. At the summit, climbers often face a mushroom-like cap of rime ice that changes shape depending on weather conditions. This makes the final push extremely unpredictable and dangerous.
Technical climbing skills are essential on Cerro Torre. Climbers must use advanced rock and ice techniques to move through vertical sections where protection is limited. Every movement requires precision because falling rocks and ice increase the risk level.
The remote location of the mountain also adds difficulty. Rescue support remains limited, and harsh weather often prevents helicopters from reaching climbers in emergencies. This isolation increases the seriousness of any accident.
Because of its extreme winds, technical routes, and unstable summit conditions, Cerro Torre remains one of the most challenging and feared mountains for climbers worldwide.
8. Makalu (Nepal / China)
Makalu stands at 8,485 meters and ranks as the fifth-highest mountain in the world. It sits on the border between Nepal and China and forms part of the Himalayas. Climbers respect Makalu because it combines extreme altitude with steep, technical terrain that demands full focus and strong experience.
The mountain has a sharp pyramid shape with narrow ridges and steep faces on all sides. These conditions make climbing very technical because climbers must move carefully on exposed sections where balance becomes difficult. One wrong step on these ridges can lead to serious danger due to the steep drop below.
Weather on Makalu adds another level of difficulty. Strong winds often hit the upper sections of the mountain, and sudden storms can reduce visibility quickly. Heavy snowfall also makes routes unstable and slows down progress during summit attempts.
Another major challenge comes from altitude. At this height, oxygen levels are extremely low, which slows down the body and affects decision-making. Climbers must move slowly and carefully to avoid exhaustion and altitude sickness.
Makalu also requires strong endurance because its routes are long and physically demanding. Climbers spend many days on the mountain, facing cold temperatures and harsh conditions before reaching the summit.
Because of its technical ridges, extreme altitude, and unpredictable weather, Makalu remains one of the most difficult and dangerous mountains in the world, even for experienced high-altitude climbers.
9. Denali (USA)
Denali rises to 6,190 meters and stands as the highest mountain in North America. It sits in Alaska and presents one of the toughest climbing environments in the world because of its extreme cold, strong winds, and remote location.
The biggest challenge on Denali comes from its weather. Climbers face some of the coldest conditions on Earth, with temperatures dropping far below freezing even in climbing season. Strong Arctic winds also increase the danger by creating wind chill that makes the mountain feel much colder than its actual temperature.
Another major difficulty comes from the mountain’s latitude. Denali sits close to the Arctic Circle, so the air pressure is lower than on mountains at the same height near the equator. This makes the climb feel more physically demanding and increases fatigue at lower altitudes.
Climbers also face complex glacier travel on Denali. They must move across deep crevasses, unstable snow bridges, and long icy slopes while carrying heavy loads. These conditions require strong navigation skills and careful teamwork to avoid accidents.
Isolation adds another serious risk. Denali sits in a remote wilderness with limited rescue options. Weather conditions often prevent helicopters from flying, so climbers must rely heavily on self-sufficiency during emergencies.
Because of its extreme cold, remote location, and challenging glacier terrain, Denali remains one of the most demanding and dangerous mountains in the world, even though it is not as tall as the Himalayan peaks.
10. Mount Everest (Nepal / China)
Mount Everest stands at 8,849 meters and ranks as the highest mountain in the world. It sits on the border between Nepal and China and attracts thousands of climbers every year. Even though it is the most famous peak, it still remains extremely dangerous due to altitude, weather, and overcrowding.
The biggest challenge on Everest comes from extreme altitude. Above 8,000 meters, climbers enter the “death zone,” where oxygen levels drop so low that the human body cannot fully recover. At this height, climbers feel extreme fatigue, confusion, and slow physical movement, which increases the risk of mistakes.
Another major danger comes from the Khumbu Icefall on the Nepal side. This section contains moving ice blocks, deep crevasses, and unstable ladders that climbers must cross carefully. Ice constantly shifts in this area, which creates unpredictable and serious risks.
Weather conditions on Everest also change quickly. Strong winds and sudden storms can trap climbers at high altitude and delay descent. Even small weather changes can turn a safe climb into a dangerous situation.
Crowding has also become a serious issue on Everest. Many climbers attempt the summit during the same short weather window, which creates traffic jams in narrow sections. This slows down movement and increases exposure time in the most dangerous zones.
Because of its extreme altitude, dangerous icefall, and unpredictable conditions, Mount Everest remains one of the most challenging and high-risk mountains in the world, despite modern climbing support and equipment.
Comparison Table (K2 vs Everest vs Annapurna)
This section compares the three most dangerous mountains in the world: K2, Mount Everest, and Annapurna I. These mountains appear in this comparison because they represent the highest levels of climbing danger based on real risks such as fatality rates, technical difficulty, and extreme weather conditions.
Climbers and researchers often compare these peaks to understand which mountain creates the highest risk for human survival. While all three sit in the “death zone” above 8,000 meters, they each present different types of danger. Some focus more on technical climbing challenges, while others involve extreme weather or high avalanche risk.
This comparison helps you clearly see why these mountains consistently rank at the top of the world’s deadliest climbs.
What This Comparison Shows
K2 ranks as the most technically difficult of the three because it combines steep climbing sections, unpredictable weather, and limited rescue options. Annapurna I shows the highest fatality risk because avalanches occur frequently and without warning. Mount Everest, although the highest mountain in the world, has a lower technical difficulty but still creates serious danger due to extreme altitude and overcrowding.
This comparison clearly shows that height alone does not determine danger. Instead, the combination of weather, terrain, and fatality history decides how dangerous a mountain truly is.
Why Climbers Still Risk These Mountains
Even though the world’s hardest and most dangerous mountains put human life at serious risk, climbers still travel from different countries to attempt these peaks. Each expedition carries danger, but strong motivation pushes people to continue climbing in extreme conditions.
Adventure
Many climbers pursue these mountains for pure adventure. They want to experience extreme environments that test their physical strength and mental control. High-altitude climbing creates moments that no normal travel experience can offer, such as walking through ice walls, crossing glaciers, and surviving freezing winds at extreme heights. This sense of adventure attracts experienced climbers who seek challenges beyond ordinary limits.
Records
Some climbers aim to break records in mountaineering. They attempt to become the youngest, fastest, or first from their country to reach a summit. These achievements bring global recognition and personal satisfaction. Records in high-altitude climbing also push climbers to attempt more difficult routes or climb multiple dangerous peaks in a short time, even when risks remain very high.
Human Challenge
Many climbers see these mountains as a test of human strength and endurance. They want to prove what the human body and mind can achieve under extreme pressure. High-altitude environments challenge decision-making, stamina, and emotional control. For many climbers, reaching the summit represents personal victory over fear, pain, and exhaustion.
Tourism
Adventure tourism also plays a major role. Guided expeditions and professional support teams make it possible for more climbers to attempt dangerous peaks. This industry provides jobs for local guides, porters, and rescue teams in mountain regions. Although the risks remain high, structured tourism systems help improve safety and organization during expeditions.
Safer Alternatives for Beginners
Not everyone wants to climb the world’s most dangerous mountains. Many adventure travelers dream of reaching a mountain summit without facing extreme technical challenges, deadly weather, or high-risk climbing conditions. Fortunately, several mountains offer an exciting trekking experience while remaining accessible to beginners with proper preparation.
Mount Kilimanjaro, Tanzania
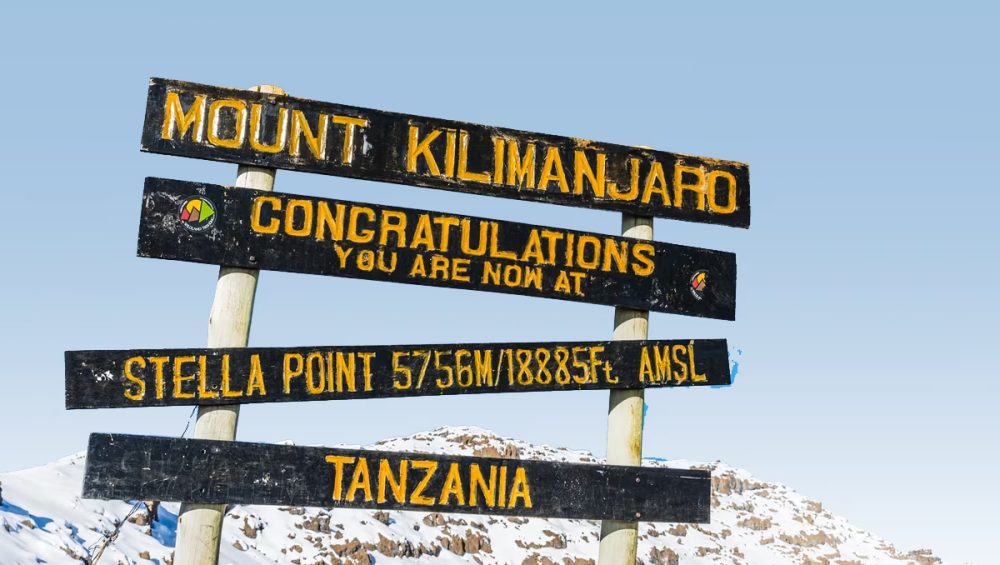
Mount Kilimanjaro stands as one of the best beginner-friendly high-altitude mountains in the world. At 5,895 meters (19,341 feet), it ranks as the highest mountain in Africa and attracts thousands of trekkers every year.
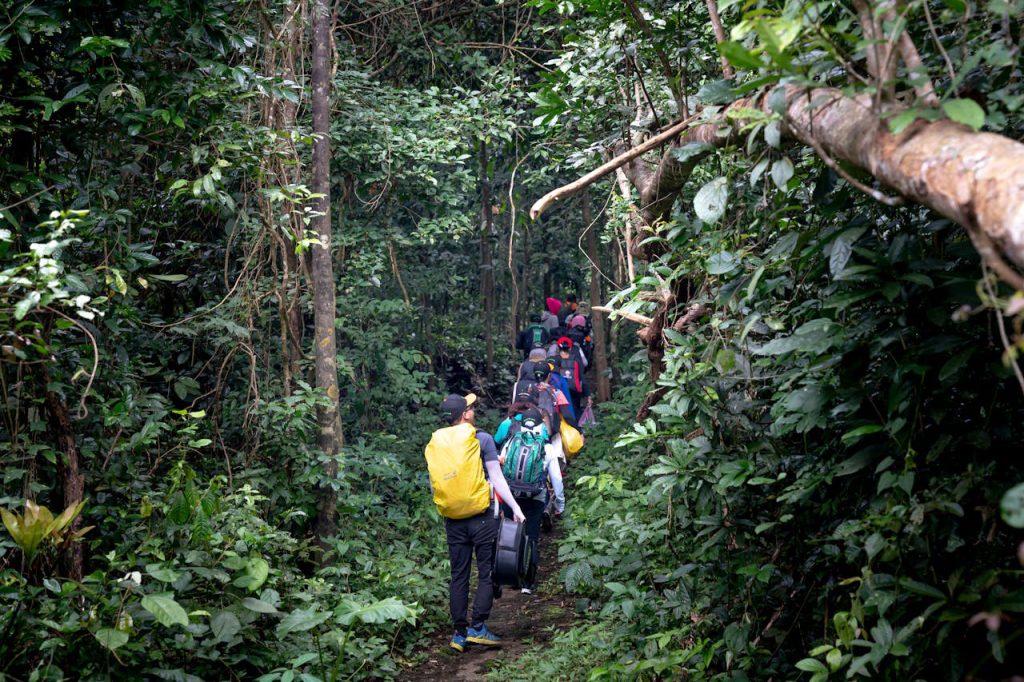
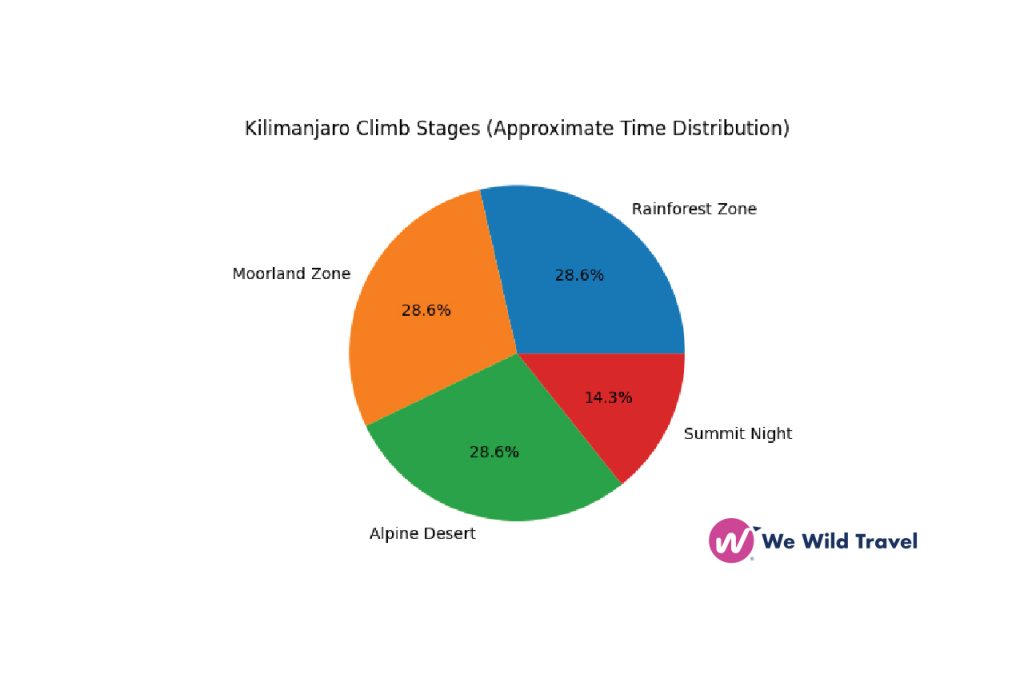
Unlike mountains such as K2 or Annapurna, Kilimanjaro does not require technical climbing skills, ropes, or mountaineering experience. Trekkers follow established routes through rainforests, alpine deserts, and arctic summit zones before reaching Uhuru Peak.
The main challenge comes from altitude rather than difficult climbing. Most climbers who choose a longer route and allow enough time for acclimatization have a strong chance of reaching the summit successfully.
For many first-time mountain adventurers, Kilimanjaro provides the perfect introduction to high-altitude trekking.
Mount Meru, Tanzania
Many travelers overlook Mount Meru, but it offers one of the most rewarding trekking experiences in East Africa. Rising to 4,566 meters (14,980 feet), Mount Meru stands within Arusha National Park and delivers spectacular scenery throughout the climb.
Trekkers pass through forests filled with wildlife, open grasslands, and dramatic volcanic landscapes. Along the way, hikers often spot giraffes, buffaloes, zebras, and monkeys.
Mount Meru challenges trekkers physically, but it remains far less crowded than Kilimanjaro. Many climbers also use Mount Meru as preparation for a future Kilimanjaro summit attempt because it helps the body adjust to higher elevations.
Other Great Trekking Peaks for Beginners
Several mountains around the world offer excellent trekking opportunities for beginners who want adventure without extreme danger.
Mount Toubkal in Morocco gives trekkers the chance to climb North Africa’s highest peak while enjoying stunning Atlas Mountain scenery.
Island Peak in Nepal provides a stepping stone for hikers who want to gain basic mountaineering experience before attempting more difficult Himalayan expeditions.
Mount Kinabalu in Malaysia combines beautiful landscapes, well-maintained trails, and a challenging but achievable summit experience.
These mountains allow travelers to build confidence, improve fitness, and gain valuable mountain experience before considering more demanding climbs.
Why Start with Beginner-Friendly Mountains?
Climbing a safer trekking peak helps adventurers learn how their bodies respond to altitude, changing weather, and multi-day hikes. It also builds confidence and mountain skills in a controlled environment.
Many experienced mountaineers began their journey on mountains such as Kilimanjaro or Mount Meru before moving on to more technical and dangerous peaks.
For most people, the goal is not simply to reach a summit. The goal is to enjoy the experience, explore incredible landscapes, and return home with unforgettable memories. Beginner-friendly mountains make that possible while keeping risks much lower than the world’s most dangerous climbs.
Safety Tips for High-Altitude Climbing
High-altitude mountains offer incredible adventures, but they also present serious challenges. Thin air, changing weather, and physical exhaustion can quickly turn a climb into a dangerous situation. Whether you plan to climb Kilimanjaro, Mount Meru, or a higher peak, following basic safety practices can greatly improve your chances of a successful summit.
Take Time to Acclimatize
Your body needs time to adjust to lower oxygen levels at high elevations. If you climb too quickly, you increase your risk of altitude sickness, which can cause headaches, nausea, dizziness, and extreme fatigue.
Choose an itinerary that includes enough days for acclimatization. Climb slowly, stay hydrated, and listen to your body throughout the trek. Many successful climbers follow the simple rule: walk slowly and conserve energy.
Climb with Experienced Guides
A professional guide does much more than show the way. Experienced guides monitor your health, track weather conditions, manage emergencies, and help you make safe decisions on the mountain.
When choosing a trekking company, look for trained guides with strong safety records and extensive experience on the mountain. Their knowledge can make a significant difference, especially at higher elevations.
Use the Right Gear
Proper equipment helps you stay warm, dry, and comfortable during your climb. Mountain weather can change quickly, and temperatures often drop dramatically as you gain altitude.
Pack quality hiking boots, warm layers, waterproof clothing, gloves, a hat, sunglasses, and a reliable backpack. Test your gear before the trek to ensure everything fits well and works properly.
Plan Your Climb Carefully
Good planning reduces risks and helps you prepare for unexpected challenges. Research your route, understand the weather patterns, and choose the best season for your climb.
Train several weeks or months before your trek to improve your endurance and strength. Make sure you have travel insurance, emergency contacts, and all required permits before you begin your adventure.
Put Safety Before the Summit
Many climbers focus only on reaching the top, but smart mountaineers know that safety comes first. If you experience severe altitude sickness or dangerous weather conditions, turning back is often the best decision.
The mountain will always remain there for another attempt. Protecting your health and returning safely should always be your highest priority.
FAQ Section (Google Snippet Booster)
What is the deadliest mountain?
Mountaineers often call Annapurna I one of the deadliest mountains in the world. Many climbers have lost their lives there because of avalanches, steep faces, and unstable snow conditions. Unlike other high peaks, Annapurna gives very little room for error, so even experienced climbers face serious risk.
Is Everest or K2 more dangerous?
K2 is more dangerous than Mount Everest. Everest stands higher, but it offers more established routes, better rescue support, and more climbing traffic. K2 has steeper sections, harsher weather, and fewer safety options. Climbers face a much lower survival rate on K2 compared to Everest.
Can beginners climb these mountains?
Beginners should not attempt extreme peaks like Everest, K2, or Annapurna. These mountains require technical skills, high-altitude experience, and strong physical conditioning. Instead, beginners should start with trekking peaks like Mount Kilimanjaro or Mount Meru. These mountains do not require technical climbing skills and give new climbers a safer way to experience high-altitude adventure while building experience for future expeditions.
Final Thoughts
Mountains inspire adventure, challenge, and personal growth, but they also demand respect. Every peak, whether small or extreme, carries real risks that climbers must take seriously.
Always put safety first. Good preparation, the right equipment, and proper guidance can turn a difficult climb into a successful and memorable journey. Never rush the mountain, and never ignore warning signs from your body or the environment.
Travel responsibly every time you step into the mountains. Protect nature, respect local communities, and follow established trekking rules. Clean trails, responsible waste management, and cultural respect keep these destinations beautiful for future generations.
At WeWild Travel, we believe that every journey should combine adventure with safety and respect for nature. We help travelers explore iconic mountains like Kilimanjaro and Mount Meru with trusted guides and well-planned experiences that focus on both achievement and responsible travel.
In the end, the best summit is not just reaching the top-it is returning safely with unforgettable memories and a deeper connection to the wild world.
Stella Point is one of the most important landmarks on the summit route of Mount Kilimanjaro. It is located on the crater rim and marks the point where climbers finally reach the top edge of the mountain after a long and difficult ascent. At this stage, trekkers are already at extreme altitude, and the environment becomes very harsh due to low oxygen, cold temperatures, and strong winds.
Stella Point is not the highest point on Kilimanjaro, but it is a major achievement in the summit journey. Reaching it means a climber has successfully completed the toughest section of the climb, usually done during the final night push from Barafu Camp. From Stella Point, the trail continues for about 30 to 60 minutes along the crater rim to reach Uhuru Peak, which is the highest point in Africa at 5,895 meters.
Many climbers consider Stella Point a powerful emotional milestone because it represents almost reaching the summit after hours of physical and mental challenge. The sunrise often happens around this area, making the moment even more memorable. In simple terms, Stella Point is the gateway to the summit of Kilimanjaro and a sign that the hardest part of the journey is already behind you.
Stella Point is located at an altitude of 5,756 meters (18,885 feet) above sea level on Mount Kilimanjaro’s crater rim. This makes it one of the highest reachable points on the mountain before reaching the true summit, Uhuru Peak. At this elevation, the environment becomes extremely harsh, and climbers enter what experts call the “extreme altitude zone.”
At 5,756 meters, oxygen levels drop significantly compared to sea level, reaching almost half of what the human body normally experiences. Because of this, most climbers experience noticeable altitude effects such as heavy breathing, slow movement, fatigue, headaches, and reduced physical strength. Even simple steps can feel very demanding, and the body must work much harder to function normally.
The cold temperature at Stella Point also adds to the difficulty. It is common to experience freezing winds, especially during the summit night ascent. Despite these challenges, reaching Stella Point is a major achievement because it confirms that a climber has successfully reached the crater rim after hours of steep and exhausting trekking from Barafu Camp.
In simple terms, Stella Point’s altitude represents the final test of endurance before the last short push to Uhuru Peak. It is a place where mental strength becomes just as important as physical fitness, and every step forward brings climbers closer to standing on the roof of Africa.
Which Routes Reach Stella Point?
Not all climbing routes on Mount Kilimanjaro pass through Stella Point, but several popular routes reach it during the final summit push. Climbers usually access Stella Point through the crater rim near the summit, and most of them arrive there after passing Barafu Camp, which serves as the main high camp before the final ascent.
Machame Route
The Machame Route is one of the most popular routes to Mount Kilimanjaro and it does reach Stella Point during the summit climb. Climbers using this route typically ascend through different ecological zones and acclimatization camps before arriving at Barafu Camp, which serves as the base for the final summit attempt.
From Barafu Camp, climbers begin their summit push at midnight or early morning, climbing steep scree and rocky terrain in very low oxygen conditions. After several hours of slow and challenging ascent, they reach Stella Point on the crater rim. This is usually the first major achievement of summit day. From Stella Point, climbers continue along the crater rim for about 30 to 60 minutes to reach Uhuru Peak, the highest point in Africa.
The Machame Route offers a strong acclimatization profile, which helps climbers increase their chances of reaching the summit. Because of this advantage, many climbers prefer it, even though it demands strong physical effort.
Lemosho Route
TheLemosho Route also leads climbers to Stella Point through its standard summit approach. Many climbers choose this route because it offers some of the most scenic views on Kilimanjaro and provides a longer acclimatization period, which improves summit success rates.
After several days of trekking through rainforest, moorland, and alpine desert zones, climbers eventually join the Machame Route near the upper mountain section. From there, they proceed to Barafu Camp, which is the final base before the summit attempt.
During summit night, climbers leave Barafu Camp and make a slow, steady ascent toward the crater rim. After hours of climbing in freezing temperatures and thin air, they arrive at Stella Point. This moment is often emotional because it confirms that the hardest part of the climb is complete. From Stella Point, the final stretch to Uhuru Peak is relatively short but still very challenging due to extreme altitude.
Umbwe Route (via Barafu)
The Umbwe Route stands as the steepest and most direct route on Mount Kilimanjaro, which makes it one of the most physically demanding options. Although climbers face a difficult ascent, they still follow the same summit approach as other major routes to reach Stella Point.
Climbers on the Umbwe Route usually ascend quickly through the lower slopes and join the higher trails leading toward Barafu Camp. Because of its steep profile, proper acclimatization is very important for safety and success on this route.
From Barafu Camp, the summit push follows the same pattern as other routes: a nighttime ascent through extreme altitude conditions. After several hours of continuous climbing, trekkers reach Stella Point on the crater rim. This is a major milestone, especially for Umbwe climbers, as it confirms they have overcome one of the toughest ascent profiles on Kilimanjaro. The journey then continues for the final short section to Uhuru Peak.
Northern Circuit Route
The Northern Circuit Route is the longest and most scenic route on Mount Kilimanjaro. It circles around the northern slopes of the mountain, giving climbers more time to acclimatize and experience different landscapes such as rainforest, moorland, alpine desert, and high-altitude zones.
Yes, the Northern Circuit Route also reaches Stella Point during the summit push. Even though the route begins on the western side of Kilimanjaro (usually through Lemosho Gate), it eventually joins the same final summit path used by other major routes like Machame and Lemosho.
From Barafu Camp, climbers begin their final ascent at midnight in very cold and low-oxygen conditions. After several hours of slow and steady climbing, they reach Stella Point on the crater rim at 5,756 meters. This moment marks a major milestone on summit day and proves that climbers have already completed the hardest part of the climb. From Stella Point, it takes about 30 to 60 minutes to reach Uhuru Peak, the highest point in Africa.
The Northern Circuit Route achieves the highest summit success rate because it gives climbers more time to acclimatize, offers fewer crowds, and provides a better overall climbing experience.
Stella Point vs Uhuru Peak
Stella Point and Uhuru Peak are two important summit points on Mount Kilimanjaro, but they differ in altitude, purpose, and overall climbing experience.
Located on the crater rim at 5,756 meters, Stella Point is the first major milestone climbers reach during the final ascent. It represents the moment you step onto the summit zone after a long and exhausting climb.
Uhuru Peak, on the other hand, stands higher at 5,895 meters and is the true summit of Kilimanjaro. This is the final destination where climbers celebrate reaching the highest point in Africa after completing the full challenge.
Comparison Table (Explained)
Feature
Stella Point
Uhuru Peak
Altitude
5,756m
5,895m
Meaning / Importance
First point on crater rim after long climb
Highest point in Africa and official summit
Difficulty
Very hard due to altitude and fatigue
Extremely hard, final push after exhaustion
Time between
About 30-60 minutes from Uhuru Peak
Final summit destination
Simple Explanation of the Table
Altitude: Stella Point is slightly lower than Uhuru Peak, but still at extreme high altitude where oxygen is very low.
Importance: Stella Point shows you have reached the top edge of the mountain, while Uhuru Peak is the actual highest point where climbers celebrate success.
Difficulty Both Stella Point and Uhuru Peak are very challenging to reach. However, climbers often find Uhuru Peak harder because they already feel exhausted after reaching Stella Point. At this stage, the body works under extreme fatigue, low oxygen, and freezing conditions, which makes the final push even more demanding.
Time between: After reaching Stella Point, it takes around 30 to 60 minutes of walking along the crater rim to finally reach Uhuru Peak.
What to Expect on Summit Night
Reaching Stella Point usually happens early in the morning after climbers begin their summit push at midnight from Barafu Camp. This part of the climb is known as summit night, and it represents the most challenging section of the entire Mount Kilimanjaro journey. Climbers leave the camp in darkness and start a slow, steady ascent toward the crater rim.
During the climb, temperatures drop sharply and often fall well below freezing. The cold becomes intense as climbers gain altitude, and every step feels heavier due to the lack of oxygen. The air at this height is very thin, so the body works much harder to supply enough oxygen, which causes shortness of breath and slow movement.
Climbers also face a very slow trekking pace because the steep volcanic slope requires careful and controlled steps. Strong winds often blow across the upper mountain, especially near the crater rim, making the conditions even more challenging. At the same time, fatigue builds up from several days of trekking, so both the mind and body feel exhausted during this final push.
Despite these difficulties, climbers continue moving forward with determination because Stella Point is close. Reaching it brings a strong emotional reward, as it confirms that the hardest part of the ascent is already complete. From Stella Point, climbers stand on the edge of the summit zone and can see that they are almost at the top of Africa, with only a short final walk remaining to reach Uhuru Peak.
How Long Does It Take to Reach Stella Point?
The time it takes to reach Stella Point depends on where climbers start their summit push, how well they have acclimatized, and their overall fitness level. Most climbers begin the final ascent from Barafu Camp, which serves as the main high camp before the summit attempt.
From Barafu Camp, it usually takes about 5 to 7 hours of steep climbing to reach Stella Point. Climbers start at midnight or early morning and move very slowly because of the extreme altitude, cold temperatures, and thin air. Every step requires effort, and frequent short breaks help the body adjust to the low oxygen conditions.
The total duration also depends on the chosen route, physical preparation, and how well the body has adapted to altitude during previous days on the mountain. Climbers who acclimatize well often move more steadily and handle the ascent more comfortably, while others may take longer due to fatigue.
After reaching Stella Point, the final stretch to Uhuru Peak takes about 30 to 60 minutes. Although this section is shorter, it still feels challenging because climbers are already exhausted and are moving at the highest altitude on the mountain.
Is Stella Point the Summit?
Technically, Stella Point is not the summit of Mount Kilimanjaro. The true summit is Uhuru Peak, which stands as the highest point in Africa at 5,895 meters.
However, in real climbing experience, Stella Point still feels like a major summit achievement. Many climbers stop here to rest, take photos, and celebrate because they have already completed the hardest and most exhausting part of the climb. Reaching the crater rim at this altitude feels like a big victory after hours of steep climbing in cold, low-oxygen conditions.
Stella Point also serves as the first official “summit milestone” on the mountain. From this point, climbers stand on the edge of the volcanic crater and see that the final destination is very close. Even though it is not the highest point, the emotional impact is very strong because it marks success after a long and difficult journey.
Still, Uhuru Peak remains the official highest point, and most climbers continue for another 30 to 60 minutes to complete the full summit experience.
Final Thoughts
Stella Point stands as one of the most emotional and rewarding moments on Mount Kilimanjaro. Climbers reach this point after hours of tough ascent in extreme altitude conditions, where every step requires strength, focus, and determination.
Reaching Stella Point marks a powerful breakthrough in the journey. It shows that climbers have overcome the hardest part of the climb and have reached the crater rim after pushing through cold temperatures, thin air, and complete exhaustion.
Some climbers take a moment here to rest and celebrate their achievement, while others continue the final short stretch to Uhuru Peak. Both choices carry great meaning because Stella Point itself represents success on one of the toughest mountains in the world.
Whether a climber stops at Stella Point or continues to the highest point in Africa, reaching this location remains a life-changing experience that stays in memory forever.
Best Time to Climb Kilimanjaro: Complete Month-by-Month Guide
Estimated reading time: 37 minutes
Planning to climb Mount Kilimanjaro? The best time to climb Kilimanjaro is during the dry seasons from January to March and June to October, when weather conditions are more stable and summit success rates are higher.
Mount Kilimanjaro attracts thousands of climbers every year who want to reach Uhuru Peak, the highest point in Africa. Choosing the right season is very important because weather, visibility, and trail conditions change throughout the year.
In this guide, you will learn the best months to climb Kilimanjaro, seasonal weather patterns, crowd levels, and expert tips to help you choose the perfect time for your adventure.
The best time to climb Kilimanjaro is during the dry seasons from January to March and June to October. These months typically offer the most favorable weather conditions, including clearer skies, less rainfall, better trail conditions, and excellent visibility.
For many climbers, January and February provide a great balance of good weather and fewer crowds compared to the peak climbing season. Meanwhile, July, August, and September are among the driest months of the year and are popular for their clear summit views and stable conditions.
Although Mount Kilimanjaro can be climbed year-round, the long rainy season from March to May and the short rainy season in November often bring muddy trails, increased cloud cover, and more challenging trekking conditions.
If your goal is the highest chance of reaching the summit while enjoying the best weather, plan your Kilimanjaro climb between January and March or June and October.
Why Timing Matters on Kilimanjaro
Choosing the right time to climb Kilimanjaro can significantly influence your overall experience, comfort, and chances of reaching Uhuru Peak. Although Mount Kilimanjaro stands close to the equator, weather conditions on the mountain change throughout the year due to seasonal rainfall patterns, temperature variations, and shifting crowd levels. A climb during the dry season often feels very different from a climb during the rainy season, even on the same route.
The month you choose affects everything from trail conditions and visibility to summit success rates and the number of people you encounter on the mountain. Some months offer clear skies and stable weather, while others bring heavy rainfall, muddy trails, and reduced visibility. Understanding these seasonal differences helps climbers select the best time based on their personal goals, fitness level, and preferred trekking experience.
Weather Conditions
Weather plays one of the most important roles in any Kilimanjaro climb. Although the mountain remains accessible throughout the year, conditions can vary significantly between the dry and rainy seasons. During the dry months, climbers often enjoy clear skies, excellent visibility, and more predictable weather patterns. These conditions create a more comfortable trekking experience and allow hikers to enjoy spectacular views of glaciers, valleys, and surrounding landscapes.
During the rainy seasons, frequent showers can make trekking more challenging. Rain often affects the lower rainforest zone, where trails become wet and slippery. Clouds may also reduce visibility, preventing climbers from fully appreciating the scenery. Strong winds and colder temperatures near the summit can add another layer of difficulty during unstable weather periods.
Weather also influences photography opportunities. Clear mornings and evenings often provide the best mountain views, while cloudy conditions can hide important landmarks and scenic viewpoints. Climbers who prioritize panoramic views and memorable photographs usually prefer the dry seasons because they offer more reliable visibility throughout the trek.
By choosing a favorable climbing season, trekkers can increase their comfort, enjoy better scenery, and reduce weather-related challenges during their Kilimanjaro adventure.
Trail Conditions
Trail conditions change considerably throughout the year and directly affect the difficulty of a Kilimanjaro climb. Dry-season trails generally provide better footing, making hiking safer and more comfortable. Climbers can move more efficiently on dry ground, conserve energy, and maintain a steady pace during long trekking days.
During the rainy seasons, many sections of the mountain become muddy and slippery, particularly within the rainforest zone. Wet roots, loose soil, and muddy paths can slow progress and increase the risk of slips and falls. Climbers often need to spend more energy navigating difficult terrain, which can contribute to fatigue later in the trek.
Trail conditions become especially important on steep routes such as Umbwe and Machame. Even experienced hikers may find these routes more demanding when rain creates unstable footing. On the other hand, dry conditions help trekkers move more confidently through challenging sections and focus their energy on altitude adaptation rather than difficult terrain.
Better trail conditions not only improve comfort but also contribute to a more enjoyable climbing experience from the first day to the summit push.
Summit Success Rates
The time of year can influence summit success rates because weather and trail conditions affect how climbers perform on the mountain. During the dry seasons, stable weather allows trekkers to follow their schedules more comfortably and conserve energy throughout the climb. Better conditions often support a smoother acclimatization process and reduce physical stress caused by constant rain, cold, and difficult terrain.
Clear weather also creates a more positive psychological experience. Climbers who enjoy good visibility and comfortable trekking conditions often maintain stronger motivation throughout the journey. Positive morale becomes especially valuable during summit night, when hikers face freezing temperatures, darkness, and the physical demands of high altitude.
Although fitness, acclimatization, route selection, and guide support remain the most important factors for summit success, favorable weather conditions can make the journey significantly easier. Many climbers therefore schedule their expeditions during the dry seasons to maximize their chances of reaching Uhuru Peak.
Choosing the right month cannot guarantee success, but it can create conditions that support a safer and more enjoyable ascent.
Crowd Levels
Crowd levels vary greatly throughout the year and can shape the overall atmosphere of a Kilimanjaro climb. Popular dry-season months such as July, August, and September attract large numbers of climbers from around the world. During these periods, busy routes like Machame and Lemosho often see many trekking groups on the trail and at campsites.
Some climbers enjoy the social atmosphere that comes with peak season. Meeting people from different countries and sharing the summit journey can add excitement to the experience. However, others prefer quieter trails where they can enjoy nature with fewer distractions.
January and February often provide a good balance between favorable weather and moderate crowd levels. Climbers can enjoy excellent conditions while avoiding some of the congestion that appears during the busiest months. Those seeking maximum solitude may even consider shoulder-season periods, provided they understand the potential weather challenges.
Understanding crowd patterns helps trekkers choose a climbing date that matches their personal preferences. Whether you prefer lively campsites or peaceful mountain trails, selecting the right season can make your Kilimanjaro experience more enjoyable and memorable.
Understanding Kilimanjaro’s Weather and Climbing Seasons
Weather plays a major role in determining the success and enjoyment of a Kilimanjaro climb Mount Kilimanjaro. Although is located near the equator, its high elevation creates a wide range of climate zones, from tropical rainforest at the base to arctic conditions near the summit. Understanding the mountain’s weather patterns can help you choose the best time to climb and prepare for changing conditions throughout your trek.
The Rainy Seasons
Kilimanjaro experiences two rainy seasons each year. The long rainy season usually occurs from March to May, while the short rainy season typically falls during November.
Heavy rainfall during the long rains can create muddy trails, slippery paths, and reduced visibility. As a result, these months are generally considered the most challenging times to climb. However, hikers who choose this period often encounter fewer crowds and may benefit from lower travel costs.
The short rainy season in November usually brings less rainfall than the long rains but can still affect trail conditions and mountain views. December often marks the transition back to drier weather and remains a popular climbing month during the holiday season..
The Dry Seasons
The dry seasons are widely considered the best times to climb Kilimanjaro. These periods generally offer lower rainfall, clearer skies, and better trail conditions.
The first dry season occurs from January to March. During these months, climbers often enjoy relatively stable weather, fewer crowds, and good visibility. January and February are particularly popular because they combine favorable conditions with a quieter atmosphere compared to the peak climbing season.
The second dry season runs from June to October. This is the most popular time to climb Kilimanjaro due to its dry weather and excellent summit views. July, August, and September typically attract the highest number of climbers, as trail conditions are often at their best.
How Weather Affects Your Climb
Weather conditions influence nearly every aspect of a Kilimanjaro trek, including trail quality, visibility, comfort, and summit success rates. Dry weather generally makes hiking easier by reducing mud and improving visibility across the mountain’s stunning landscapes.
Rainy conditions can make trails slippery and increase the physical demands of the climb. Cloud cover may also limit panoramic views and photography opportunities. In contrast, clear skies during the dry season often provide spectacular sunrise and sunset views, particularly near the summit.
Regardless of the season, temperatures decrease significantly as you gain altitude. Climbers may experience warm temperatures in the rainforest zone and freezing conditions near Uhuru Peak within the same trek. Proper clothing, careful preparation, and choosing the right season can greatly improve your overall Kilimanjaro experience.
Temperature by Altitude
One of the most important things to understand about Kilimanjaro is that temperature changes dramatically as altitude increases. A climber may begin the trek in warm tropical conditions and reach freezing temperatures only a few days later.
At the base of the mountain, temperatures often range between 20°C and 30°C (68°F to 86°F), especially in the rainforest zone. These warm conditions support dense vegetation, high humidity, and abundant wildlife.
As climbers move into the heath and moorland zones, temperatures gradually become cooler. Daytime conditions usually remain comfortable, but nights can become cold, particularly at higher camps. In the alpine desert zone, temperatures drop further due to the thinner atmosphere and higher elevation.
Near the summit, conditions become much harsher. Temperatures frequently fall below freezing, especially during summit night when climbers begin their ascent before dawn. Strong winds can make the air feel even colder, requiring proper clothing and layering systems to maintain comfort and safety.
Because of these dramatic temperature changes, climbers must pack for a wide range of weather conditions during a single expedition.
Summit Weather
The summit of Kilimanjaro presents the most extreme weather conditions on the mountain. Uhuru Peak sits at 5,895 meters above sea level, where the air contains significantly less oxygen and temperatures often fall well below freezing.
Most climbers begin their summit attempt around midnight to reach the peak near sunrise. During these early morning hours, temperatures commonly range between -10°C and -20°C (14°F to -4°F), depending on the season and weather patterns. Strong winds can create even colder conditions, making proper cold-weather gear essential for a successful summit push.
Weather near the summit can change quickly. Clear skies may provide breathtaking sunrise views above the clouds, while wind, snow, or cloud cover can reduce visibility and increase the difficulty of the climb. Even during the dry season, climbers should prepare for freezing temperatures and unpredictable mountain conditions.
Understanding summit weather helps trekkers select appropriate clothing, manage expectations, and prepare mentally for the most demanding section of the Kilimanjaro climb. Proper preparation greatly improves comfort and confidence during the final ascent to Africa’s highest point.
Best Time to Climb Kilimanjaro by Month
The best months to climb Kilimanjaro are generally January, February, July, August, September, and October. These months fall within the mountain’s main dry seasons and usually offer the most favorable combination of weather, trail conditions, visibility, and summit opportunities. Most climbers who reach Uhuru Peak choose to trek during these periods because they provide a more comfortable and enjoyable experience on the mountain.
Among all months, January and February often stand out as the best overall time to climb Kilimanjaro. During these months, the mountain typically experiences warm daytime temperatures, clear skies, and lower crowd levels than the busy summer season. Climbers can enjoy excellent views, beautiful photography conditions, and a quieter trekking experience while still benefiting from stable weather. Many experienced guides consider February one of the finest months of the year for a Kilimanjaro expedition.
The second excellent climbing period runs from July through October. These months bring dry conditions and some of the most reliable weather patterns of the year. Trails remain relatively dry, summit nights often experience stable conditions, and visibility is usually excellent. July, August, and September attract the highest number of climbers because many travelers schedule their holidays during this period. Although popular routes can become busy, these months consistently deliver strong climbing conditions and high satisfaction among trekkers.
Climbers can also achieve successful summits during March and December, but weather becomes slightly less predictable as seasonal transitions occur. These months often provide a balance between moderate crowds and reasonable weather conditions.
The most challenging months are typically April, May, and November because rainfall increases significantly during these periods. Heavy rain can create muddy trails, reduce visibility, and make trekking more demanding. While experienced hikers still climb during these months, most first-time trekkers prefer the dry seasons for a safer and more comfortable journey.
Ultimately, the best month depends on your priorities. If you want the best overall combination of weather, scenery, and crowd levels, February often earns the title of the best month to climb Kilimanjaro, closely followed by January, September, and October. These months consistently provide the conditions that most climbers seek when planning their journey to Africa’s highest peak.
Climbing Kilimanjaro in January
January is one of the best months to climb Kilimanjaro. The mountain is usually experiencing the short dry season, bringing relatively stable weather, good visibility, and comfortable trekking conditions. Trails are generally less crowded than during the peak months of July and August, making January an excellent choice for climbers seeking a quieter experience.
Temperatures are moderate, and hikers often enjoy clear views of the surrounding landscapes. January is particularly popular among travelers looking to combine a Kilimanjaro climb with a Tanzania safari.
Pros:
Good weather and clear skies
Moderate crowd levels
Excellent visibility for photography
Cons:
Occasional rain showers may still occur
Climbing Kilimanjaro in February
February is widely considered one of the best months to climb Kilimanjaro. Weather conditions are typically dry, warm, and stable, providing excellent hiking conditions across most routes. Many experienced guides consider February one of the most reliable months for summit attempts.
The mountain often offers outstanding visibility, making it a favorite month for photographers. Although visitor numbers increase compared to January, crowds remain manageable on most routes.
Pros:
Excellent weather conditions
High summit success potential
Beautiful views and photography opportunities
Cons:
Slightly busier than January
Climbing Kilimanjaro in March
March marks the transition into the long rainy season. Early March can still provide good climbing conditions, particularly during the first half of the month. However, rainfall generally becomes more frequent as the month progresses.
Climbers choosing March may encounter changing weather patterns, including occasional rain and cloud cover. Despite these conditions, fewer visitors on the mountain can create a more peaceful trekking experience.
Pros:
Fewer climbers on the trails
Early March may still offer favorable weather
Potentially lower travel costs
Cons:
Increasing rainfall later in the month
Reduced visibility compared to January and February
Climbing Kilimanjaro in April
April is usually the wettest month on Kilimanjaro and falls within the long rainy season. Heavy rainfall can make trails muddy, slippery, and more physically demanding. Cloud cover is common, which may limit visibility and scenic views.
Although climbing is still possible, April is generally not recommended for first-time climbers. However, experienced hikers who do not mind wet conditions may appreciate the quieter trails and lower visitor numbers.
Pros:
Very few crowds
Lush mountain scenery
Possible discounts on some tours
Cons:
Limited mountain views
Heavy rainfall
Muddy and challenging trail conditions
Climbing Kilimanjaro in May
May falls within the long rainy season and is generally considered one of the most challenging months to climb Kilimanjaro. Rainfall remains frequent across much of the mountain, creating muddy trails, slippery conditions, and reduced visibility. As a result, May sees some of the lowest numbers of climbers throughout the year.
Despite the wet weather, climbing Kilimanjaro in May does have certain advantages. The mountain is much quieter, allowing hikers to enjoy a more peaceful trekking experience. The landscapes are also incredibly green and vibrant due to the rainfall, creating beautiful scenery along the lower slopes.
For experienced hikers who prefer solitude and do not mind occasional rain, May can still be a rewarding time to climb. Routes such as Rongai, located on the mountain’s northern side, often receive less rainfall and may offer better conditions than other routes.
Pros:
Very few crowds on the mountain
Lush green scenery and vibrant vegetation
Greater availability of camps and accommodations
Potentially lower travel costs
Cons:
Frequent rainfall and muddy trails
Reduced visibility and fewer summit views
More challenging hiking conditions
Less suitable for first-time climbers
Overall, May is not the best time to climb Kilimanjaro for those seeking clear skies and dry trails. However, adventurous hikers looking for a quieter and more secluded experience may find the month appealing despite the wetter conditions.
Climbing Kilimanjaro in June
June marks the beginning of the main dry season on Mount Kilimanjaro and is considered one of the best times to climb. As the long rains come to an end, trail conditions improve significantly, with drier paths, clearer skies, and better visibility across the mountain.
The first half of June may still experience occasional showers, but conditions generally become more stable as the month progresses. Because the peak climbing season has not yet fully arrived, June often offers a good balance between favorable weather and moderate crowd levels.
Many climbers choose June because it provides excellent trekking conditions without the large crowds commonly seen in July and August. The mountain’s landscapes remain green from the recent rains, creating beautiful scenery along the lower slopes and rainforest zones.
Pros:
Start of the dry season
Improved trail conditions
Clearer skies and better visibility
Fewer crowds than July and August
Lush scenery from the recent rainy season
Cons:
Occasional rain may occur early in the month
Temperatures can be colder at higher elevations
For many hikers, June offers one of the best combinations of good weather, scenic landscapes, and manageable crowd levels. It is an excellent choice for climbers seeking a successful summit experience before the busiest months of the year begin.
Climbing Kilimanjaro in July
July is one of the most popular months to climb Kilimanjaro and marks the heart of the dry season. The mountain typically experiences stable weather, minimal rainfall, and excellent visibility, making it an ideal time for trekking and summit attempts.
The dry conditions help keep trails in good shape, allowing climbers to enjoy more comfortable hiking throughout the journey. Clear skies often provide spectacular views of Kilimanjaro’s diverse landscapes, from the rainforest zone to the glaciers near Uhuru Peak.
Because July coincides with summer holidays in many countries, the mountain attracts a large number of visitors. Popular routes such as Machame and Lemosho can become busy, so booking well in advance is highly recommended.
Pros:
Dry and stable weather
Excellent visibility and photography opportunities
Good trail conditions
High summit success potential
Ideal for combining a Kilimanjaro climb with a Tanzania safari
Cons:
One of the busiest months of the year
Higher demand for permits, guides, and accommodations
Advance booking is often necessary
Overall, July is considered one of the best months to climb Kilimanjaro. Climbers benefit from favorable weather conditions, stunning mountain views, and a strong chance of reaching the summit, making it a top choice for many trekkers.
Climbing Kilimanjaro in August
August is widely regarded as one of the best months to climb Kilimanjaro. The mountain remains in the middle of the dry season, bringing clear skies, low rainfall, and excellent trekking conditions. These favorable conditions make August one of the busiest months for climbers from around the world.
Visibility is often outstanding, allowing hikers to enjoy panoramic views of the surrounding plains, volcanic landscapes, and the mountain’s iconic glaciers. The dry trails also make hiking more comfortable and help reduce weather-related challenges during the ascent.
Due to its popularity, August can be crowded on major routes such as Machame, Lemosho, and Marangu. Travelers planning to climb during this period should book their trek several months in advance to secure their preferred dates and route.
Pros:
Excellent weather and dry trail conditions
Clear summit views and great photography opportunities
Low chance of rainfall
High summit success rates
Ideal for combining a Kilimanjaro climb with a safari
Cons:
Very busy trails and campsites
Higher demand for guides and accommodations
Early booking is strongly recommended
For climbers seeking reliable weather, breathtaking views, and some of the best trekking conditions of the year, August is an excellent time to climb Kilimanjaro. While crowds can be significant, many hikers consider the outstanding conditions well worth it.
Climbing Kilimanjaro in September
September is one of the best months to climb Kilimanjaro, offering excellent weather conditions and a high likelihood of clear summit views. The dry season continues throughout the month, bringing minimal rainfall, stable conditions, and comfortable trekking temperatures across most of the mountain.
Many climbers choose September because it combines the advantages of the peak climbing season with slightly fewer crowds than July and August. Trails remain dry, visibility is often exceptional, and hikers can enjoy spectacular views of Kilimanjaro’s diverse landscapes.
September is also an excellent month for travelers planning to combine a Kilimanjaro climb with a safari in northern Tanzania. Wildlife viewing in parks such as the Serengeti and Ngorongoro Conservation Area is often outstanding during this time of year.
Pros:
Dry and stable weather
Excellent visibility and summit views
Good trail conditions
High summit success potential
Great time to combine climbing with a safari
Cons:
Popular routes can still be busy
Advance booking is recommended
Overall, September is considered one of the top months for climbing Kilimanjaro. With favorable weather, beautiful scenery, and slightly fewer crowds than the busiest summer months, it offers an excellent balance for hikers seeking a memorable summit experience.
Climbing Kilimanjaro in October
October is one of the last months of the long dry season and remains an excellent time to climb Kilimanjaro. Weather conditions are generally stable, with relatively low rainfall, clear skies, and good visibility across the mountain. Many climbers choose October because it offers favorable trekking conditions while often being less crowded than the peak months of July and August.
The trails are typically dry and easier to navigate, making the climb more comfortable and enjoyable. Clear mornings and evenings often provide spectacular views of the surrounding landscapes and unforgettable summit sunrises.
As October progresses, occasional showers may begin to appear, signaling the approach of the short rainy season. However, these usually have a limited impact on climbing conditions, especially during the first half of the month.
Pros:
Generally dry and stable weather
Good trail conditions
Excellent visibility and photography opportunities
Fewer crowds than peak season
Strong summit success potential
Cons:
Weather can become slightly less predictable toward the end of the month
Some routes may still be moderately busy
For many hikers, October offers an excellent balance between good weather and lower crowd levels. It is a great choice for climbers who want dry-season conditions without the peak-season congestion often experienced during July and August.
Climbing Kilimanjaro in November
November falls within Kilimanjaro’s short rainy season and is generally one of the quieter months on the mountain. While rainfall is usually less intense than during the long rains of April and May, climbers should still expect occasional showers, cloudy conditions, and muddy trails, particularly in the rainforest zone.
Despite the wetter weather, November can be an appealing option for hikers who prefer fewer crowds and a more peaceful trekking experience. The mountain is often much quieter than during the peak climbing season, allowing climbers to enjoy a greater sense of solitude on the trails.
The northern side of Kilimanjaro, including the Rongai Route, typically receives less rainfall than southern routes and is often recommended for November climbs. Visibility may vary depending on weather conditions, but hikers can still enjoy beautiful scenery between rain showers.
Pros:
Fewer climbers on the mountain
Quieter campsites and trails
Lush green landscapes
Greater availability of routes and accommodations
Cons:
Increased chance of rain
Muddy and slippery trail conditions
Reduced visibility on some days
Less predictable weather
Although November is not considered one of the peak climbing months, it can still provide a rewarding Kilimanjaro experience for travelers who are flexible and prepared for changing weather conditions. Choosing the right route and packing proper rain gear can help ensure a successful trek.
Climbing Kilimanjaro in December
December marks the transition from the short rainy season back to drier conditions on Mount Kilimanjaro. Weather patterns can vary throughout the month, with occasional rain showers possible in early December, while conditions often improve significantly as the month progresses.
The holiday season makes December one of the busier times of the year, especially during the Christmas and New Year period. Many climbers choose this month to celebrate the festive season with a Kilimanjaro adventure, creating a lively atmosphere on popular routes.
As the weather becomes more stable, hikers can enjoy improving visibility, beautiful mountain scenery, and comfortable trekking conditions. Clear days often provide excellent views of the surrounding landscapes and memorable summit experiences.
Pros:
Improving weather conditions
Beautiful green scenery after the rains
Good visibility during much of the month
Popular time for holiday climbs
Excellent opportunity to combine trekking with a safari
Cons:
Crowds increase during Christmas and New Year
Early December may still experience some rainfall
Higher demand for guides and accommodations during the holidays
Overall, December is a good time to climb Kilimanjaro, particularly during the second half of the month. Climbers benefit from improving weather, scenic landscapes, and the excitement of reaching Africa’s highest peak during the festive season. For those planning a holiday adventure, December offers an excellent balance of favorable conditions and unforgettable mountain experiences.
summary tableBest Time to Climb Kilimanjaro by Month
Month
Weather
Crowds
Recommendation
January
Very Good
Moderate
Excellent
February
Excellent
Moderate
Excellent
March
Mixed
Low
Good
April
Rainy
Very Low
Not Ideal
May
Rainy
Very Low
Not Ideal
June
Good
Moderate
Very Good
July
Excellent
High
Excellent
August
Excellent
High
Excellent
September
Excellent
Moderate-High
Excellent
October
Very Good
Moderate
Very Good
November
Mixed
Low
Fair
December
Good
Moderate-High
Very Good
Best Season to Climb Kilimanjaro
Kilimanjaro Climbing Seasons at a Glance
Choosing the right time to climb Kilimanjaro can significantly impact your experience on the mountain. Weather conditions, crowd levels, and summit success rates vary throughout the year. The following comparisons provide a quick overview of what climbers can expect during each month.
Monthly Weather Comparison Table
Month
Weather Conditions
Rainfall
Overall Rating
January
Warm and mostly dry
Low
Excellent
February
Dry and stable
Low
Excellent
March
Mixed conditions
Moderate
Good
April
Wet and cloudy
High
Poor
May
Wet and muddy
High
Poor
June
Improving conditions
Low to Moderate
Very Good
July
Dry and clear
Low
Excellent
August
Dry and stable
Low
Excellent
September
Dry and pleasant
Low
Excellent
October
Mostly dry
Low
Very Good
November
Short rainy season
Moderate
Fair
December
Improving weather
Low to Moderate
Very Good
Monthly Crowd Levels
Crowd levels vary depending on weather conditions and international holiday periods. The busiest months often provide the best weather, while quieter months may appeal to climbers seeking more solitude.
Month
Crowd Level
January
Moderate
February
Moderate
March
Low
April
Very Low
May
Very Low
June
Moderate
July
High
August
Very High
September
High
October
Moderate
November
Low
December
Moderate to High
July, August, and September are typically the busiest months due to excellent weather conditions. December also attracts many climbers during the Christmas and New Year holidays.
Monthly Summit Success Expectations
While summit success depends on factors such as route choice, acclimatization, fitness level, and weather, some months generally provide better conditions than others.
Month
Summit Success Expectation
January
High
February
Very High
March
Moderate to High
April
Lower
May
Lower
June
High
July
Very High
August
Very High
September
Very High
October
High
November
Moderate
December
High
The highest summit success rates are often recorded during February, July, August, and September, when weather conditions are most stable. Climbers who choose these months usually benefit from drier trails, clearer skies, and more comfortable trekking conditions throughout their journey.
Kilimanjaro Weather by Elevation
Mount Kilimanjaro has a unique climate system because it rises from tropical plains to an arctic summit. As you climb higher, the temperature drops significantly and weather conditions change across distinct ecological zones. Understanding these zones helps climbers prepare properly for each stage of the trek.
Rainforest Zone
The rainforest zone is found at the base of Kilimanjaro, typically between 800m and 1,800m. This area is warm, humid, and receives frequent rainfall throughout the year. Dense vegetation, tall trees, and rich biodiversity dominate the landscape.
Climbers often experience muddy and slippery trails in this zone, especially during the rainy seasons. Waterproof gear is essential here, as rain showers can occur at any time of year.
Moorland Zone
The moorland zone lies between approximately 1,800m and 3,000m. The climate becomes cooler and drier compared to the rainforest, with open landscapes, shrubs, and unique plants such as giant groundsels and lobelias.
Rainfall is less frequent, but mist and cloud cover are common. Temperatures begin to drop, especially at night, making layered clothing important.
Alpine Desert Zone
The alpine desert zone stretches from about 3,000m to 4,800m. This region is dry, cold, and exposed, with very little vegetation due to harsh conditions.
Temperature changes between day and night can be extreme. During the day, strong sunlight and thin air create intense conditions, while nights can be freezing. Wind protection and proper insulation are essential for climbers in this zone.
Arctic Summit Zone
The arctic summit zone begins around 4,800m and extends to the peak at 5,895m (Uhuru Peak). This is the coldest part of Kilimanjaro, with freezing temperatures, strong winds, and possible snow or ice.
Oxygen levels are very low at this altitude, making the climb physically demanding. Climbers must be fully prepared for extreme cold conditions, especially during summit night, when temperatures can drop well below freezing.
Despite the harsh environment, this zone offers breathtaking views and the ultimate reward of reaching the highest point in Africa.
Best Time to Climb Kilimanjaro for Different Goals
The best time to climb Kilimanjaro depends on your personal goals and preferences. While the dry seasons generally offer the most favorable conditions, certain months are better suited for specific experiences, whether you’re a first-time climber, photographer, wildlife enthusiast, or someone looking to avoid crowds.
Best Time for Snow on Kilimanjaro
Although Kilimanjaro’s glaciers have been shrinking over time, snow can still be seen near the summit throughout much of the year. Climbers hoping to experience snowy conditions often choose January, February, or the months following the rainy seasons, when fresh snowfall is more likely at higher elevations.
Weather patterns vary from year to year, so snow conditions can never be guaranteed. However, the summit area often appears most impressive after periods of precipitation.
Best Time for Photography
For photographers, January, February, July, August, September, and October offer the best opportunities. These months often feature clear skies, stunning sunrise and sunset views, and excellent visibility from the mountain’s higher elevations.
The dry season also provides better chances of capturing iconic views of Kilimanjaro’s glaciers, dramatic landscapes, and panoramic vistas stretching across northern Tanzania and southern Kenya.
Best Time to Avoid Crowds
Climbers looking for a quieter experience should consider January, March, June, November, or early December. These months generally see fewer visitors compared to the peak climbing season.
April and May are the least crowded months on Kilimanjaro, but heavy rainfall makes trekking more challenging. For a balance between fewer crowds and reasonable weather, January and June are often better options.
Best Time for First-Time Climbers
First-time climbers should consider trekking during January, February, July, August, September, or October. These months typically provide stable weather, dry trails, and excellent visibility, making the climb more comfortable and increasing the likelihood of a successful summit.
February is often regarded as one of the best months for beginners due to its combination of reliable weather and manageable crowd levels. September and October are also excellent choices for those seeking favorable conditions without the peak-season crowds of July and August.
Best Time for a Kilimanjaro and Safari Combination
Travelers planning to combine a Kilimanjaro climb with a Tanzania safari should consider January, February, July, August, or September.
The months of July through September coincide with excellent wildlife viewing in northern Tanzania, including the famous wildebeest migration in the Serengeti. January and February also offer outstanding safari opportunities, particularly during the wildebeest calving season in the southern Serengeti.
For many visitors, combining a Kilimanjaro climb with a safari during these months creates the ultimate Tanzania adventure, offering both world-class trekking and unforgettable wildlife experiences.
Best Time to Climb Kilimanjaro for Wildlife Lovers
The best time to climb Mount Kilimanjaro for wildlife lovers is during the dry seasons, especially from January to March and June to October. These months offer the clearest visibility in the lower rainforest zone and increase the chances of spotting animals along the trail. While Kilimanjaro is not a traditional safari mountain, its lower slopes are rich in wildlife, and timing your climb can greatly improve your experience.
During the dry seasons, the rainforest trails are easier to walk through, which allows climbers to move more quietly and comfortably. This improves the chances of seeing animals such as colobus monkeys, blue monkeys, and various bird species that live in the forest. Wildlife tends to be more active and visible when conditions are dry, as heavy rain and thick mist often reduce movement and visibility.
January and February are especially good months for wildlife observation. The forest is still lush from previous rains, providing plenty of food and activity for animals. At the same time, clearer skies and better trail conditions make it easier to spot movement in the trees and hear animal sounds along the route. Early morning hikes are particularly rewarding for wildlife sightings.
From June to October, wildlife viewing remains strong because of the dry conditions. Animals often gather near water sources, making them easier to spot in certain areas of the forest zone. The reduced rainfall also means fewer disruptions during trekking, allowing climbers more time to observe nature along the trail. Although vegetation becomes slightly less dense than earlier in the year, visibility improves significantly.
In contrast, the rainy seasons April to May and November make wildlife spotting more difficult. Heavy rainfall, thick fog, and slippery trails reduce visibility and limit animal activity along the lower slopes. While the forest remains beautiful and green during this time, sightings are less frequent.
Overall, the best time for wildlife lovers to climb Kilimanjaro is during the dry seasons, with February, July, August, and September offering the best balance of clear trails, active wildlife, and excellent viewing conditions.
Best Kilimanjaro Routes by Season
Choosing the right route on Mount Kilimanjaro can improve your comfort, safety, and chances of reaching Uhuru Peak. While weather conditions influence every climb, some routes perform better depending on the season and your experience level.
Best Routes During the Dry Season
During the dry seasons from January to March and June to October, most routes are in excellent condition because trails are firm, skies are clearer, and rainfall is minimal.
The Machame Route is one of the most popular choices during this time due to its scenic views and strong summit success rate. The Lemosho Route is also highly recommended because it offers a gradual ascent and excellent acclimatization opportunities. For experienced trekkers seeking a longer and quieter journey, the Northern Circuit Route provides the best overall success rate and outstanding scenery.
These routes are more enjoyable in dry conditions because visibility is better and hiking trails are less slippery.
Best Routes During the Rainy Season
During the rainy seasons from March to May and in November, mountain trails can become muddy and more difficult to navigate. However, some routes are better suited for these conditions.
The Rongai Route is the best option during wet months because it lies on the northern side of the mountain, which receives less rainfall. The Marangu Routeis another practical choice since it offers hut accommodation, giving climbers shelter from heavy rain compared to camping routes.
These routes help reduce exposure to harsh weather and make climbing more manageable during the rainy season.
Best Route for Beginners
For first-time climbers, the best routes are those that allow gradual altitude gain and better acclimatization. The Lemosho Routeis widely considered the best option for beginners because it is scenic, less crowded, and has a high success rate. The Machame Route (7 days) is another strong choice, offering a good balance between challenge and acclimatization. The Marangu Route is physically easier due to hut accommodation, but it has a lower success rate compared to longer routes.
Best Route for Acclimatization
Proper acclimatization is one of the most important factors for reaching the summit successfully. TheNorthern Circuit Routeoffers the best acclimatization experience due to its longer duration and gradual ascent. The Lemosho Route also performs very well, giving climbers enough time to adapt to altitude changes. The Machame Route is effective as well because it follows a “climb high, sleep low” profile that helps the body adjust gradually.
Longer routes consistently increase summit success rates and reduce the risk of altitude sickness, making them the preferred choice for serious climbers aiming for Uhuru Peak.
Local Guide Insights: What Experienced Kilimanjaro Guides Recommend
Experienced Kilimanjaro guides spend hundreds of days on the mountain each year, so their advice is based on real climbing conditions rather than theory. Their recommendations are especially valuable when choosing the best time to climb and preparing for changing weather at different altitudes.
Most Popular Climbing Months
According to local guides, the most popular months on Kilimanjaro are January, February, July, August, and September. These months attract the highest number of climbers because they offer the most stable weather conditions, with lower rainfall and clearer skies.
July to September is considered the peak season, when international visitors arrive in large numbers. January and February are also highly recommended because they combine good weather with slightly fewer crowds compared to the mid-year peak.
Months with the Best Trail Conditions
Guides consistently report that the best trail conditions occur during the dry seasons from January to March and June to October. During these periods, paths are firmer, less muddy, and easier to navigate, especially on steep sections of the mountain.
They often highlight that dry trails improve both safety and comfort, particularly on routes such as Machame and Lemosho, where steep ascents and descents can become challenging in wet conditions. Clear weather also improves visibility, making navigation and acclimatization easier for climbers.
Common Mistakes Climbers Make
Kilimanjaro guides frequently point out several mistakes that can reduce summit success rates. One of the most common is choosing a climb date based only on price rather than weather conditions. Climbers who choose rainy months often struggle with muddy trails and reduced visibility.
Another common mistake is selecting shorter itineraries, which reduce acclimatization time and increase the risk of altitude sickness. Guides strongly recommend longer routes such as Lemosho or Northern Circuit for better adaptation.
Many climbers also underestimate the importance of proper gear. Inadequate clothing for cold summit conditions is a frequent issue, especially during night ascents when temperatures can drop significantly below freezing.
Overall, local guides emphasize that success on Kilimanjaro depends not only on fitness, but also on timing, preparation, and choosing the right route for the season.
Advantages and Disadvantages of Each Season
Climbing Mount Kilimanjaro at different times of the year affects weather conditions, trail quality, crowd levels, and overall summit success. Understanding the advantages and disadvantages of each season helps you choose the best time based on your goals and experience level.
January to March
January to March is one of the best periods to climb Kilimanjaro because it falls within the short dry season. Weather is generally stable, skies are clearer, and trail conditions are good compared to rainy months. This period is also less crowded than the peak mid-year season, giving climbers a more peaceful experience. However, temperatures at higher elevations can be very cold, especially during summit night, and early March may still experience occasional rain.
June to October
June to October is the main dry season and the most popular time for climbing Kilimanjaro. Conditions are usually excellent with minimal rainfall, dry trails, and very good visibility. These months offer some of the highest summit success rates because weather conditions are more predictable. The main disadvantage is crowding, especially in July, August, and September, when many climbers are on the mountain. Early booking is often necessary during this period.
Rainy Season Climbs
The rainy seasons occur from March to May and again in November. These months bring more challenging climbing conditions due to frequent rainfall, muddy trails, and reduced visibility, especially in the rainforest zone. Despite this, some climbers choose this time for lower costs and fewer crowds. The mountain is quieter and the scenery is very green, but overall trekking is more difficult and summit success rates are generally lower.
Essential Tips for Choosing Your Climbing Date
Choosing the right date to climb Mount Kilimanjaro is not only about weather. It also depends on your fitness level, crowd preferences, and whether you plan to combine your trek with a safari in Tanzania. Making the right decision can improve your comfort, safety, and overall summit success.
Consider Your Fitness Level
Your fitness level plays an important role in selecting the best time to climb. If you are a first-time climber or have limited high-altitude experience, it is better to choose stable dry months such as January to March or June to October. These periods offer more predictable weather and safer trail conditions, making the climb less physically demanding. Stronger and more experienced hikers may be comfortable attempting the mountain even during shoulder or rainy seasons.
Consider Crowds and Availability
Crowd levels vary significantly throughout the year on Kilimanjaro. July, August, and September are the busiest months due to excellent weather, which means campsites and popular routes can be crowded. If you prefer a quieter experience, consider climbing in January, early March, or June, when there are fewer trekkers. Booking early is important for peak season climbs to secure guides, permits, and preferred routes.
Plan Around Your Safari
Many climbers combine their Kilimanjaro trek with a safari in northern Tanzania, especially in Serengeti and Ngorongoro. If this is your plan, timing becomes even more important. July to October is ideal for wildlife viewing during the Great Migration in the Serengeti, while January and February also offer excellent safari conditions in the southern Serengeti. Aligning your climbing date with safari seasons can make your overall Tanzania adventure more rewarding.
Frequently Asked Questions About the Best Time to Climb Kilimanjaro
What is the best month to climb Kilimanjaro?
The best months to climb Kilimanjaro are generally February, July, August, and September. These months offer the most stable weather, dry trails, and excellent visibility, which increase comfort and summit success rates.
Can you climb Kilimanjaro during the rainy season?
Yes, it is possible to climb during the rainy seasons in March to May and November, but conditions are more challenging. Expect muddy trails, reduced visibility, and more rain, especially in the rainforest zone.
What month has the highest summit success rate?
Summit success rates are generally highest in February, July, August, and September because these months have the most stable weather and the best trekking conditions.
When is Kilimanjaro least crowded?
Kilimanjaro is least crowded in April, May, and November due to heavy or short rains. March and early December can also be quieter compared to peak season months.
Is January or August better for climbing?
Both months are good, but they offer different experiences. January is quieter with fewer crowds, while August has the most stable dry conditions but is much busier. The choice depends on whether you prefer solitude or peak weather conditions.
Does Kilimanjaro have snow year-round?
Yes, snow can be seen near the summit throughout the year, but it is not guaranteed. Snowfall is more likely after rainy periods or during colder months, although climate change has reduced permanent snow cover over time.
Which route is best during the rainy season?
The Rongai Route is the best option during rainy months because it lies on the northern side of the mountain, which receives less rainfall. The Marangu Route is also suitable due to hut accommodation.
What is the coldest month on Kilimanjaro?
The coldest conditions are usually experienced during the dry season nights in July, August, and September, especially at higher elevations near the summit where temperatures can drop well below freezing.
When should beginners climb Kilimanjaro?
Beginners should aim for January to March or June to October, when weather is more stable and trail conditions are safer and easier to manage. Longer routes like Lemosho are also recommended for better acclimatization
Can I combine a safari with my Kilimanjaro climb?
Yes, many travelers combine both experiences. The best time for a safari is July to October for the Great Migration, or January and February for excellent wildlife viewing in southern Serengeti. These periods also align well with the best climbing seasons.
Final Thoughts
The best time to climb Kilimanjaro depends on what you want from your adventure, but most climbers achieve the best experience during the dry seasons from January to March and June to October. These months offer clearer skies, safer trails, and higher chances of reaching the summit successfully.
If you prefer quieter routes and fewer crowds, the early part of the year or shoulder months like January, early March, or June can be a great choice. For the most stable weather and iconic summit views, July to September remains the most popular period, although it is also the busiest.
Rainy seasons such as April to May and November can still offer a unique experience with lush scenery and fewer climbers, but they come with more challenging conditions and lower visibility.
Ultimately, choosing the right time comes down to balancing weather, crowd levels, and your personal climbing goals. With proper preparation, the right route, and good timing, Kilimanjaro offers a life-changing adventure in every season.
Plan Your Kilimanjaro Climb With WeWild Travel
Planning your Kilimanjaro adventure becomes much easier when you choose the right support team. With WeWild Travel, climbers get professional guidance, well-planned itineraries, and experienced mountain crews who understand every route on Mount Kilimanjaro. This helps you focus on the experience while the logistics, safety, and organization are fully handled.
WeWild Travel designs climbs that match different experience levels, from first-time trekkers to advanced climbers. Whether you choose popular routes like Machame and Lemosho or more challenging options like Umbwe, each itinerary is carefully planned to improve acclimatization, safety, and summit success chances. The team also helps you choose the best season based on your goals, fitness, and budget.
Every climb includes trained guides, porters, and support staff who ensure a safe and well-supported journey from the rainforest base to Uhuru Peak at 5,895 meters. Clear briefing, daily guidance, and strong safety procedures help climbers stay confident throughout the trek, even in challenging high-altitude conditions.
WeWild Travel also focuses on comfort and preparation. From airport transfers in Tanzania to campsite arrangements on the mountain, every detail is organized to reduce stress and improve your trekking experience. Climbers receive support on packing lists, gear selection, and route planning before the journey begins.
Most importantly, WeWild Travel aims to create meaningful and successful Kilimanjaro experiences. The goal is not only to reach the summit but also to enjoy the journey, landscapes, and adventure along the way. With the right planning and expert support, climbing Kilimanjaro becomes a safe, memorable, and life-changing achievement.
If you are ready to take on Africa’s highest mountain, planning your climb with WeWild Travel gives you the confidence and structure needed for a successful summit.
The Umbwe Route Kilimanjaro climb takes you up one of the mountain’s steepest and most direct trails. It starts on the southern side of Mount Kilimanjaro and moves quickly from dense rainforest into higher, rocky terrain. The route then joins the Southern Circuit at Barranco before continuing to Karanga, Barafu, and Uhuru Peak at 5,895 metres.
Umbwe usually takes 6 or 7 days on the mountain. The 6-day itinerary follows a faster schedule, while the 7-day option adds more time for acclimatization. Because Umbwe gains altitude quickly and includes steep sections, it suits fit and experienced trekkers who understand the demands of high-altitude climbing.
In this complete guide, you will learn about the Umbwe Route itinerary, difficulty, distance, best time to climb, cost, acclimatization, safety, packing needs, and what to expect on summit night. We also explain the difference between the 6-day and 7-day routes so you can understand which itinerary matches your experience and climbing goals.
If you choose to climb Umbwe with WeWild Travel, our local mountain team will guide you through each stage of the trek while helping you manage your pace, energy, hydration, and altitude throughout the climb.
Main Challenge: Steep climbing and rapid altitude gain
Crowds: Usually quieter during the early stages
Acclimatization: Limited on the 6-day itinerary; the 7-day option allows more time
Best For: Fit and experienced trekkers seeking a demanding Kilimanjaro climb
Key Highlight: A direct and dramatic approach through the southern slopes of Kilimanjaro
Is the Umbwe Route Right for You?
The Umbwe Route is right for you if you want a challenging Kilimanjaro climb and feel comfortable hiking on steep mountain terrain. The route gains altitude quickly, so you need good physical preparation and a strong attitude toward long trekking days.
Umbwe can suit you if you:
Have previous mountain or multi-day trekking experience
Feel comfortable walking on steep and uneven trails
Can handle long hiking days with a backpack
Have prepared your legs and endurance before the climb
Understand that altitude can affect anyone, regardless of fitness
Prefer a quieter and more direct approach to Kilimanjaro
Want to camp throughout your mountain trek
Are ready for a demanding summit night
Who Should Think Twice About Umbwe?
Umbwe may not suit you if this is your first serious mountain trek or if you prefer a gradual ascent with more time for acclimatization. The rapid elevation gain can make the first days demanding, especially for trekkers who have little experience at high altitude.
If you want a slower schedule, you can consider a longer Kilimanjaro itinerary that gives your body more time to adjust to the increasing elevation.
Choose Your Umbwe Itinerary Carefully
Umbwe offers 6-day and 7-day itineraries, and the extra day changes the pace of the climb. The 6-day route keeps the trek compact, while the 7-day itinerary provides additional time for acclimatization.
Before choosing your itinerary, consider your trekking experience, physical preparation, previous altitude experience, and how much time you can spend on the mountain. Your WeWild Travel mountain team can also discuss these factors with you before the climb.
How Difficult Is the Umbwe Route?
The Umbwe Route is one of the most challenging routes on Mount Kilimanjaro. Its main difficulty comes from steep trails, rapid altitude gain, and demanding hiking days. The route reaches the Barranco area quickly before joining the Southern Circuit toward Karanga and Barafu.
You do not need technical climbing skills for the standard Umbwe Route, but you need good physical preparation, steady endurance, and the ability to walk for several hours each day. Altitude also plays a major role, so fitness alone does not guarantee an easy climb.
Physical Challenge
The first part of the Umbwe Route demands strong legs and steady balance. The trail climbs through the rainforest and then follows steep ridges toward higher ground. Some sections require careful steps over roots, rocks, and uneven surfaces.
As the trek continues, the altitude makes normal walking harder. You may notice slower breathing, tired legs, reduced appetite, or headaches. Long trekking days can also increase fatigue.
Good preparation helps. Before your climb, focus on long walks, uphill training, stair climbing, and regular aerobic exercise. During the trek, walk at a controlled pace and save energy for the higher sections and summit night.
Altitude and Acclimatization
Altitude presents a different challenge from physical fitness. Umbwe gains elevation quickly during its early stages, giving your body less time to adjust compared with longer routes.
Your body needs time to adapt as you climb higher. You may feel the effects of altitude even if you have strong fitness and previous trekking experience. For this reason, your pace, hydration, rest, and response to symptoms matter throughout the climb.
The 6-day Umbwe itinerary follows a faster schedule. The 7-day itinerary adds more time on the mountain, which can give your body additional time to adjust before the summit attempt.
Your mountain guides should monitor how you feel each day and respond appropriately when altitude symptoms appear. If symptoms become serious, safety takes priority over reaching the summit.
Terrain
Umbwe changes character as you gain elevation. The trek begins in dense rainforest, where the trail can feel narrow, steep, and humid. You then move into more open mountain terrain as the vegetation becomes shorter.
Near Barranco, large rocks and steep sections create a more rugged hiking experience. The trail later passes through alpine terrain before reaching the high camp at Barafu.
The famous Barranco Wall adds another memorable challenge. You will use your hands for balance in some places, but the standard route does not require technical rock climbing equipment.
Weather can also change the trail conditions. Rain can make lower sections slippery, while cold, wind, and low temperatures become more important at higher elevations.
Summit Night
Summit night creates the biggest physical and mental test of the Umbwe climb. You normally leave Barafu Camp around midnight and begin walking in darkness toward the summit.
The trail becomes colder and steeper as you climb toward Stella Point on the crater rim. You will walk slowly, take regular breaks, and follow your guide’s pace. The thin air at this elevation makes each step feel harder.
After reaching Stella Point, you continue around the crater rim toward Uhuru Peak at 5,895 metres. The final section can feel demanding because of the altitude, cold, fatigue, and many hours of walking.
Reaching Uhuru Peak is only part of the summit day. After taking time at the top, you descend to lower ground, rest, eat, and continue toward the next camp. The full summit day can therefore require many hours of continuous effort.
The key to summit night is not speed. A steady pace, proper clothing, hydration, energy management, and close communication with your guide can help you manage the challenge safely.
6-Day vs 7-Day Umbwe Route
The Umbwe Route usually takes 6 or 7 days to complete. Both itineraries follow the same general trail toward Barranco, Karanga, Barafu, and Uhuru Peak, but the 7-day option gives trekkers more time on the mountain.
The main difference comes from the pace. The 6-day Umbwe Route follows a compact schedule with fewer days for acclimatization. The 7-day Umbwe Route adds an extra day, allowing a slower pace and more time to adjust to the increasing altitude.
Feature
6-Day Umbwe
7-Day Umbwe
Duration
6 days
7 days
Pace
Faster
More gradual
Acclimatization time
More limited
More time available
Physical demand
High
High, with more time
Camping
Yes
Yes
Summit
Uhuru Peak
Uhuru Peak
Descent
Mweka Route
Mweka Route
Your choice should depend on your trekking experience, preparation, altitude history, available time, and how your body responds during the climb.
6-Day Umbwe Route Itinerary
Day 1: Umbwe Gate to Umbwe Camp
Elevation: 1,600 m to 2,850 m
Distance: About 11 km
Hiking time: 5-7 hours
Habitat: Montane forest
Your Umbwe adventure begins at Umbwe Gate. After registration and a final equipment check, you start walking through the dense rainforest.
The trail climbs steadily from the beginning. Roots, rocks, and narrow sections make the route feel rugged, while thick vegetation surrounds you. Your guide sets a controlled pace so you can conserve energy for the days ahead.
You finish the day at Umbwe Camp, where you have dinner and rest in your tent.
Day 2: Umbwe Camp to Barranco Camp
Elevation: 2,850 m to 3,960 m
Distance: About 6 km
Hiking time: 4-6 hours
Habitat: Montane forest to moorland
The trail becomes steeper as you leave the forest behind. You follow the Umbwe Ridge through increasingly open terrain before reaching the Barranco area.
This day brings a significant altitude gain in a relatively short distance. Your guide will keep the pace slow and steady while watching how you respond to the elevation.
Barranco Camp offers dramatic views of the mountain, including the imposing Barranco Wall. After reaching camp, you eat, rest, and prepare for the next morning.
Day 3: Barranco Camp to Karanga Camp
Elevation: 3,960 m to 4,035 m
Distance: About 5 km
Hiking time: 4-5 hours
Habitat: Alpine desert
You begin the day by climbing the famous Barranco Wall. Although it looks intimidating from camp, the standard trail does not require technical climbing equipment. You use your hands for balance while your guide helps you choose secure steps.
After the wall, the trail rises and falls through the mountain landscape before reaching Karanga Camp.
This shorter day gives you time to rest and prepare for the higher altitude ahead.
Day 4: Karanga Camp to Barafu Camp
Elevation: 4,035 m to 4,640 m
Distance: About 4 km
Hiking time: 4-5 hours
Habitat: Alpine desert
Today you climb toward Barafu Camp, the main starting point for summit night. The vegetation becomes sparse as you move deeper into the high-altitude environment.
The trail may feel physically demanding because of the elevation. Once you reach Barafu, your team prepares your dinner and sleeping arrangements while your guide explains the summit schedule.
Try to rest as much as possible because you will start the summit attempt around midnight.
Day 5 – Summit: Barafu Camp to Uhuru Peak and Down to Mweka Camp
Barafu elevation: 4,640 m
Uhuru Peak: 5,895 m
Hiking time: About 12-16 hours, depending on conditions and pace
Habitat: Alpine desert to arctic zone
Summit night begins around midnight. You leave Barafu Camp in darkness and climb slowly toward Stella Point.
The trail becomes colder and steeper as you gain altitude. Your guide maintains a steady pace and monitors the group throughout the climb.
After reaching Stella Point at about 5,739 m, you continue along the crater rim toward Uhuru Peak, the highest point in Africa at 5,895 m.
At the summit, you have time to celebrate, take photographs, and enjoy the views when conditions allow. You then begin the long descent toward Mweka Camp.
The descent gives your body a chance to return to lower altitude, but fatigue can make the final hours demanding.
Day 6: Mweka Camp to Mweka Gate
Elevation: About 3,100 m to 1,640 m
Distance: About 10 km
Hiking time: 3-5 hours
Habitat: Rainforest
After breakfast, you begin the final walk through the rainforest toward Mweka Gate.
The trail feels different after the summit. You are returning to warmer, lower ground, and the forest becomes thicker as you descend.
At Mweka Gate, you complete the park procedures and meet your transport. Your Kilimanjaro climb ends here.
The 7-day Umbwe itinerary follows the same general route but spreads the climb over an additional day. This creates a slower schedule and gives you more time to adjust to the altitude.
The exact placement of the extra day can vary by operator and itinerary design, so your final program should clearly state where the additional acclimatization time takes place.
What Changes?
The biggest difference is time. Instead of moving through the route on a compact six-day schedule, the seven-day itinerary gives you an additional day before the summit.
This can make the overall experience feel less rushed. You have more time to rest, monitor how your body responds to altitude, and manage your energy before summit night.
The route still includes steep terrain, high altitude, and a demanding summit day. Adding one day does not remove those challenges. It simply gives your body more time to adapt and gives your team more flexibility during the trek.
Extra Acclimatization Day
The extra day provides additional time for acclimatization before the final push toward Uhuru Peak. Depending on the itinerary, your guide may use this time for a shorter hike, rest, or an acclimatization-focused program.
Your guide will consider the group’s condition, altitude symptoms, weather, and overall progress when managing the day.
For trekkers who have limited high-altitude experience, understanding the value of a slower schedule can make an important difference. The mountain does not reward rushing. A steady pace, proper rest, good hydration, and careful altitude management remain important throughout the climb.
Umbwe Route Map & Elevation Profile
The Umbwe Route map shows why this climb feels different from other Kilimanjaro routes. The trail starts on the southern side of the mountain at Umbwe Gate and climbs rapidly through the rainforest before reaching the higher Southern Circuit.
The route follows this general progression:
Umbwe Gate to Umbwe Camp to Barranco Camp to Karanga Camp to Barafu Camp to Uhuru Peak to Mweka Camp to Mweka Gate
The biggest elevation change happens during the first two days. You start around 1,600 metres at Umbwe Gate and climb to roughly 2,850 metres at Umbwe Camp before continuing toward Barranco.
From Barranco, the route joins the Southern Circuit. You pass the Barranco Wall, continue toward Karanga, and then climb to Barafu Camp. Barafu sits at around 4,600 metres and serves as the main base for the summit attempt.
From Barafu, you climb toward Uhuru Peak at 5,895 metres before descending through the Mweka Route.
Understanding the Umbwe Elevation Profile
The elevation profile matters because Umbwe does not spread its ascent evenly across many days. The route gains a lot of height early, which gives your body less time to adjust to the changing altitude.
The profile becomes especially important when comparing the 6-day and 7-day itineraries. The additional day on the longer itinerary can create more time for acclimatization and recovery before the summit attempt.
A good Umbwe map should therefore show more than the trail line. It should help you understand where the route climbs quickly, where you sleep, where the terrain changes, and how the final summit ascent fits into the whole journey.
Umbwe Route Distance
The Umbwe Route covers approximately 50-53 kilometres from Umbwe Gate to the summit and down to Mweka Gate, depending on the exact route measurements used by the operator. Published route maps commonly show about 32 miles, which equals roughly 51 kilometres.
The distance may look manageable on paper, but kilometres alone do not show the true difficulty of Umbwe. The route combines steep climbing, rapid elevation gain, uneven terrain, and a long summit day.
A typical 6-day itinerary covers approximately:
Day 1: Umbwe Gate to Umbwe Camp – about 11 km
Day 2: Umbwe Camp to Barranco Camp – about 6 km
Day 3: Barranco Camp to Karanga Camp – about 5 km
Day 4: Karanga Camp to Barafu Camp – about 4 km
Day 5: Barafu Camp to Uhuru Peak and down toward Mweka Camp – about 17 km
Day 6: Mweka Camp to Mweka Gate – about 10 km
The summit day carries a particularly large workload. You climb from Barafu toward Uhuru Peak and then descend thousands of metres to the lower Mweka area. That combination of altitude, climbing, and descent makes the summit day much more demanding than its distance alone suggests.
For this reason, trekkers should prepare for elevation, terrain and total hiking time, rather than training only for a certain number of kilometres.
Umbwe Route Success Rate
There is no single official success rate for the Umbwe Route that applies to every operator or every climber. Published figures differ because operators use different groups, itineraries, time periods, definitions of success, and data samples.
For example, some current sources estimate around 50% for 6-day Umbwe and around 70% for 7-day Umbwe, while another operator reports its own historical data of 58% for 6-day and 73% for 7-day Umbwe. These figures should not be presented as a universal Kilimanjaro statistic.
Why Does the Success Rate Vary?
Several factors can affect whether a climber reaches Uhuru Peak:
Itinerary length: More days can provide additional time for acclimatization.
Altitude response: Every person’s body responds differently to high altitude.
Pacing: A controlled pace helps conserve energy during the ascent.
Acclimatization: Gradual exposure to higher elevations gives the body more time to adapt.
Fitness and preparation: Strong endurance helps with the physical demands of the route.
Weather: Cold, rain, wind, and poor trail conditions can affect the climb.
Guide support: Experienced guides can monitor symptoms and adjust the pace or plan when necessary.
Health and energy: Sleep, hydration, nutrition, and recovery all matter during a multi-day climb.
What Does This Mean for Your Umbwe Climb?
A published success percentage cannot tell you exactly whether you will reach Uhuru Peak. It can only provide context about the route and the conditions surrounding previous climbs.
At WeWild Travel, we focus on the factors our mountain team can manage: steady pacing, altitude monitoring, proper rest, hydration, nutrition, experienced local guides, and careful decision-making throughout the trek.
If you want to understand your chances of completing Umbwe, the better question is not simply, “What is the success rate?” It is “How can I prepare properly for this route and manage altitude safely?”
That approach gives you a more useful picture of what it takes to reach Uhuru Peak at 5,895 metres.
Best Time to Climb Umbwe Route
The best time to climb the Umbwe Route is during Kilimanjaro’s drier periods, especially January to early March and June to October. These months generally bring better trail conditions, clearer mountain views, and less rainfall than the wetter periods. This matters on Umbwe because the route starts with steep terrain where rain can make roots, rocks, and soil slippery.
Unlike some Kilimanjaro routes, Umbwe does not become easier simply because the weather is dry. The route remains steep and demanding, so choosing a period with more stable conditions can help you manage the terrain more comfortably.
January to Early March
January and February offer a useful combination of relatively dry conditions, warmer temperatures at lower elevations, and generally good visibility. The mountain can also feel quieter than during the busiest months of the main dry season.
February often provides good conditions for trekkers who want dry trails and clear mountain scenery. March becomes more changeable as rainfall increases, so exact conditions can vary.
June to October
June through October forms the main dry season on Kilimanjaro. The mountain usually experiences more stable weather, drier trails, and good visibility, although temperatures become colder at higher elevations. July and August attract more climbers across Kilimanjaro, while September and October can offer a different crowd level as the season progresses.
For Umbwe, the dry conditions are particularly useful during the steep opening section. Firm ground makes it easier to place your feet securely and maintain a steady pace.
What About March, April and May?
March can bring a transition toward wetter conditions, while April and May receive the heaviest rainfall. Wet weather can make the lower Umbwe trail muddy and slippery, reduce visibility, and make the steep sections more demanding.
You can still find climbers on Kilimanjaro during these months, but the conditions require greater flexibility. For the Umbwe Route, the combination of steep terrain and wet ground deserves particular consideration.
What About November and December?
November usually brings the short rains. Conditions can change quickly, with rain and cloud affecting the lower mountain and visibility. December can also bring changing weather before the January dry period.
If your travel dates fall during a wetter month, speak with your local operator before choosing Umbwe. The route’s steep character makes trail conditions an important part of the decision.
Which Months Give the Best Umbwe Experience?
For a simple planning guide:
January to February: Generally dry, relatively warm, and good for mountain views
Early March: Possible good conditions, but rainfall becomes more variable
April to May: Long rains; wetter and muddier trail conditions
June: Start of the main dry period; cooler conditions
July to August: Dry and popular, with colder high-altitude conditions
September to October: Generally dry with good trekking conditions
November: Short rains and more variable weather
December: Changing conditions before the January dry period
Does the Season Affect Umbwe’s Difficulty?
Yes. The route itself does not change, but weather can change how the trail feels underfoot.
A dry Umbwe trail can give you firmer footing on steep sections. Heavy rain can create mud, slippery roots, wet rocks, and poorer visibility. Cold weather also becomes more important as you approach the summit.
However, weather is only one part of a successful climb. Your itinerary, acclimatization, physical preparation, pacing, guide support, and response to altitude all matter.
For that reason, WeWild Travel looks at your planned climbing dates together with your experience and itinerary rather than treating one month as a guarantee of good summit conditions.
Umbwe Route Cost
The cost to climb Mount Kilimanjaro via the Umbwe Route depends on the number of trekking days, group size, travel season, accommodation, and level of service. Current published Umbwe prices range from about $1,300 to more than $3,800 per person, with larger group climbs generally costing less per person and private climbs costing more.
For a realistic budget, most international climbers should compare packages around these levels:
Budget group climb: about $1,300 to $2,000 per person
Standard or mid-range climb: about $2,000 to $2,800 per person
Private or premium climb: about $2,800 to $3,800+ per person
These figures provide a general market guide rather than a fixed WeWild Travel price. Your final quote depends on your travel dates, group size, itinerary, hotel choice, and services included in your package.
Why Does the Umbwe Route Price Vary?
The number of days on the mountain has a major effect on the cost. A longer climb requires additional park fees, meals, crew support, camping nights, and mountain logistics.
Group size also affects the price. When several climbers travel together, costs for guides, transport, and some equipment can be shared across the group. A private climb costs more because you receive a more personalized arrangement.
The level of service also matters. A package with quality tents, hotel accommodation, airport transfers, health monitoring, emergency equipment, and a strong support crew will normally cost more than a basic package.
At WeWild Travel, we believe you should know what you are paying for before you book. We provide a clear quotation based on your actual trip rather than hiding important costs behind a low advertised price.
What Can Affect Your Umbwe Route Cost?
Your final price may depend on:
6-day or 7-day Umbwe itinerary
Number of climbers in your group
Private or group departure
Hotel accommodation before and after the climb
Airport and mountain transfers
Camping equipment and toilet arrangements
Mountain crew and support services
Travel season and availability
Optional equipment rental
Additional nights or activities
Important: International flights, Tanzania visa fees, travel insurance, personal trekking equipment, crew tips, and personal expenses are normally separate unless your quotation specifically includes them.
Get Your Umbwe Route Quote
Instead of choosing an Umbwe climb only because it has the lowest advertised price, compare the complete package. Ask what park fees, crew, meals, camping equipment, transfers, accommodation, and safety services are included.
Contact WeWild Travel for a personalized Umbwe Route quote based on your dates, group size, and preferred itinerary.
What Is Included in a WeWild Umbwe Climb?
A WeWild Travel Umbwe climb is organized as a complete mountain expedition, not simply a trail permit. Your package can cover the main services you need from arrival in Tanzania through your descent from Mount Kilimanjaro.
Included in Your Umbwe Climb
Kilimanjaro National Park Fees Required park and mountain fees are included in the agreed climbing package.
Professional Local Mountain Guides Experienced mountain guides lead the trek, control the pace, monitor your condition, and support you throughout the climb.
Porters and Mountain Support Crew Our porters carry camping equipment, food, and group supplies so you can concentrate on trekking with a manageable daypack.
Mountain Cook and Meals Breakfast, lunch, and dinner are prepared during the climb to keep you fueled throughout the demanding Umbwe itinerary.
Quality Camping Equipment Umbwe uses mountain camping accommodation. Your package includes tents and the main group camping setup required for the expedition.
Dining Tent and Camp Equipment The mountain team provides the dining setup, including the equipment needed for meals and camp organization.
Drinking Water Purified drinking water is provided during the mountain trek.
Airport and Mountain Transfers Depending on your selected package, transfers can be arranged between Kilimanjaro International Airport, your hotel, and the mountain gate.
Pre- and Post-Climb Hotel Accommodation WeWild packages can include hotel accommodation before and after the climb, depending on the package you choose.
Daily Health Monitoring Our mountain team uses health checks and pulse oximeters to monitor your condition and help identify altitude-related concerns early.
Emergency Oxygen and First Aid Emergency oxygen and first-aid equipment are carried by the mountain team as part of our safety preparation.
Local Support Before and During Your Climb Our Arusha-based team remains available to help with planning, preparation, transfers, and mountain logistics.
These services reflect the inclusion structure currently published by WeWild Travel for Kilimanjaro climbing packages.
What Is Not Included?
Unless specifically added to your quotation, you should budget separately for:
International flights
Tanzania visa fees
Travel insurance
Personal trekking clothing and equipment
Sleeping bag and rental equipment
Tips for guides, porters, and cooks
Personal expenses
Drinks and other personal purchases
A clear inclusion list helps you compare Umbwe Route prices properly. A cheaper quotation may look attractive until you discover that important services are missing.
What to Pack for Umbwe Route
Packing for the Umbwe Route requires careful preparation because the trail moves through several climate zones. You can start in a warm, humid rainforest and finish in freezing conditions near Uhuru Peak at 5,895 metres.
The steep terrain also makes it important to keep your daypack practical and avoid carrying unnecessary weight.
Clothing for Umbwe Route
Pack clothing that allows you to add or remove layers as temperatures change.
Moisture-wicking base layers
Long-sleeve trekking shirts
Fleece or warm mid-layer
Insulated summit jacket
Waterproof and windproof jacket
Trekking trousers
Warm thermal underwear
Waterproof trousers
Warm hat and sun hat
Lightweight gloves
Warm summit gloves
Neck gaiter or buff
Several pairs of trekking socks
Comfortable underwear
Footwear
Your footwear needs to provide good grip on steep and uneven ground.
Well-broken-in hiking boots
Lightweight camp shoes
Several pairs of quality hiking socks
Gaiters for wet or muddy conditions
Avoid wearing brand-new boots on the mountain. Break them in before your trip to reduce the risk of blisters.
Sleeping and Camping Gear
WeWild provides the main group camping equipment, but you should confirm your personal equipment with us before departure.
You may need:
Warm sleeping bag suitable for summit temperatures
Sleeping bag liner
Headlamp with spare batteries
Trekking poles
Small personal towel
Reusable water bottles or hydration system
Dry bags or waterproof packing bags
Personal and Health Items
Keep important personal items easy to reach.
Personal medication
Basic blister treatment
Sunscreen
Lip balm with sun protection
Sunglasses
Personal toiletries
Hand sanitizer
Wet wipes
Small first-aid items
Prescription medication
Personal documents and travel insurance details
Summit Night Essentials
Summit night is the coldest and most demanding part of the Umbwe climb. Keep your warmest clothing accessible rather than buried at the bottom of your bag.
Your summit pack should include:
Warm insulated jacket
Thermal layers
Warm gloves
Warm hat
Headlamp
Spare batteries
Water
High-energy snacks
Sunglasses
Sunscreen
Trekking poles
What Should You Leave at Home?
Do not overload yourself with unnecessary items. Your porters carry the main camping equipment, while you normally carry only the items you need during the day’s trek.
Avoid packing excessive clothing, heavy electronics, unnecessary toiletries, or duplicate equipment. A lighter daypack makes steep sections of the Umbwe Route more comfortable.
Before departure, WeWild Travel can also help you check your packing list and identify equipment you may need to rent or bring from home.
Camping and Accommodation on Umbwe
The Umbwe Route uses mountain camping throughout the climb. Unlike the Marangu Route, there are no mountain huts with permanent beds. You sleep in tents at designated camps along the route.
During the first part of the climb, the Umbwe trail is quieter than the more established southern routes. After reaching Barranco Camp, the route joins the Southern Circuit used by climbers coming from Machame and Lemosho. From there, you continue toward Karanga and Barafu before making the summit attempt. The descent follows the Mweka Route.
What Is Umbwe Camping Like?
Your mountain crew sets up camp while you focus on trekking and recovery. A typical camp setup includes:
Sleeping tent
Dining area for meals
Sleeping mats or mattresses, depending on your package
Cooking equipment
Dining and eating equipment
Toilet arrangements according to your package
Hot meals prepared by the mountain cook
At camp, you can change clothes, eat, rest, drink water, and prepare for the next day’s trek.
Where Do You Sleep on the Umbwe Route?
The exact camps can vary slightly between itineraries and operators, but the standard route follows the general progression:
Umbwe Gate to Umbwe Camp to Barranco Camp to Karanga Camp to Barafu Camp to Uhuru Peak to Mweka Camp to Mweka Gate
The early camps feel quieter because fewer climbers use the Umbwe approach. Once you reach Barranco, you share the camping area with groups arriving from other southern routes.
Is Camping Comfortable on Umbwe?
Mountain camping is basic, but a well-organized camp gives you the essentials for a safe and comfortable night.
You should not expect hotel-style facilities. Temperatures also become much colder as you climb higher, particularly around Barafu Camp and during summit night.
A good sleeping bag, warm clothing, a comfortable sleeping mat, and proper protection from rain and wind make a major difference.
With WeWild Travel, our mountain crew manages the camp setup, meals, and daily mountain logistics so you can concentrate on walking, resting, and preparing for the next stage.
Umbwe Route Safety & Altitude Management
Safety on the Umbwe Route starts with understanding its biggest challenge: rapid altitude gain.
The route climbs steeply during the first two days and reaches Barranco Camp at around 3,900–3,960 metres relatively quickly. This gives your body less time to adapt than longer Kilimanjaro routes. Current route sources identify this rapid ascent as the main reason Umbwe demands careful acclimatization and experienced trekking.
How Does WeWild Manage Altitude?
Our mountain team monitors your condition throughout the trek. We pay attention to symptoms such as:
Headache
Nausea
Dizziness
Unusual tiredness
Loss of appetite
Shortness of breath
Difficulty walking normally
Confusion or unusual behaviour
Tell your guide immediately if you feel unwell. Do not hide altitude symptoms because you want to reach the summit.
Your guide can slow the pace, recommend rest, monitor your condition, or arrange descent when continuing would create an unacceptable safety risk.
Why Is a Slow Pace Important?
Umbwe is steep, especially during the first two days. Walking too quickly wastes energy and can make the climb harder.
Our guides use a controlled pace that allows you to breathe comfortably and conserve energy. Regular breaks also give you time to drink, eat, and check how your body feels.
What About the Barranco Wall?
The Barranco Wall looks dramatic, but it does not require technical climbing equipment on the standard route. You may use your hands for balance on some sections as you move over rocks and around the wall.
The important point is to follow your guide’s instructions and move carefully rather than rushing.
What Happens If Someone Becomes Sick?
Altitude sickness can become serious. If a climber develops concerning symptoms, the priority changes from reaching the summit to getting the person to a safer altitude.
The mountain team can assess the situation and arrange descent when necessary. Emergency oxygen and first-aid equipment should form part of a properly prepared Kilimanjaro expedition.
On Umbwe, reaching Uhuru Peak is never more important than your safety.
Umbwe Route Pros and Cons
The Umbwe Route offers a very different Kilimanjaro experience. It gives you a direct, steep approach and quieter early days, but it also gives your body less time to adjust to altitude.
Pros of the Umbwe Route
1. Direct approach to Kilimanjaro Umbwe takes a direct line up the southern side of the mountain rather than following a long gradual approach.
2. Quiet first days The early Umbwe trail normally sees fewer trekkers than the busier routes.
3. Dramatic scenery You move from rainforest into moorland and higher alpine terrain before joining the Southern Circuit.
4. Challenging trekking experience The steep terrain makes Umbwe attractive to experienced trekkers who enjoy demanding mountain routes.
5. Camping experience You spend the climb sleeping in mountain camps and experiencing Kilimanjaro away from hotel-style accommodation.
6. Joins the Southern Circuit After Barranco, the route connects with the popular southern approach toward Karanga, Barafu, and Uhuru Peak.
Cons of the Umbwe Route
1. Rapid altitude gain This is the main disadvantage. Umbwe reaches high sleeping elevations quickly, giving your body less time to acclimatize.
2. Steep first days The opening section is physically demanding and requires steady effort.
3. Not ideal for beginners Trekkers with little mountain or altitude experience may find the combination of steep terrain and rapid elevation gain difficult.
4. Limited acclimatization on the shorter itinerary A 6-day schedule keeps the climb compact. A 7-day itinerary can add more time for acclimatization, depending on the itinerary used by the operator.
5. Mountain camping only If you prefer huts with permanent beds and indoor facilities, Umbwe will not provide that type of accommodation.
So, What Are the Main Advantages and Disadvantages?
The simple answer is:
Umbwe gives you a direct, steep, quieter approach, but its rapid altitude gain makes acclimatization the main challenge.
Choose Umbwe because you understand the demands of the route, not simply because it is shorter or quieter. Your trekking experience, altitude history, physical preparation, itinerary, and ability to follow your guide’s instructions all matter.
Umbwe vs Machame vs Lemosho
Umbwe, Machame, and Lemosho all lead to Uhuru Peak, but they give you very different experiences on the mountain. The main differences are the starting approach, climbing pace, terrain, number of days, and time available for acclimatization.
Feature
Umbwe Route
Machame Route
Lemosho Route
Typical duration
6 to 7 days
6 to 7 days
7 to 8 days
Approach
Southern side
Southern side
Western side
Early terrain
Steep rainforest and ridges
Rainforest and steep trails
Rainforest, Shira Plateau
Early traffic
Usually quieter
Usually busier
Quieter at first
Acclimatization
Faster and more demanding
Better on 7-day itinerary
More gradual on longer itineraries
Camping
Yes
Yes
Yes
Main character
Direct and steep
Scenic and challenging
Gradual and varied
Best suited to
Experienced trekkers
Fit trekkers
Trekkers wanting more acclimatization time
Current route guides generally describe Umbwe as the more direct and demanding approach, while Machame provides a longer southern approach and Lemosho gives climbers more time on the mountain on its longer itineraries.
Umbwe vs Machame
The biggest difference is the pace of the early climb.
Umbwe takes a more direct line up the mountain and gains altitude quickly. The first two days can feel particularly demanding because of the steep terrain and rapid elevation gain.
Machame also has steep sections, but its route profile spreads the climb differently. The 7-day Machame itinerary gives more time to adapt than a compressed 6-day schedule.
Both routes eventually reach the southern section around Barranco, Karanga, and Barafu before the summit attempt.
Choose Umbwe if: you want a direct, steep mountain experience and have strong trekking experience.
Choose Machame if: you want dramatic scenery, a challenging climb, and a little more time for acclimatization on the 7-day itinerary.
Read More : Machame Route 7 Day itinerary
Umbwe vs Lemosho
Umbwe and Lemosho feel very different during the first part of the climb.
Starting from the southern side, Umbwe climbs steeply and reaches the Southern Circuit quickly. Lemosho takes a more gradual approach, allowing climbers to gain elevation more slowly while enjoying a longer route through varied landscapes.
The longer Lemosho itineraries allow a more gradual ascent and more time for your body to adapt to altitude. Lemosho also starts more quietly before joining the busier southern routes.
Choose Umbwe if: you want a shorter, steeper, more direct trekking experience.
Choose Lemosho if: you have more time and prefer a gradual itinerary with more acclimatization opportunities.
Read More : Lemosho Route 9 Day itinerary
Which Route Fits Your Climbing Goals?
There is no single route that suits every climber.
For a direct and demanding climb, Umbwe provides that experience from the start.
Climbers looking for a challenging route with varied scenery and a 6- to 7-day schedule can consider Machame.
Those who prefer more time for acclimatization and a longer approach may find Lemosho suitable, with 7- to 8-day itineraries.
The important thing is to match the route and itinerary with your experience, preparation, available time, and ability to handle altitude.
Who Should Climb Umbwe?
The Umbwe Route is best suited to fit and experienced trekkers who are comfortable with steep terrain, long hiking days, and rapid altitude gain.
This route is not simply about being physically strong. You also need to understand how your body responds to altitude and be prepared to follow your guide’s instructions throughout the climb.
Umbwe Is Suitable For You If You:
Have previous multi-day trekking experience
Have experience hiking on steep and uneven terrain
Have prepared well for long walking days
Feel comfortable with mountain camping
Can maintain a slow and steady pace
Understand that fitness does not prevent altitude sickness
Are prepared for a demanding summit night
Prefer a quieter and more direct route
Have enough time to choose a 7-day itinerary if appropriate
Who Should Avoid the Short Umbwe Itinerary?
The 6-day Umbwe itinerary moves quickly and gives your body less time to adapt to altitude. If you have little trekking experience, no previous high-altitude experience, or you are unsure how you respond to altitude, a longer route may provide a more suitable acclimatization profile.
This does not mean that every experienced climber will find Umbwe easy. Altitude affects people differently, and previous experience cannot guarantee that you will reach Uhuru Peak.
Is Umbwe Suitable for First-Time Climbers?
A first-time Kilimanjaro climber can physically complete difficult mountain terrain, but Umbwe requires more careful consideration than routes with a more gradual ascent.
If you have never completed a serious multi-day mountain trek, Umbwe may not be the most suitable starting point. Discuss your previous trekking experience, available days, fitness preparation, and altitude history with your local mountain operator before booking.
What Experience Helps on Umbwe?
Useful experience includes:
Multi-day hiking
Steep mountain trekking
Long-distance walking
Camping in changing weather
Hiking at higher elevations
Managing your pace over several consecutive days
You do not need technical rock-climbing skills for the standard Umbwe Route. The challenge comes mainly from steep trekking, endurance, altitude, and the long summit push.
Who Should Choose Umbwe?
Choose Umbwe because you understand its character: steep, direct, physically demanding, and fast-gaining in altitude.
If that matches your trekking experience and climbing goals, Umbwe can give you a demanding and memorable way to approach Kilimanjaro.
If you want more gradual acclimatization, you can also compare Umbwe with the 7-day Machame or 8-day Lemosho before making your decision. Your WeWild Travel team can help you compare the routes based on your experience, dates, and preferred number of days.
Frequently Asked Questions About the Umbwe Route
What is the Umbwe Route?
The Umbwe Route is a steep and direct trail to Mount Kilimanjaro’s southern slopes. It reaches Barranco before joining the Southern Circuit toward the summit.
How difficult is the Umbwe Route?
Umbwe is one of Kilimanjaro’s most challenging routes because of its steep trails, rapid elevation gain, and demanding early days.
How many days does the Umbwe Route take?
Most Umbwe climbs take 6 or 7 days. A 7-day itinerary gives you more time on the mountain and supports better acclimatization.
Is the 6-day or 7-day Umbwe better for acclimatization?
The 7-day Umbwe route generally provides better acclimatization because it gives your body more time to adjust to altitude before the summit attempt.
Is Umbwe suitable for beginners?
Umbwe is not usually the first choice for beginners because of its steep terrain and faster altitude gain. Experience with long mountain hikes helps.
How much does the Umbwe Route cost?
The cost depends on the number of days, group size, season, and services included. Your operator should provide a detailed quotation before booking.
What is the Umbwe Route success rate?
Success rates vary between operators and depend on itinerary length, acclimatization, weather, and individual preparation. Longer itineraries generally allow more acclimatization time.
What is the best time to climb Umbwe?
The best periods are generally the drier months, especially January to February and June to October. Weather can still change quickly on the mountain.
Where does the Umbwe Route start?
The Umbwe Route starts at Umbwe Gate, located on the southern side of Mount Kilimanjaro near Machame.
Where does the Umbwe Route descend?
Most Umbwe climbs descend through the Mweka Route after reaching Uhuru Peak, finishing at Mweka Gate.
Conclusion
The Umbwe Route offers a challenging and direct way to climb Mount Kilimanjaro. Its steep trails, dramatic scenery, and quieter sections make it different from the more popular Machame and Lemosho routes. However, the route demands good preparation and a realistic approach to altitude.
Choosing between 6 and 7 days depends on your experience, fitness, and acclimatization needs. The 7-day option adds more time on the mountain, giving your body extra time to adjust before the summit.
Before booking, consider the route difficulty, climbing season, total cost, equipment, safety support, and what your package includes. A well-planned itinerary can make your climb more comfortable and give you a better opportunity to enjoy the mountain.
At WeWild Travel, we focus on well-organized Kilimanjaro climbs with experienced mountain crews, proper planning, and support throughout your journey. If the Umbwe Route matches your experience and goals, we can help you choose the right itinerary and prepare for your climb.
The Northern Circuit Route is the longest trekking route on Mount Kilimanjaro and one of the most scenic ways to reach Uhuru Peak, the highest point in Africa. The route starts on the western side of the mountain at Londorossi Gate and slowly climbs through different ecological zones before circling almost the entire northern side of Kilimanjaro. This full circuit makes it unique because trekkers experience more variety of landscapes than any other route on the mountain.
This route is widely known as the most scenic Kilimanjaro route because it passes through quiet, untouched areas with very few crowds. Climbers enjoy wide open views of the mountain, especially on the remote northern slopes where fewer tourists go. The journey moves from dense rainforest to open moorlands, then to the dramatic alpine desert, and finally to the icy summit zone. Each stage of the climb feels different, which makes the experience more rewarding and memorable.
The Northern Circuit Route also has the highest summit success rate on Kilimanjaro. The main reason is its long duration, usually 8 to 9 days. These extra days give climbers more time to adjust to high altitude gradually. Slow acclimatization reduces the risk of altitude sickness, which is the main reason many climbers fail on shorter routes. Because of this careful ascent, more trekkers reach the summit successfully compared to other routes.
In total, the Northern Circuit Route offers a complete Kilimanjaro experience in 8 to 9 days, combining safety, scenery, and a high chance of reaching the summit.
The Northern Circuit Route is the longest and most scenic route on Mount Kilimanjaro. It is designed for trekkers who want a high summit success rate, excellent acclimatization, and a full mountain experience.
Distance
The Northern Circuit Route covers approximately (98-120 km 61-75 miles) depending on the exact itinerary and summit descent path. It is the longest route on Kilimanjaro because it circles most of the mountain before reaching Uhuru Peak.
Duration (8 to 9 days)
The trek normally takes 8 to 9 days to complete. The longer duration allows slow climbing and better acclimatization, which increases the chance of reaching the summit safely and successfully.
Difficulty Level
The route is rated moderate to challenging. It is not technically difficult (no climbing skills needed), but the long distance and high altitude make it physically demanding. Good fitness and mental preparation are important.
Success Rate
The Northern Circuit Route has the highest summit success rate on Kilimanjaro, around 85%-95%. The long acclimatization time is the main reason for this high success rate compared to shorter routes.
Starting Point
The journey begins at Londorossi Gate (western side of Mount Kilimanjaro). From there, trekkers pass through rainforest before joining the Shira Plateau and continuing the full circuit around the mountain.
Accommodation Type
Accommodation is camping in mountain tents throughout the trek. Trekkers sleep in designated campsites along the route, supported by guides, porters, and a professional trekking crew.
What Is the Northern Circuit Route?
The Northern Circuit Route is the longest trekking route on Mount Kilimanjaro and one of the most scenic ways to reach Uhuru Peak. It is a multi-day hiking path that circles around the northern side of the mountain before ascending to the summit. Unlike shorter routes that go directly up and down, the Northern Circuit gives climbers a full mountain experience by passing through different landscapes, climates, and viewpoints. It is known for its slow and steady ascent, which improves acclimatization and increases summit success.
Where Does It Start?
The route starts at Londorossi Gate, located on the western side of Mount Kilimanjaro in Tanzania. From the gate, trekkers first enter the lush rainforest zone where they may see monkeys, birds, and dense green vegetation. After the rainforest, the trail climbs toward the Shira Plateau where the route begins to open up into wide views and moorland scenery. From this point, the journey continues clockwise around the northern slopes of the mountain until it joins the final ascent to Uhuru Peak.
Why Is It Unique?
The Northern Circuit Route is unique because it is the only route that circles almost the entire northern side of Kilimanjaro, giving trekkers a 360-degree view of the mountain, including remote and quiet areas that most other routes do not reach. It is also unique because it is the longest route on Kilimanjaro, offers the best acclimatization schedule, has very low crowd levels, provides changing scenery every day, and delivers the highest summit success rate. This combination of length, scenery, and safety makes it one of the most rewarding Kilimanjaro experiences.
Who Is It Best For?
The Northern Circuit Route is best for climbers who want the highest chance of reaching the summit while enjoying a comfortable and scenic trek. It is ideal for first-time Kilimanjaro climbers who want better acclimatization, trekkers who prefer a longer and less rushed experience, people who want to avoid crowded routes, climbers who value scenery and photography opportunities, and anyone aiming for the highest summit success rate on Kilimanjaro. It is not a technical climb, so no mountaineering skills are required, but good physical fitness and endurance are important because of the long duration.
Northern Circuit Route Overview
The Northern Circuit Route is the longest and most complete trekking route on Mount Kilimanjaro. It is designed for climbers who want a slow ascent, maximum acclimatization, and a full 360-degree experience around the mountain. The route passes through rainforest, moorland, alpine desert, and arctic zones before reaching Uhuru Peak, offering constant changes in scenery and climate. Because of its longer duration and gradual climb, it is considered one of the safest and most rewarding ways to climb Kilimanjaro.
Route Distance and Duration
The Northern Circuit Route covers approximately 98 to 120 kilometers depending on the exact variation and descent path. This makes it the longest route on Kilimanjaro. The trek usually takes 8 to 9 days to complete, with most operators recommending the 9-day option for better acclimatization and a higher chance of reaching the summit successfully. The extra days allow climbers to walk slowly, rest properly, and adjust to altitude changes step by step instead of rushing the ascent.
Difficulty Level Explained
The route is classified as moderate to challenging, but it does not require technical climbing skills. The main difficulty comes from the long distance, high altitude, and cold summit conditions. Daily hiking is manageable for people with good fitness, but endurance is important because trekkers walk for many hours each day. The slow climbing profile makes it easier on the body compared to shorter routes, which is why many beginners also choose it despite the longer duration.
Accommodation Type (Camping)
Accommodation on the Northern Circuit Route is fully based on camping. Trekkers sleep in mountain tents at designated campsites along the route. A professional crew sets up tents, prepares meals, and supports climbers throughout the journey. Camps are simple but comfortable, usually including sleeping tents, a dining tent, and basic washing facilities. This camping experience keeps climbers close to nature throughout the entire trek.
Summit Success Rate Overview
The Northern Circuit Route has the highest summit success rate on Kilimanjaro, often estimated between 85% and 95%. This high success rate is mainly due to the long acclimatization period, which gives the body more time to adjust to high altitude. The gradual ascent reduces the risk of altitude sickness, which is the main reason climbers fail on shorter routes. Because of this, the Northern Circuit is widely recommended for climbers who want the best possible chance of reaching Uhuru Peak.
Why Choose the Northern Circuit Route?
The Northern Circuit Route is one of the best choices for climbing Mount Kilimanjaro because it combines safety, scenery, and a high chance of reaching the summit. It is designed for trekkers who want a complete mountain experience without rushing, while also improving their chances of success through a longer and more gradual ascent.
Highest Summit Success Rate on Kilimanjaro
The Northern Circuit Route has the highest summit success rate of all Kilimanjaro routes, often ranging between 85% and 95%. This high success rate comes from the slow climbing pace and extended itinerary, which gives the body more time to adapt to high altitude. Because climbers spend more days on the mountain, they reduce the risk of altitude sickness, which is the main reason people fail to reach Uhuru Peak.
Best Acclimatization Profile
This route offers the best acclimatization profile on Kilimanjaro because it follows a “climb high, sleep low” approach and includes extra days of gradual elevation gain. The body adjusts slowly to changing oxygen levels, which helps reduce fatigue, headaches, and other altitude-related symptoms. This makes the climb safer and more comfortable, especially for first-time trekkers.
Least Crowded Trail Experience
Compared to popular routes like Machame and Marangu, the Northern Circuit is much less crowded. The trail passes through remote northern slopes where fewer climbers go. This creates a quieter, more peaceful trekking experience where you can enjoy nature without large groups of people. It also gives a stronger sense of wilderness and adventure.
360° Scenic Views of Kilimanjaro
The route circles around most of the mountain, giving trekkers wide panoramic views from different angles. Unlike other routes that only cover one side of Kilimanjaro, the Northern Circuit allows you to see changing landscapes every day. You experience lush rainforest, open moorlands, dramatic ridges, and vast desert-like zones, all with constant views of the mountain itself.
Full Mountain Circuit Experience
The Northern Circuit Route is the only Kilimanjaro route that almost fully circles the mountain before heading to the summit. This makes the journey feel complete and unique. Instead of a direct ascent, trekkers experience a full exploration of Kilimanjaro’s northern side, making the climb more rewarding and memorable from start to finish.
Northern Circuit Route Map & Trail Overview
The Northern Circuit Route is the longest trekking route on Mount Kilimanjaro and follows a wide clockwise path around the northern slopes of the mountain. It starts on the western side at Londorossi Gate and gradually climbs through rainforest, moorland, and alpine desert before reaching the summit at Uhuru Peak. After the summit, climbers descend through the southern side of the mountain to Mweka Gate. This full journey gives trekkers a complete mountain experience with changing landscapes, fewer crowds, and excellent acclimatization opportunities.
Route Summary (Start – Finish)
The journey begins at Londorossi Gate, where trekkers enter the rainforest zone and start the gradual ascent. From there, the route moves to the Shira Plateau and continues eastward across the northern slopes of Kilimanjaro. The trail then passes remote camps such as Moir Hut, Buffalo Camp, and Third Cave Camp before joining the final ascent at School Hut. After reaching Uhuru Peak, climbers descend through the Mweka Route to Mweka Gate. This long circular path is what makes the Northern Circuit unique compared to all other Kilimanjaro routes.
Key Camps Along the Route
The main camps on the Northern Circuit Route include Mti Mkubwa Camp, Shira 1 Camp, Shira 2 Camp, Moir Hut, Buffalo Camp, Third Cave Camp, and School Hut. Each camp is placed at different elevations, allowing gradual altitude gain and proper rest between hiking days. These camps provide basic but essential facilities such as sleeping tents, dining tents, and support from guides and porters. The spacing between camps is carefully planned to improve acclimatization and reduce the risk of altitude sickness during the climb.
Elevation Profile Overview
The elevation profile of the Northern Circuit Route shows a steady and gradual climb from around 2,100 meters at Londorossi Gate to 5,895 meters at Uhuru Peak. After the initial rainforest ascent, the route rises onto the Shira Plateau before continuing with slow altitude gains across the northern slopes. The profile includes natural ups and downs, which help the body adapt more effectively to high altitude. This gradual elevation change is one of the main reasons why the route has the highest summit success rate on Kilimanjaro.
Daily Altitude Gain Overview
Daily altitude gain on the Northern Circuit Route is designed to be slow and controlled, usually ranging between 300 to 800 meters per day depending on the stage of the trek. Some days include “climb high, sleep low” patterns, especially around Moir Hut, which helps improve acclimatization. The slow gain prevents sudden altitude shocks and allows the body to adjust gradually. This careful daily progression is a key factor in reducing altitude sickness and increasing the overall success rate of climbers attempting the summit.
Northern Circuit Route Itinerary (Day by Day)
The Northern Circuit Route itinerary is designed to give climbers a slow and steady ascent around Mount Kilimanjaro. Each day gradually increases altitude while allowing enough time for rest and acclimatization. This is one of the main reasons why the route has the highest summit success rate. Below is the full 9-day trekking journey from start to finish.
Day 1: Londorossi Gate to Mti Mkubwa Camp
The journey begins at Londorossi Gate where climbers complete registration and enter Kilimanjaro National Park. From here, the trail passes through dense rainforest filled with tall trees, birds, and sometimes monkeys. The hike is steady and not too steep, making it a good warm-up for the days ahead. After several hours of walking, trekkers arrive at Mti Mkubwa Camp, also known as Big Tree Camp, where the first night is spent in tents surrounded by forest sounds.
Day 2: Mti Mkubwa Camp to Shira 1 Camp
On the second day, the trail gradually leaves the rainforest and enters the moorland zone. The vegetation becomes shorter, and wide views of the Shira Plateau begin to open up. The air becomes cooler and thinner as altitude increases. The trek continues at a slow and steady pace until reaching Shira 1 Camp, where climbers rest and prepare for higher elevations ahead.
Day 3: Shira 1 Camp to Shira 2 Camp
This day involves trekking across the Shira Plateau, one of the most beautiful open landscapes on Kilimanjaro. The path is less forested and more exposed, offering clear views of the mountain. The hike is moderate in difficulty, and climbers begin to feel the effects of altitude. Shira 2 Camp is reached in the afternoon, where the team rests at a higher elevation to improve acclimatization.
Day 4: Shira 2 Camp to Moir Hut
The route continues across the northern slopes toward Moir Hut, a quieter and more remote campsite. This day is important for acclimatization because it includes optional short hikes to higher elevations before returning to camp to sleep lower. The landscape becomes more volcanic and dry, with fewer plants and wider open spaces. Moir Hut offers a peaceful environment with very few crowds.
Day 5: Moir Hut to Buffalo Camp
The trail climbs and crosses into the northern circuit section of Kilimanjaro. This part of the journey is remote and rarely visited, offering a true wilderness experience. The path includes rolling terrain with steady ascents and descents. Climbers arrive at Buffalo Camp in the afternoon, where they rest at a higher altitude while enjoying views of the Kenyan plains on clear days.
Day 6: Buffalo Camp to Third Cave Camp
Today the route continues along the northern slopes with gradual altitude gain. The terrain becomes more alpine, with fewer plants and more rocky ground. The pace remains slow to help the body adjust to thinning air. By late afternoon, trekkers reach Third Cave Camp, where they rest and prepare for the final push toward the summit zone.
Day 7: Third Cave Camp to School Hut
This is a shorter but important acclimatization day. The trail climbs steadily toward School Hut, which sits close to the summit zone. As altitude increases, temperatures drop and oxygen levels decrease noticeably. Climbers rest early at School Hut to prepare for the midnight summit attempt. This is a critical stage for mental and physical preparation.
Day 8: School Hut to Uhuru Peak & Mweka Camp
This is summit day. Climbers begin their ascent around midnight, hiking slowly in cold and dark conditions toward Stella Point and then Uhuru Peak. Reaching the summit of Africa is the highlight of the journey. After taking photos and celebrating, climbers descend back to Mweka Camp for rest. This is a long and physically demanding day, but also the most rewarding.
Day 9: Mweka Camp to Mweka Gate
The final day is a descent through the rainforest zone to Mweka Gate. The air becomes warmer and richer in oxygen as altitude decreases. Climbers receive summit certificates and celebrate the successful completion of the climb. From here, transport returns trekkers to Moshi or Arusha, marking the end of the Northern Circuit adventure.
Northern Circuit Route 8 Days vs 9 Days
The Northern Circuit Route is normally offered in two main versions: 8 days and 9 days. Both follow the same general path around Mount Kilimanjaro, but the difference lies in the speed of ascent and the amount of time spent for acclimatization. Choosing between these two options affects comfort, summit success rate, and overall trekking experience.
Key Differences
The 8-day itinerary is a faster version of the route, which combines some sections to reduce one trekking day. This means longer hiking hours each day and less time for rest at altitude. The 9-day itinerary spreads the journey more evenly, allowing shorter daily hikes and more recovery time at camps. While both options reach the same summit point, the 9-day version feels less rushed and more comfortable for most climbers.
Why 9 Days Is Recommended
The 9-day Northern Circuit Route is recommended because it gives the body more time to adjust to high altitude in a natural and gradual way. Climbers move at a slower pace, which reduces fatigue and allows better energy management throughout the trek. The extra day also helps improve sleep quality at higher camps, which is very important for performance on summit night. For most trekkers, especially first-time climbers, the 9-day option provides a safer and more enjoyable experience.
Acclimatization Benefits
The biggest advantage of the 9-day itinerary is improved acclimatization. With more time spent climbing gradually, the body produces more red blood cells and adapts better to lower oxygen levels. This reduces the risk of altitude sickness symptoms such as headaches, dizziness, and nausea. The slower ascent also allows climbers to follow a better “climb high, sleep low” pattern in certain sections, which strengthens adaptation. Overall, the 9-day route gives the body a smoother transition to high altitude conditions.
Success Rate Comparison
The success rate for the 9-day Northern Circuit Route is higher than the 8-day version. While both already have strong summit success rates, the 9-day option can reach around 90% to 95% because of better acclimatization and lower physical stress. The 8-day version still performs well but may have slightly lower success rates due to faster ascent and reduced recovery time. For climbers who want the best possible chance of reaching Uhuru Peak, the 9-day itinerary is the preferred choice.
How Difficult Is the Northern Circuit Route?
The Northern Circuit Route is considered a moderate to challenging trek, but it is not a technical climb. This means you do not need ropes, climbing experience, or mountaineering skills. The difficulty mainly comes from long trekking days, increasing altitude, and cold summit conditions. Even though it is long, it is actually one of the easiest Kilimanjaro routes in terms of success because the pace is slow and well designed for acclimatization.
Physical Demand Level
The physical demand of the Northern Circuit Route is steady but manageable for people with good fitness. Each day involves several hours of walking on uneven terrain, including forest paths, rocky slopes, and open volcanic landscapes. The biggest challenge is endurance rather than speed or strength. Trekkers need to be prepared for long hiking days, sometimes 5 to 8 hours or more, while carrying only a small daypack. With proper training such as hiking, walking, or light cardio before the trip, most people can handle the physical demand without major problems.
Altitude Challenge
Altitude is the main difficulty on the Northern Circuit Route. As you climb higher, the air becomes thinner and oxygen levels decrease. This can cause symptoms like headaches, tiredness, or mild nausea, especially above 3,000 meters. However, the route is designed to reduce these effects by increasing altitude slowly and allowing extra time for acclimatization. Because of this gradual ascent, most climbers adapt better compared to shorter routes, making altitude challenges more manageable.
Summit Night Difficulty
Summit night is the hardest part of the entire journey. Climbers begin the final ascent from School Hut around midnight in very cold and dark conditions. The path to Uhuru Peak is steep, slow, and physically exhausting due to low oxygen and fatigue from previous days. Temperatures can drop below freezing, and every step requires strong mental focus. Despite the difficulty, the reward of reaching Uhuru Peak at sunrise makes this moment one of the most unforgettable experiences on the mountain.
Is It Good for Beginners?
Yes, the Northern Circuit Route is one of the best options for beginners on Kilimanjaro. Even though it is long, the slow pace and excellent acclimatization make it safer and more comfortable than shorter routes. Beginners benefit from the extra days, which help the body adjust gradually to altitude changes. With proper preparation, good fitness, and guidance from experienced guides, first-time climbers have a very high chance of successfully reaching the summit using this route.
Altitude & Acclimatization
Altitude is one of the most important factors when climbing Mount Kilimanjaro. As you go higher, the air becomes thinner and oxygen levels decrease. This affects how your body performs and how comfortable you feel during the trek. The Northern Circuit Route is specially designed to help climbers adjust slowly to these changes, which is why it has one of the highest summit success rates on the mountain.
How Altitude Affects the Body
When you climb higher on Kilimanjaro, your body receives less oxygen with every breath. This can make you feel more tired than usual, even when walking at a slow pace. Your heart and lungs must work harder to supply oxygen to your muscles and brain. As a result, normal activities like walking uphill or carrying a small backpack can feel more challenging. The higher you go, the more important it becomes to move slowly, rest well, and stay hydrated.
Common Altitude Sickness Symptoms
Altitude sickness can affect anyone, regardless of fitness level. The most common symptoms include headache, nausea, dizziness, fatigue, and loss of appetite. Some climbers may also experience difficulty sleeping or shortness of breath during rest. These symptoms usually appear when the body is not adapting fast enough to the reduced oxygen levels. On Kilimanjaro, early detection is important because mild symptoms can improve with rest and slower movement.
Prevention Tips
The best way to prevent altitude sickness is to climb slowly and allow enough time for acclimatization. Drinking plenty of water helps the body adjust more effectively, while eating regular meals keeps energy levels stable. It is also important to walk at a steady, slow pace instead of rushing. Following guide instructions and taking rest seriously at camps can greatly reduce the risk of altitude problems. Some climbers also use medication like acetazolamide after consulting a doctor before the trek.
Why This Route Works Best for Acclimatization
The Northern Circuit Route is the best route on Kilimanjaro for acclimatization because it offers the longest and most gradual ascent. The 8 to 9-day itinerary gives the body enough time to adapt step by step to changing altitude levels. The route also includes natural “climb high, sleep low” sections, which help the body produce more red blood cells and improve oxygen efficiency. Because of this slow and steady approach, climbers experience fewer altitude-related issues and have a much higher chance of reaching Uhuru Peak successfully.
Northern Circuit Route Success Rate
The Northern Circuit Route is widely known as the most successful route on Mount Kilimanjaro. Its long duration, gradual ascent, and excellent acclimatization profile make it the safest option for reaching Uhuru Peak. Many trekking operators recommend it for climbers who want the highest possible chance of standing on the summit of Africa.
Average Success Rate
The average summit success rate for the Northern Circuit Route is around 85% to 95%, depending on the number of days used and the quality of the trekking operator. The 9-day itinerary usually performs better than the 8-day option because it gives more time for acclimatization and recovery. Compared to shorter routes, this is the highest success rate on Kilimanjaro, making it a top choice for both beginners and experienced trekkers.
Why It Has the Highest Success Rate
The main reason for the high success rate is the slow and steady climbing profile. The route allows climbers to ascend gradually without rushing, which gives the body enough time to adjust to decreasing oxygen levels. The extended time on the mountain reduces the risk of altitude sickness, which is the number one reason climbers fail to reach the summit. In addition, the “climb high, sleep low” sections improve acclimatization and help the body adapt more efficiently, increasing overall performance during summit night.
Factors That Affect Summit Success
Several factors influence whether climbers reach the summit successfully on the Northern Circuit Route. Physical fitness plays an important role, as stronger endurance helps manage long trekking days. Proper hydration and nutrition also improve energy levels and recovery. Weather conditions can affect visibility and trail difficulty, especially near the summit zone. Mental strength is equally important, as summit night is long, cold, and physically demanding. Finally, choosing a reputable operator with experienced guides significantly increases safety and success rates, as guides closely monitor climbers’ health throughout the journey.
Best Time to Climb Northern Circuit Route
The best time to climb the Northern Circuit Route is during the dry seasons when the weather is more stable, the skies are clearer, and the trekking conditions are safer and more comfortable. These periods give climbers better visibility, firmer trails, and a higher chance of enjoying the full scenery of Mount Kilimanjaro without heavy rain or thick clouds blocking the views.
January to March
January to March is one of the best times to climb the Northern Circuit Route. The weather is generally dry and warm at lower elevations, while higher camps remain cold but stable. During this season, the mountain is less crowded, which creates a more peaceful trekking experience. Visibility is often very good, allowing climbers to see wide landscapes and clear views of the summit. Nights can still be very cold, especially near the top, but overall conditions are favorable for a successful climb.
June to October
June to October is considered the most popular and most reliable climbing season on Kilimanjaro. The weather during these months is dry, with minimal rainfall and clear skies for most of the trek. Trails are firmer and easier to walk on, and visibility is excellent throughout the journey. This makes it one of the safest and most comfortable times to attempt the Northern Circuit Route. However, this is also the busiest season, so more climbers are on the mountain compared to other months.
Rainy Season Considerations
The rainy seasons occur from March to May and again from November to early December. During these months, climbing becomes more challenging because trails can be muddy, slippery, and less comfortable to walk on. Cloud cover may also reduce visibility, especially in the rainforest zone. However, the advantage is that the mountain is quieter with fewer trekkers. Climbers who choose this time need proper waterproof clothing and strong preparation, but it can still be a rewarding experience for those who prefer solitude.
Scenery & Landscape on the Northern Circuit Route
The Northern Circuit Route offers one of the most diverse and beautiful landscape experiences on Mount Kilimanjaro. As climbers move from the base to the summit, the environment changes dramatically through different ecological zones. Each zone has its own climate, vegetation, and scenery, making the journey feel like traveling through multiple worlds in one trek.
Rainforest Zone
The journey begins in the rainforest zone at the lower slopes of Kilimanjaro. This area is rich, green, and full of life, with tall trees, thick vegetation, and humid air. Climbers often hear birds calling and may see monkeys moving through the forest canopy. The trail is soft and sometimes muddy, especially after rain, but it offers a gentle introduction to the climb. This lush environment slowly fades as the altitude increases.
Shira Plateau
After leaving the forest, the route opens up into the wide and dramatic Shira Plateau. This is one of the most scenic parts of the climb, offering open views of the mountain and surrounding landscapes. The air becomes cooler and thinner, and vegetation changes to low grasses and small shrubs. The vast open space creates a strong sense of wilderness and marks the transition into higher altitude terrain.
Northern Slopes
As trekkers continue around the mountain, they reach the remote northern slopes. This area is quiet, less visited, and offers uninterrupted views of Kilimanjaro’s vast landscape. The terrain becomes more rugged and dry, with volcanic rock formations and fewer plants. This section is known for its peaceful environment and wide panoramic views, making it a highlight of the Northern Circuit experience.
Alpine Desert Zone
Higher up, the landscape turns into the alpine desert zone. This area is dry, cold, and almost lifeless, with strong winds and intense sunlight during the day. Vegetation is extremely limited, and the ground is mostly made of volcanic rock and ash. Although harsh, this zone offers dramatic scenery with wide open views and a feeling of true high-altitude wilderness.
Arctic Summit Zone
The final stage is the arctic summit zone near Uhuru Peak. This area is covered in ice, snow, and glaciers, with freezing temperatures and thin air. The environment feels completely different from the lower slopes, creating a powerful contrast to the green rainforest below. Reaching this zone marks the final push to the top of Africa, offering breathtaking views and a truly unforgettable summit experience.
Northern Circuit Route vs Other Kilimanjaro Routes
The Northern Circuit Route is often compared with other popular Kilimanjaro routes like Lemosho and Machame because it offers a different balance of length, scenery, and summit success rate. While all routes lead to Uhuru Peak, the experience, difficulty, and acclimatization levels vary greatly. The Northern Circuit is generally considered the most complete and safest route due to its longer duration and gradual ascent.
Northern Circuit vs Lemosho Route
The Northern Circuit Route and Lemosho Route both start on the western side of Kilimanjaro and offer excellent scenery through rainforest and moorland zones. However, the main difference is that the Northern Circuit continues further around the northern slopes, making it longer and less crowded. This extra distance gives better acclimatization and a higher summit success rate. Lemosho is slightly shorter and more popular, but the Northern Circuit is more remote, quieter, and offers a more complete mountain experience.
Northern Circuit vs Machame Route
The Machame Route is one of the most popular Kilimanjaro routes because of its shorter duration and challenging “climb high, sleep low” profile. However, it is more crowded and physically demanding due to steeper daily sections and a faster ascent. In contrast, the Northern Circuit is longer and more gradual, which reduces altitude stress and improves comfort. While Machame is known as the “Whiskey Route,” the Northern Circuit is considered the safest and most successful route for reaching the summit.
Key Differences Summary
The Northern Circuit Route is the longest, least crowded, and has the highest summit success rate on Kilimanjaro. Lemosho offers a similar scenic experience but with a shorter duration and slightly more traffic. Machame provides a faster and more intense climb but with lower acclimatization time and more crowds. Overall, the Northern Circuit is best for climbers who want maximum safety, better acclimatization, and a full scenic circuit around the mountain, while other routes focus more on speed or popularity.
Food & Water on the Route
Food and water are very important for a successful climb on the Northern Circuit Route. Because trekkers spend many days on the mountain, proper nutrition and hydration help maintain energy, improve acclimatization, and reduce fatigue. All meals and drinking water are usually provided by the trekking crew, ensuring climbers stay well-fueled throughout the journey.
Meals on the Mountain
Meals on the Northern Circuit Route are prepared daily by professional mountain chefs who travel with the trekking team. The food is designed to provide enough energy for long hiking days at high altitude. Breakfast often includes porridge, eggs, bread, tea, or coffee to start the day with strength. Lunch is usually a packed meal or hot lunch depending on the day’s schedule, while dinner is the main meal and includes carbohydrates like rice, pasta, potatoes, vegetables, and sometimes chicken or beef. Fresh fruit is also served when available. The goal is to keep energy levels stable and support recovery after each trekking day.
Drinking Water Safety
Drinking water on Kilimanjaro is collected from mountain springs and natural sources along the route. Before being given to climbers, the water is always boiled and treated to ensure it is safe to drink. Guides and porters prepare enough water each day and carry it to the camps. Climbers are encouraged to drink regularly, even when not feeling thirsty, because dehydration can increase the risk of altitude sickness. Carrying a reusable water bottle or hydration pack helps make drinking easier during the trek.
Energy Tips for Climbers
Maintaining energy on the Northern Circuit Route requires consistent eating, drinking, and pacing. Climbers should eat all meals provided, even if appetite is low at high altitude, because the body needs constant fuel. Drinking enough water throughout the day helps prevent fatigue and supports acclimatization. Walking at a slow and steady pace also saves energy and reduces strain on the body. Small snacks like nuts, energy bars, or chocolate can help during breaks to maintain stamina. Following these simple habits greatly improves performance and increases the chances of reaching the summit successfully.
What to Pack for Northern Circuit Route
Packing correctly for the Northern Circuit Route is very important because climbers experience different weather conditions, from hot rainforest to freezing summit temperatures. A good packing list helps you stay warm, dry, and comfortable throughout the trek while also improving safety and performance at high altitude.
Clothing Layers
Clothing should follow a layering system because temperatures change quickly on Kilimanjaro. The base layer keeps sweat away from the body, the middle layer provides warmth, and the outer layer protects against wind and rain. Climbers should pack thermal base layers, fleece jackets, and a waterproof and windproof jacket. Lightweight trekking shirts and trousers are useful for lower altitudes, while warm insulated clothing is essential for higher camps. Proper layering helps you adjust easily to changing conditions during the climb.
Footwear
Good footwear is one of the most important parts of your gear. Strong, waterproof hiking boots with good ankle support are essential for rocky, muddy, and uneven terrain. Boots should be well broken-in before the trek to avoid blisters. Comfortable trekking socks, preferably wool or moisture-wicking material, help keep feet dry and warm. At camp, lightweight shoes or sandals are useful for relaxing after long hiking days.
Sleeping Gear
Sleeping gear is important for comfort and recovery during the trek. A warm sleeping bag rated for cold temperatures (around -10°C to -20°C) is recommended because nights can be very cold, especially at higher camps. A sleeping mat or mattress is usually provided by the trekking company, but climbers can bring an extra liner for added warmth. Proper sleeping gear ensures better rest, which is important for energy and acclimatization.
Essential Accessories
Essential accessories include items that improve safety, comfort, and convenience on the mountain. A headlamp is necessary for early morning summit attempts and nighttime movement. Sunglasses and sunscreen protect against strong UV rays at high altitude. A reusable water bottle or hydration system helps maintain hydration throughout the day. Trekking poles reduce pressure on knees during steep sections, especially on descent. Gloves, a warm hat, and a neck gaiter are also important for cold conditions near the summit. These small items make a big difference in overall trekking experience.
Northern Circuit Route Cost
The cost of climbing the Northern Circuit Route is higher compared to shorter Kilimanjaro routes because it takes more days (8 to 9 days), includes more camp logistics, and requires a larger support team of guides and porters. However, the longer duration also gives better acclimatization and a much higher summit success rate, making it a strong value for climbers who want the best chance of reaching Uhuru Peak.
What Is Included
A standard Northern Circuit Route package usually includes all essential mountain services needed for a safe climb. This includes park fees, camping fees, rescue fees, professional mountain guides, porters, and cooks. It also includes all meals on the mountain, drinking water, tents, and safety equipment such as first aid kits and oxygen for emergencies. Transport from Moshi or Arusha to the starting gate and return transfers are also commonly included in a full package.
What Is Not Included
Some costs are not included in most trekking packages. These usually include international flights, visa fees for Tanzania, travel insurance, personal trekking gear, sleeping bag rental (if not provided), tips for guides and porters, and personal items such as snacks, drinks, or hotel stays before and after the climb. Climbers should always confirm inclusions carefully before booking to avoid unexpected costs.
Tipping Guide
Tipping is an important part of Kilimanjaro trekking culture and supports the mountain crew who assist throughout the climb. On average, climbers tip guides, assistant guides, cooks, and porters at the end of the trek in cash. The total tipping amount depends on group size and service level, but it is usually shared among the crew. Guides typically receive the highest share, followed by assistant guides and cooks, while porters receive smaller individual amounts that are pooled together fairly.
Price Based on Group Size
The cost per person varies depending on group size. Smaller groups usually have higher prices because fixed costs like guides, transport, and equipment are shared among fewer people. Larger groups reduce the per-person cost because expenses are divided among more climbers. Private climbs are generally more expensive but offer more flexibility and personalized service. Group climbs are more affordable and are the most common option for budget and mid-range trekkers.
Tips for Reaching Uhuru Peak
Reaching Uhuru Peak, the highest point in Africa, depends on smart pacing, good preparation, and following the right climbing strategy. The Northern Circuit Route already gives you a strong advantage because of its long acclimatization period, but your personal habits during the trek still play a major role in summit success.
Walk Slowly (Pole Pole)
Walking slowly is one of the most important rules on Kilimanjaro. The Swahili phrase “pole pole” means “slowly, slowly,” and guides repeat it throughout the climb for a reason. Moving at a slow and steady pace helps your body adjust to decreasing oxygen levels without stress. It also saves energy for summit night, which is the most demanding part of the trek. Climbers who rush often get tired faster and struggle with altitude symptoms, while slow walkers adapt better and reach the summit more comfortably.
Stay Hydrated
Drinking enough water every day is essential for successful acclimatization. At high altitude, your body loses water faster through breathing and physical effort, even if you do not feel very thirsty. Staying hydrated helps reduce symptoms like headaches, fatigue, and dizziness. It also supports energy levels and improves digestion, which is important because appetite often decreases at higher camps. Drinking small amounts of water regularly throughout the day works better than drinking a large amount at once.
Choose Longer Itinerary
Selecting a longer itinerary, especially the 9-day Northern Circuit Route, greatly increases your chance of reaching Uhuru Peak. Extra days give your body more time to adapt to altitude changes gradually. This reduces stress on your lungs and heart and improves overall stamina. A longer itinerary also allows better rest between hiking days, which helps you recover properly before the final summit push. In simple terms, more days on the mountain means a safer and more successful climb.
Follow Guide Instructions
Following your guide’s instructions is critical for both safety and success. Kilimanjaro guides are experienced in monitoring altitude symptoms and adjusting pace based on your condition. They know when to slow down, rest, or hydrate. Ignoring their advice can increase the risk of altitude sickness or exhaustion. Trusting your guide and staying with your group ensures you move at the correct pace and increases your chances of reaching Uhuru Peak safely and successfully.
Frequently Asked Questions (FAQs)
Is the Northern Circuit Route worth it?
Yes, the Northern Circuit Route is absolutely worth it for most climbers. It is the longest and most scenic route on Kilimanjaro, offering a full mountain experience with fewer crowds and better views. It also has the highest summit success rate because of its excellent acclimatization profile. Although it takes more days and costs slightly more, the safety, comfort, and success rate make it one of the best choices for reaching Uhuru Peak.
How long does it take?
The Northern Circuit Route usually takes 8 to 9 days to complete. The 9-day option is more recommended because it allows a slower pace and better acclimatization. The extra day increases comfort and improves the chances of reaching the summit successfully, especially for first-time climbers or those worried about altitude sickness.
Is it good for beginners?
Yes, the Northern Circuit Route is one of the best Kilimanjaro routes for beginners. Even though it is the longest route, the slow ascent makes it safer and easier on the body. Beginners benefit from gradual altitude gain, more rest time, and better adaptation to mountain conditions. With proper preparation and guidance, many first-time climbers successfully reach the summit using this route.
What is the success rate?
The Northern Circuit Route has the highest summit success rate on Kilimanjaro, usually between 85% and 95%. The long itinerary allows climbers to acclimatize properly, which reduces the risk of altitude sickness. The 9-day version typically has a higher success rate than the 8-day option because it provides more time for the body to adjust.
What is the best time to climb?
The best time to climb the Northern Circuit Route is during the dry seasons: January to March and June to October. These months offer clearer skies, better trail conditions, and safer trekking weather. June to October is the most popular season, while January to March is quieter with fewer crowds. The rainy seasons are possible but more challenging due to muddy trails and reduced visibility.
Final Thoughts
The Northern Circuit Route is widely considered the best Kilimanjaro route for climbers who want both high success and unforgettable scenery. It combines a long, gradual ascent with fewer crowds, giving trekkers more time to acclimatize and enjoy the mountain. This slow and steady approach is the main reason it has the highest summit success rate compared to all other routes.
At the same time, the route offers some of the most beautiful and diverse landscapes on Kilimanjaro. From lush rainforest and wide Shira Plateau views to remote northern slopes and the dramatic alpine desert, every day feels different and rewarding. This makes the journey not just a climb to the summit, but a full mountain experience.
For the best results, it is strongly recommended to book with an experienced and trusted local operator. A professional team ensures proper safety, quality equipment, good food, and expert guidance throughout the trek. With the right support and preparation, the Northern Circuit Route becomes one of the most successful and memorable adventures in Africa.
The Rongai Route is one of the quieter and less crowded ways to climb Mount Kilimanjaro. It approaches the mountain from the northern side, near the border with Kenya. The trail offers a more remote and peaceful trekking experience compared to other routes, making it ideal for climbers who prefer solitude and a less busy path to the summit. It is also known for its gradual ascent, which helps with acclimatization.
The Rongai Route starts at Rongai Gate, located on the northern side of Mount Kilimanjaro near the town of Nale Moru. From here, climbers begin hiking through farmland and forest areas before entering the mountain’s higher ecological zones. The route is accessible from Moshi or Arusha, although the journey to the starting point is longer compared to southern routes.
The Rongai Route is unique because it is the only major Kilimanjaro route that approaches the mountain from the north. This side of the mountain is drier and receives less rainfall, which means better trail conditions, especially during wet seasons. The route is also less crowded, offering a more peaceful climbing experience. In addition, it provides a gradual and steady ascent, which improves acclimatization and makes it a good alternative for climbers who want a quieter journey.
The Rongai Route is best for climbers who want a less crowded and more remote trekking experience. It is suitable for beginners as well as experienced hikers who prefer a quieter environment on the mountain. It is also a good choice during the rainy season because the northern side receives less rainfall, making the trail drier and easier to walk. Climbers who value gradual ascent and better acclimatization often choose this route for a safer summit experience.
The Rongai Route is a peaceful and less crowded trail on Mount Kilimanjaro, offering a unique climbing experience from the northern side of the mountain. It is known for its dry conditions, gradual ascent, and remote wilderness feel. Many climbers choose this route because it provides a quieter alternative to the busier southern routes while still offering a full Kilimanjaro summit experience.
Route Distance
The Rongai Route covers approximately 75 kilometers (round trip), depending on the exact itinerary and variations used by different operators. The distance is spread across several days of steady hiking, allowing climbers to gradually gain altitude without very steep sections. This makes the route feel longer but more manageable, especially for climbers who prefer a consistent and less aggressive climb.
Route Duration
The Rongai Route is usually completed in 6 to 7 days. The 6-day option is more direct, while the 7-day itinerary includes an extra acclimatization day, which significantly improves comfort and summit success. The longer version is recommended for beginners or anyone concerned about altitude because it gives the body more time to adjust before reaching higher camps like Kibo Hut.
Difficulty Level
The Rongai Route is considered a moderate-difficulty climb. It is not technical, meaning no climbing skills are required, but altitude remains the main challenge. The gradual slope makes the hike physically easier compared to steeper routes like Machame. However, climbers still need good fitness, mental strength, and proper pacing to handle long hiking days and summit night conditions.
Accommodation Type
Accommodation on the Rongai Route is in tents throughout the entire journey. Climbers stay in designated campsites along the trail, with mountain crews setting up tents, cooking meals, and managing logistics. This camping experience adds to the adventure and allows climbers to feel closer to nature. Conditions are simple but comfortable when proper gear is used.
Summit Success Rate
The Rongai Route has a relatively good summit success rate, especially on the 7-day itinerary. The longer version improves acclimatization and reduces altitude-related issues. The 6-day option has a slightly lower success rate due to faster ascent. Overall, Rongai is considered a solid choice for climbers who want a quieter route with a fair chance of reaching Uhuru Peak when properly prepared.
Why Choose the Rongai Route?
The Rongai Route is a good choice for climbers who want a quieter and more controlled experience on Mount Kilimanjaro. It approaches the mountain from the northern side and follows a steady, less busy path to the summit. The route is simple to follow, has fewer crowds, and offers a different landscape compared to the southern routes. It is often selected by climbers who prefer a calm trekking environment and more predictable trail conditions.
Quiet and Less Crowded Trail
The Rongai Route has fewer climbers compared to routes like Machame and Marangu, so the trail feels open and less congested. This allows climbers to walk at their own pace without frequent stops caused by group traffic. Campsites are also less busy, which makes evenings more relaxed and organized. The quieter environment reduces distractions and gives climbers more time to focus on walking, resting, and preparing for the next day. For people who do not want crowded mountain paths, this route offers a more isolated trekking experience without being technically difficult.
Drier Northern Side of Kilimanjaro
The northern side of Mount Kilimanjaro receives less rainfall than the southern side, so the Rongai Route is generally drier throughout the year. This reduces mud and slippery sections, especially in the forest zone near the start of the climb. Even during wetter months, the trail remains more stable compared to other routes. Dry conditions also make walking easier and reduce the need for constant adjustments in footing. The landscape may look less green than southern routes, but the trail condition is more consistent, which helps with steady progress during the hike.
Gentle and Gradual Ascent
The Rongai Route has a gradual elevation profile, which means the climb increases slowly over several days instead of steep sections. This allows the body more time to adjust to altitude changes. Climbers do not face very sharp climbs in the early stages, which makes the trek feel less physically intense at the start. However, altitude still becomes a challenge in the higher camps, so steady pacing is important. The gradual nature of the route supports better energy management across the climb and helps reduce early fatigue for many trekkers.
Great for First-Time Climbers
The Rongai Route is suitable for first-time climbers who want a simpler and less crowded Kilimanjaro experience. The trail is clear and does not require technical climbing skills, so navigation is straightforward. The steady ascent helps beginners adapt to higher altitude more gradually compared to steeper routes. While the route is not physically easy, it avoids extreme daily elevation jumps in the lower sections. This makes it more manageable for people with basic fitness who prepare well before the climb. Proper pacing and following guide instructions are still necessary for a successful summit attempt.
Rongai Route Map and Trail Profile
The Rongai Route follows a unique path on the northern side of Mount Kilimanjaro, starting near the Kenyan border and ascending toward the summit before descending via the Marangu Route. It is one of the few routes that approaches Kilimanjaro from this direction, which makes its trail profile different from the more popular southern routes. The map shows a steady upward climb through forest, moorland, alpine desert, and finally the arctic summit zone.
Northern Approach Route Explanation
The Rongai Route begins at Rongai Gate on the northern slope of Mount Kilimanjaro. From here, climbers move through farmland and enter a dry forest zone before gradually gaining altitude. Unlike southern routes that are busier and more developed, this path is quieter and more remote. The trail slowly curves around the mountain, heading toward the northeastern side before joining higher camps near Mawenzi Tarn and Kibo Hut. The descent is usually made through the Marangu Route, allowing climbers to experience two different sides of the mountain. This north-to-south traverse provides a wider view of Kilimanjaro’s landscapes and reduces crowding on the way up.
Key Elevation Zones
The Rongai Route passes through several distinct elevation zones, each with changing climate and terrain. The journey starts at about 1,950 meters in the forest zone, where the air is warm and vegetation is dense. As climbers move higher, they enter the moorland zone around 3,000 meters, where the landscape becomes more open with shrubs and giant plants. Around 4,000 meters, the terrain shifts into the alpine desert zone, which is dry, rocky, and exposed to strong sun and cold winds. Near 4,700 meters, Kibo Hut marks the final base before the summit attempt. The final ascent leads to Uhuru Peak at 5,895 meters, where conditions are extreme with low oxygen, freezing temperatures, and volcanic terrain. Each zone requires gradual adjustment, making pacing and acclimatization important throughout the route.
Rongai Route Itinerary
The Rongai Route itinerary follows a steady north-side ascent of Mount Kilimanjaro before joining the summit trail and descending via the Marangu Route. The journey is designed to allow gradual altitude gain, with each day moving into a higher ecological zone. Below is the standard 6-day Rongai Route itinerary used by most operators.
Day 1: Rongai Gate to Simba Camp
The trek begins at Rongai Gate on the northern side of Kilimanjaro. After registration and final preparations, climbers start walking through farmland and into a dry forest zone. The trail is relatively gentle on the first day, allowing the body to adjust to walking at altitude. Wildlife such as colobus monkeys and birds may be seen along the way. The hike takes about 4 to 6 hours before reaching Simba Camp, located near the edge of the forest zone. Here, climbers rest overnight in tents and prepare for higher elevations.
Day 2: Simba Camp to Kikelewa Camp
On the second day, the trail becomes steeper as climbers leave the forest and enter the moorland zone. Vegetation becomes shorter, and views of the mountain open up more clearly. The air becomes cooler and drier as altitude increases. The hike continues steadily toward Kikelewa Camp, passing through rocky paths and open landscapes. This day takes around 6 to 7 hours, and climbers begin to feel the effects of reduced oxygen as they gain height.
Day 3: Kikelewa Camp to Mawenzi Tarn
This is one of the most scenic sections of the Rongai Route. The trail climbs steadily toward Mawenzi Tarn, located at the base of the dramatic Mawenzi Peak. The landscape becomes more rugged and alpine in nature, with fewer plants and more volcanic rock formations. Climbers usually reach camp after 5 to 6 hours of hiking. Mawenzi Tarn offers strong views of both Mawenzi and Kibo peaks, making it an important acclimatization stop.
Day 4: Mawenzi Tarn to Kibo Hut
On this day, climbers cross the saddle area between Mawenzi and Kibo, a wide and barren alpine desert zone. The terrain is dry, rocky, and exposed, with strong sun during the day and cold temperatures. The hike can feel long due to the lack of vegetation and the gradual incline. After 5 to 7 hours, climbers reach Kibo Hut, the final base camp before the summit attempt. Rest is important here as the night ascent begins soon.
Day 5: Kibo Hut to Uhuru Peak and Horombo Camp
The summit attempt begins around midnight. Climbers ascend in darkness toward Gilman’s Point and continue along the crater rim to Uhuru Peak, the highest point in Africa at 5,895 meters. This section is the most physically demanding due to steep slopes, cold temperatures, and low oxygen levels. After reaching the summit, climbers descend back to Kibo Hut for a short rest and continue further down to Horombo Camp for overnight recovery.
Day 6: Horombo Camp to Marangu Gate
The final day is a long descent from Horombo Camp back to Marangu Gate. The trail passes through moorland and rainforest zones as oxygen levels increase and temperatures become warmer. The hike takes about 5 to 7 hours depending on pace. Upon arrival at the gate, climbers receive summit certificates and complete the trek. This marks the end of the Rongai Route journey on Mount Kilimanjaro.
Rongai Route 6 Days vs 7 Days
The Rongai Route can be climbed in either 6 or 7 days, depending on how much time climbers want for acclimatization. Both options follow the same trail, but the 7-day version adds an extra night on the mountain. This difference has a strong impact on comfort, altitude adaptation, and overall summit success. Choosing between the two depends on fitness level, experience, and how well a climber handles high altitude.
Why Add an Extra Acclimatization Day?
The main reason to choose the 7-day Rongai Route is to improve acclimatization. The extra day is usually spent at Mawenzi Tarn or a similar mid-altitude camp, allowing the body more time to adjust to reduced oxygen levels. This follows the “climb high, sleep low” principle, which helps the body adapt more effectively before reaching higher camps like Kibo Hut. The additional rest also reduces fatigue, improves sleep quality, and gives climbers a better chance to recover from early altitude symptoms such as headaches or tiredness. Overall, the extra day makes the climb feel more controlled and less rushed.
Difference in Success Rate
The success rate on the Rongai Route is noticeably higher on the 7-day itinerary compared to the 6-day option. With more time for acclimatization, climbers are better prepared for the summit push and experience fewer altitude-related issues. The 6-day route is still achievable, but it involves faster altitude gain, which can increase the risk of discomfort and early turnbacks. In general, the 7-day version is recommended for first-time climbers or anyone who wants a safer and more gradual ascent, while the 6-day option suits experienced hikers who are confident in their altitude response.
Accommodation on the Rongai Route
Accommodation on the Rongai Route is based on camping throughout the entire climb. Climbers sleep in tents at designated campsites along the trail, which are set up by the mountain crew. This type of accommodation is simple but practical, allowing climbers to stay close to nature while moving steadily up Mount Kilimanjaro. Unlike hut-based routes, Rongai provides a full wilderness camping experience from start to summit.
Mountain Camps Overview
The Rongai Route has several main camps where climbers spend each night during the ascent. The journey begins at Simba Camp, located near the forest zone, where conditions are relatively mild and sheltered. The next stop is Kikelewa Camp, followed by Mawenzi Tarn Camp, which is one of the most scenic camping areas on the route with views of Mawenzi Peak. The final base before the summit is Kibo Hut, where climbers rest and prepare for the midnight ascent. After the summit attempt, climbers usually descend to Horombo Camp on the Marangu Route side before continuing to the final gate. Each camp is positioned at increasing altitude to support gradual acclimatization.
Facilities at Each Camp
Facilities on the Rongai Route are basic but sufficient for a high-altitude trek. Each campsite includes sleeping tents, a dining tent, and a toilet area set up by the support team. Meals are prepared by cooks and served in the dining tent, providing warm food after long hiking days. There are no permanent buildings or luxury services, so comfort depends on the quality of camping equipment and weather conditions. At higher camps like Kibo Hut, temperatures drop significantly, and conditions become more extreme, requiring warm sleeping bags and proper clothing. Despite the simplicity, the setup is designed to support climbers safely throughout the journey.
How Difficult Is the Rongai Route?
The Rongai Route is considered a moderate trekking route on Mount Kilimanjaro. It is not a technical climb, so no climbing skills are required, but it still involves long hiking days, high altitude, and cold conditions near the summit. The route is often seen as slightly easier than steeper southern routes because it has a more gradual ascent, but it still demands good preparation and endurance.
Physical Challenges
The Rongai Route involves steady daily hiking over uneven terrain, including forest paths, rocky slopes, and open alpine ground. Most days take between 4 to 7 hours of walking, which can become tiring over several days. While the incline is not very steep in most sections, the continuous movement at altitude still puts pressure on the body. Carrying a daypack, adjusting to changing temperatures, and walking on rough ground can lead to fatigue. Proper pacing and regular rest breaks are important to manage energy levels throughout the trek.
Altitude Challenges
Altitude is the main difficulty on the Rongai Route. As climbers move above 3,000 meters, oxygen levels begin to drop, and the body must adjust to thinner air. Symptoms such as headaches, shortness of breath, and reduced appetite can appear, especially at higher camps like Mawenzi Tarn and Kibo Hut. Even though the ascent is gradual, altitude still affects every climber differently. The 7-day itinerary helps reduce these effects by allowing more time for acclimatization, which improves comfort and reduces the risk of altitude sickness.
Summit Night Difficulty
Summit night is the most demanding part of the Rongai Route. Climbers begin the final ascent around midnight in freezing temperatures and complete darkness. The trail becomes steep and rocky as they climb toward Gilman’s Point and then Uhuru Peak. Low oxygen levels, cold winds, and physical exhaustion combine to make progress slow and difficult. The climb can take 6 to 8 hours, followed by a long descent back to lower camps. This section requires mental focus, slow movement, and strong determination to complete successfully.
Rongai Route Success Rate
The Rongai Route has a solid success rate compared to many other Kilimanjaro routes because it offers a more gradual ascent and fewer crowds. However, success still depends strongly on the number of days used, physical preparation, and how well climbers adapt to altitude. The longer the itinerary, the higher the chance of reaching Uhuru Peak.
6-Day Success Rate
The 6-day Rongai Route has a moderate success rate because climbers ascend at a faster pace with limited time for full acclimatization. Some trekkers may experience altitude symptoms earlier, especially after Kikelewa Camp and approaching Kibo Hut. While many still reach the summit, the shorter schedule increases physical stress and reduces recovery time between camps. This version is better suited for climbers who already have high-altitude experience or strong fitness levels.
7-Day Success Rate
The 7-day Rongai Route has a higher success rate because it includes an extra acclimatization day, usually at Mawenzi Tarn. This additional time allows the body to adjust more effectively to lower oxygen levels before reaching higher camps. Climbers often feel more stable and less fatigued during summit preparation. The slower ascent reduces altitude sickness risk and improves endurance on summit night, making this option the recommended choice for most climbers.
Key Success Factors
Several factors influence success on the Rongai Route. Acclimatization is the most important, as the body needs time to adjust to altitude changes. A slow and steady pace also plays a major role, as rushing increases fatigue and altitude-related symptoms. Hydration and proper nutrition help maintain energy levels throughout the climb. Following guide instructions is essential, especially during summit night when conditions are most challenging. Good preparation before the trek, including physical training and mental readiness, also improves the chances of reaching Uhuru Peak.
Best Time to Climb the Rongai Route
The best time to climb the Rongai Route depends on weather conditions and visibility on Mount Kilimanjaro. Although the route can be used throughout the year, some months provide more stable weather, clearer skies, and better trail conditions. Choosing the right season helps improve comfort, safety, and overall summit success.
January to March
January to March is a good time to climb the Rongai Route because conditions are generally stable and the mountain is less crowded. The northern side of Kilimanjaro, where Rongai is located, is naturally drier, so even during this period the trail remains more manageable compared to southern routes. Climbers can expect moderate temperatures, especially in lower zones, with colder conditions appearing at higher camps. Visibility is often good, allowing clear views of the mountain landscapes and Mawenzi Peak. Occasional light rain may occur, but it is usually less intense than on other routes.
June to October
June to October is considered the best season for the Rongai Route. During these months, weather conditions are dry, skies are clear, and the trail is in its most stable condition. This makes hiking easier and more predictable, especially in forest and moorland zones. Temperatures are cooler but consistent, and visibility is excellent for most of the climb. Because this is peak trekking season, there may be more climbers on the route, but Rongai is still less crowded compared to southern routes. Overall, this period offers the most reliable conditions for a successful summit attempt.
Rainy Season Conditions
The rainy seasons on Kilimanjaro occur from March to May and again in November. During these months, the Rongai Route is still one of the better options because the northern side receives less rainfall. However, some sections, especially in the lower forest zone, can still become wet and slippery. Cloud cover may reduce visibility at times, and trails can feel heavier due to moisture. Despite these challenges, the route remains accessible, and some climbers prefer this period for its quiet atmosphere. Proper waterproof gear and preparation are essential for safe trekking during the rainy season.
Scenery and Wildlife on the Rongai Route
The Rongai Route offers a changing landscape as climbers move from the lower forest near the Kenyan border up to the high alpine desert near the summit. Because it approaches Kilimanjaro from the drier northern side, the scenery feels more open and less humid compared to southern routes. The route is also known for its quieter environment, giving climbers more time to observe nature and enjoy wide mountain views.
Forest Zone Wildlife
The journey begins in the forest zone near Rongai Gate, where vegetation is thick and green. This area has fewer crowds and a calm atmosphere. Climbers may see wildlife such as colobus monkeys, blue monkeys, and a variety of birds moving through the trees. The forest is less dense compared to the southern side of Kilimanjaro, but it still provides a natural and peaceful start to the trek. The trail is often dry and easier to walk on, especially outside the rainy season, and it slowly climbs upward as the forest begins to thin.
Dry Northern Slopes
As climbers gain altitude, the forest gradually fades into open moorland and dry northern slopes. This section is less humid and more exposed, with fewer trees and more scattered vegetation. The landscape becomes wider, allowing clear views of the mountain and surrounding plains. The air is cooler and drier, and the trail feels more open compared to lower zones. Wildlife becomes less common here, but the peaceful and quiet environment makes it easier to focus on steady walking and acclimatization.
Mawenzi Peak Views
One of the highlights of the Rongai Route is the clear view of Mawenzi Peak. As climbers approach Mawenzi Tarn, the dramatic jagged shape of the peak becomes more visible. This area is considered one of the most scenic camps on the route, offering strong views of both Mawenzi and Kibo peaks. The rocky terrain and high altitude create a more rugged and alpine feeling. The scenery here is open and dramatic, with wide skies and volcanic landscapes that show the scale of Kilimanjaro’s mountain system.
Alpine Desert Zone
Higher up, the route enters the alpine desert zone near Kibo Hut. This area is dry, cold, and almost completely without vegetation. The ground is rocky and volcanic, with strong winds and large temperature changes between day and night. The landscape feels empty but powerful, with wide open space and clear views toward the summit. Oxygen levels are lower here, so movement becomes slower and more deliberate. Despite the harsh conditions, this zone marks the final stage before the summit push and shows the raw environment of high-altitude Kilimanjaro.
Altitude and Acclimatization
Altitude and acclimatization are key factors on the Rongai Route because the climb reaches very high elevations where oxygen levels are low. As climbers move higher on Mount Kilimanjaro, the body must adjust gradually to thinner air. Proper acclimatization reduces the risk of altitude sickness and improves the chances of reaching Uhuru Peak safely.
How the Body Reacts to Altitude
As altitude increases, the air contains less oxygen, and the body begins to work harder to supply oxygen to muscles and organs. Climbers may start to feel symptoms such as headaches, tiredness, shortness of breath, and reduced appetite, especially above 3,000 meters. Sleep can also become lighter or less comfortable at higher camps like Mawenzi Tarn and Kibo Hut. These reactions are normal responses to reduced oxygen, but they show that the body is under stress. Each person reacts differently, so some climbers may feel mild effects while others may experience stronger symptoms.
Importance of Slow Ascent
A slow ascent is one of the most effective ways to improve acclimatization on the Rongai Route. Moving gradually between camps gives the body more time to adapt to changing oxygen levels. The route is already designed with a steady climb, but taking extra time such as choosing the 7-day itinerary further improves adaptation. Walking slowly, resting properly, and avoiding unnecessary physical strain also help the body adjust better. This approach reduces the risk of altitude sickness and makes the overall climb safer and more manageable, especially in the higher sections of the mountain.
Rongai Route vs Marangu Route
The Rongai Route and Marangu Route are two popular ways to climb Mount Kilimanjaro, but they offer very different experiences. Rongai approaches the mountain from the quiet northern side and uses camping, while Marangu follows a more established southern path with hut accommodation. Choosing between them depends on comfort preference, crowd tolerance, and acclimatization needs.
Accommodation Differences
The biggest difference between the two routes is the type of accommodation. The Rongai Route uses camping throughout the entire climb, where climbers sleep in tents set up by the support team at designated campsites. This creates a more basic and outdoor experience close to nature. In contrast, the Marangu Route offers hut accommodation at Mandara, Horombo, and Kibo huts, where climbers sleep in bunk beds inside simple mountain shelters. Marangu is therefore more comfortable in terms of shelter, especially during cold or rainy conditions, while Rongai feels more remote and adventurous.
Crowd Levels
Rongai is generally much quieter than Marangu. Because it starts on the northern side of Kilimanjaro, fewer climbers choose this route, resulting in less crowded trails and camps. This allows for a more peaceful hiking experience with fewer interruptions on the path. Marangu, on the other hand, is one of the most used routes, so it often feels busier, especially during peak seasons. Huts on Marangu can also become crowded because all climbers stay in shared facilities, while Rongai camps are more spread out and less congested.
Success Rate Comparison
Both routes can lead to the summit, but success rates differ depending on itinerary length and acclimatization. Rongai generally has a higher success rate than the 5-day Marangu Route because of its gradual ascent and lower crowd pressure. However, the 6-day or 7-day Rongai option performs better than shorter Marangu climbs. The 6-day Marangu Route improves success rates but still remains slightly more challenging due to faster altitude gain. Overall, Rongai is often preferred for a steadier climb, while Marangu is chosen for comfort, but both require proper pacing and preparation to reach Uhuru Peak successfully.
Rongai Route Cost
The cost of the Rongai Route depends on group size and the number of trekking days. The 7-day Rongai Route is slightly more expensive than the 6-day option because it includes an extra acclimatization day, which improves comfort and summit success. Prices decrease as the group size increases, making group bookings more affordable per person.
What Is Included?
The Rongai Route price includes all essential services required for a Kilimanjaro climb. This covers park entrance fees, camping fees, rescue fees, professional mountain guides, cooks, and porters. Full board meals are provided during the trek, along with safe drinking water. Camping equipment such as tents, dining tents, and sleeping tents for staff are also included. These services ensure climbers are fully supported throughout the journey, allowing focus on trekking and acclimatization.
What Is Excluded?
Some expenses are not included in the standard Rongai Route package. These include international flights, Tanzania visa fees, travel insurance, and hotel accommodation before and after the climb. Personal trekking equipment such as boots, jackets, sleeping bags, trekking poles, and backpacks are also excluded unless rented separately. Tips for guides, cooks, and porters are not included in the package price and are paid at the end of the trek. Personal items like snacks, drinks, and souvenirs are additional costs during the climb.
Price Based on Group Size (7-Day Rongai Route)
The 7-day Rongai Route uses a group-based pricing system where the cost per person decreases as the group size increases:
1 guest: $2,865 per person
2 guests: $2,253 per person
3 guests: $2,048 per person
4 guests: $1,946 per person
5 guests: $1,885 per person
6 guests: $1,844 per person
7 guests: $1,815 per person
8 guests: $1,793 per person
9 guests: $1,776 per person
10+ guests: $1,763 per person
This pricing structure makes group travel more cost-effective. Larger groups benefit from shared logistics, while solo climbers pay a higher rate due to fixed operational costs on the mountain.
Packing for the Rongai Route requires preparation for different weather conditions, from warm forest zones to freezing summit temperatures. Since the route uses camping throughout, climbers must carry gear that ensures warmth, comfort, and protection in remote mountain environments. Proper packing helps reduce discomfort and improves safety during the climb.
Clothing Layers
Layered clothing is essential on the Rongai Route because temperatures change quickly with altitude. A base layer that manages moisture helps keep the body dry during long hikes. A warm mid-layer such as fleece or insulated jackets is needed for cold evenings and higher camps. The outer layer should be waterproof and windproof to protect against rain and strong winds. Thermal clothing is also important for summit night when temperatures drop below freezing. Using layers allows climbers to adjust easily throughout the day depending on weather conditions.
Footwear
Good hiking boots are one of the most important items for the Rongai Route. Boots should be waterproof, well-fitted, and broken in before the climb to avoid blisters. Strong ankle support is important for rocky and uneven terrain. Climbers should also pack warm hiking socks and extra pairs to keep feet dry and comfortable. Camp shoes or sandals are useful for relaxing at camps after long hiking days. Proper footwear helps reduce fatigue and improves stability on different sections of the trail.
Sleeping Gear
Since the Rongai Route is a camping route, a high-quality sleeping bag is necessary. The bag should be rated for cold temperatures, ideally suitable for sub-zero conditions, especially for higher camps like Mawenzi Tarn and Kibo Hut. A sleeping mat is also important for insulation from the cold ground. A sleeping bag liner can provide extra warmth and hygiene. Warm clothing for sleeping is recommended because nights become very cold at higher altitudes. Good sleeping gear ensures better rest, which is important for energy recovery.
Essential Accessories
Several accessories are important for safety and comfort on the Rongai Route. A headlamp is needed for early morning summit attempts and movement around camp at night. Trekking poles help reduce pressure on knees during both ascent and descent. Sunglasses, sunscreen, and lip balm protect against strong sun and wind at high altitude. A reusable water bottle or hydration system is essential for staying hydrated throughout the trek. Gloves, a warm hat, and a neck gaiter help protect against cold temperatures, especially during summit night.
Tips for Reaching the Summit
Reaching Uhuru Peak on the Rongai Route depends on steady pacing, good acclimatization, and following basic mountain rules. The route is not technical, but altitude is the main challenge. Small decisions during the climb can strongly affect whether a climber reaches the summit or turns back early. The following tips help improve safety and increase the chance of success.
Walk Slowly (Pole Pole)
Walking slowly is one of the most important habits on Kilimanjaro. On the Rongai Route, climbers should avoid rushing even on easier sections of the trail. Moving at a steady and controlled pace allows the body to use oxygen more efficiently and reduces fatigue. The local phrase “pole pole,” meaning slowly, is often used by guides because it helps climbers adjust better to altitude. A slow pace also helps conserve energy for summit night, which is the most demanding part of the climb.
Stay Hydrated
Hydration plays a major role in how the body responds to high altitude. Drinking enough water helps reduce symptoms such as headaches, tiredness, and dizziness. On the Rongai Route, climbers should drink small amounts of water regularly throughout the day instead of waiting until they feel thirsty. Warm drinks at camp also help maintain body temperature in cold conditions. Proper hydration supports circulation and helps the body adapt more effectively to lower oxygen levels.
Choose 7-Day Option if Possible
The 7-day Rongai Route is recommended because it includes an extra acclimatization day. This additional time allows the body to adjust more gradually to altitude changes, especially before reaching Kibo Hut and the summit zone. The slower progression reduces stress on the body and improves overall comfort during the climb. Many altitude-related problems are caused by ascending too quickly, so adding one extra day can make a significant difference in summit success rates.
Follow Guide Instructions
Mountain guides play an important role in safety and decision-making during the climb. They monitor climbers for signs of altitude sickness and adjust the pace when necessary. Following their instructions is essential, especially during steep or high-altitude sections. If a guide advises rest, slower movement, or additional precautions, it should be taken seriously. Their experience on the mountain helps prevent unnecessary risks and ensures a safer and more organized climb to the summit.
Frequently Asked Questions
The Rongai Route is often chosen by climbers looking for a quieter and more gradual path to Mount Kilimanjaro’s summit. Below are clear answers to the most common questions travelers ask before booking this route.
Is Rongai Route Easy?
The Rongai Route is considered moderately easy compared to other Kilimanjaro routes, but it is not simple. It has a gradual slope and fewer steep sections, which makes walking more comfortable in the lower and middle zones.
How Long Does It Take?
The Rongai Route usually takes 6 to 7 days to complete. The 6-day option is more direct, while the 7-day itinerary includes an extra acclimatization day. Both routes start at Rongai Gate and end at the summit of Uhuru Peak, followed by descent through the Marangu Route. The longer version is recommended because it gives the body more time to adjust to altitude changes, which improves comfort and success rates.
Is It Good for Beginners?
Yes, the Rongai Route is suitable for beginners who have basic fitness and are prepared for multi-day trekking. The route is less crowded and has a steady ascent, which makes it easier to follow compared to steeper routes.
What Is the Success Rate?
The success rate on the Rongai Route depends mainly on the number of days used. The 7-day itinerary has a higher success rate because of better acclimatization, while the 6-day option has a slightly lower rate due to faster ascent. Overall, Rongai performs well compared to many other routes because of its gradual climb and lower crowd pressure.
Final Thoughts on the Rongai Route
The Rongai Route is a solid choice for climbers who want a quieter and more gradual approach to Mount Kilimanjaro. It offers a different experience compared to the busier southern routes, with fewer crowds, drier conditions, and a steady ascent that supports better acclimatization. The route is straightforward to follow and gives a strong sense of wilderness, especially in the early and middle sections of the climb.
At the same time, it still demands respect because altitude becomes the main challenge as climbers approach higher camps and the summit zone. Success depends on pacing, preparation, and choosing the right itinerary length. The 7-day option is generally more reliable for acclimatization, while the 6-day version suits experienced hikers who are comfortable with faster altitude gain.
Overall, the Rongai Route is best for climbers who prefer a calm, less crowded trekking experience without technical difficulty. It may not be the most scenic route in every section, but it provides a stable and manageable path to Uhuru Peak when approached with the right preparation and mindset.
The Marangu Route is a 5- or 6-day Kilimanjaro trek to Uhuru Peak, 5,895 meters above sea level. It is the only Kilimanjaro route that uses permanent mountain huts instead of tents, with the trail starting at Marangu Gate on the mountain’s southeastern side. Known as the “Coca-Cola Route,” Marangu follows a gradual trail through rainforest, moorland, and alpine desert before reaching the summit.
The main challenge on Marangu is altitude, not technical climbing. The 5-day itinerary gives your body less time to adjust to the increasing elevation, while the 6-day itinerary adds an acclimatization day at Horombo Hut before continuing toward Kibo and the summit. For this reason, the extra day changes the pace and acclimatization profile of the climb.
This guide explains the 5-day and 6-day Marangu Route, including the itinerary, distance, elevation, huts, difficulty, acclimatization, summit day, best time to climb, costs, packing requirements, and what to expect on the mountain with WeWild Travel.
Location: Southeastern side of Mount Kilimanjaro, Tanzania
Duration: 5 or 6 days
Distance: Approximately 64-72 km (40-45 miles) round trip
Starting Elevation: Marangu Gate at about 1,870 m (6,135 ft)
Summit Elevation: Uhuru Peak at 5,895 m (19,341 ft)
Accommodation: Permanent communal mountain huts
Difficulty: Moderate overall, with altitude as the main challenge
Main Camps: Mandara Hut, Horombo Hut, and Kibo Hut
Nickname: The “Coca-Cola Route”
Descent Route: The same Marangu trail used during the ascent
What Is the Marangu Route?
The Marangu Route is a well-established trekking route on Mount Kilimanjaro that approaches Uhuru Peak from the southeastern side of the mountain. It begins at Marangu Gate and follows a gradual trail through several of Kilimanjaro’s natural zones before reaching the summit at 5,895 meters.
Unlike other Kilimanjaro routes, Marangu provides permanent mountain huts for overnight accommodation, so climbers do not need to sleep in tents. The route passes through rainforest, moorland, alpine desert, and the high-altitude summit zone, with key overnight stops at Mandara Hut, Horombo Hut, and Kibo Hut.
Marangu uses one trail for both the ascent and descent, meaning you return along the same path after reaching the summit. The route offers 5-day and 6-day itineraries, with the extra day on the 6-day option providing more time for acclimatization at Horombo.
Why Is Marangu Called the Coca-Cola Route?
The Marangu Route is known as the “Coca-Cola Route” because climbers traditionally found bottled soft drinks, including Coca-Cola, at huts and stops along the trail. The nickname also became associated with Marangu’s established huts, gradual trail, and straightforward trekking experience compared with more rugged camping routes.
The name is now widely used by climbers and tour operators, but Marangu is still a serious high-altitude trek. The route reaches Uhuru Peak at 5,895 meters, so altitude remains the main challenge regardless of its nickname.
Marangu Route 5-Day Itinerary
The 5-day Marangu Route takes you from Marangu Gate to Uhuru Peak and back through the same trail, with overnight stays in mountain huts. The itinerary moves from rainforest to moorland, alpine desert, and the high-altitude summit zone before descending to the gate.
Day 1: Marangu Gate to Mandara Hut
Starting elevation: 1,870 m
Mandara Hut: 2,700 m
Distance: About 8 km
Hiking time: 4-5 hours
Habitat: Montane rainforest
Your climb begins at Marangu Gate, where your team completes park registration before starting the hike. The trail enters the lush rainforest and gradually climbs toward Mandara Hut. The forest is dense and humid, with opportunities to see birds and wildlife along the trail.
Overnight: Mandara Hut.
Day 2: Mandara Hut to Horombo Hut
Starting elevation: 2,700 m
Horombo Hut: 3,720 m
Distance: About 12 km
Hiking time: 5-6 hours
Habitat: Moorland
The trail leaves the rainforest and opens into moorland, with wider views of Kilimanjaro’s slopes. You continue at a steady pace toward Horombo Hut, where you spend the night at higher elevation.
Overnight: Horombo Hut.
Day 3: Horombo Hut to Kibo Hut
Starting elevation: 3,720 m
Kibo Hut: 4,703 m
Distance: About 9-10 km
Hiking time: 5-7 hours
Habitat: Alpine desert
The landscape becomes drier as you leave Horombo and cross the Saddle, the broad alpine area between Mawenzi and Kibo. Vegetation becomes sparse as you gain altitude. At Kibo Hut, you rest and prepare for the summit attempt.
Overnight: Kibo Hut.
Day 4: Kibo Hut to Uhuru Peak and Horombo Hut
Kibo Hut: 4,703 m
Uhuru Peak: 5,895 m
Distance: About 22 km total
Hiking time: 11-14 hours
Habitat: Alpine desert to summit zone
This is the hardest day of the 5-day Marangu Route. You normally start around midnight and climb toward Gilman’s Point at 5,685 m, then continue along the crater rim toward Uhuru Peak at 5,895 m.
After reaching the summit, you descend to Kibo Hut for a short rest before continuing down to Horombo Hut. The long ascent and descent make this a demanding day, especially at high altitude.
Overnight: Horombo Hut.
Day 5: Horombo Hut to Marangu Gate
Starting elevation: 3,720 m
Marangu Gate: About 1,870 m
Distance: About 18-20 km
Hiking time: 5-7 hours
Habitat: Moorland to rainforest
The final day follows the trail downhill from Horombo through the moorland and back into the rainforest. At Marangu Gate, you complete the park formalities and finish your Kilimanjaro climb before transferring back to your hotel.
5-Day Marangu Route at a Glance
Marangu Gate to Mandara to Horombo to Kibo to Uhuru Peak to Horombo to Marangu Gate
The key thing to understand is that the 5-day itinerary has no dedicated acclimatization day. You climb from 1,870 m to 5,895 m within a short schedule, making altitude management especially important.
The 6-day Marangu Route adds an acclimatization day at Horombo Hut, giving you more time to adjust to the increasing altitude before the summit attempt. You sleep in permanent mountain huts throughout the trek and follow the same trail back down after reaching Uhuru Peak.
Day 1: Marangu Gate to Mandara Hut
Starting elevation: 1,860 m
Mandara Hut: 2,720 m
Distance: 8 km
Hiking time: 4-5 hours
Habitat: Tropical rainforest
After registration at Marangu Gate, you begin your climb through the lush rainforest. The trail gradually gains elevation as you approach Mandara Hut, your first overnight stop.
Overnight: Mandara Hut.
Day 2: Mandara Hut to Horombo Hut
Starting elevation: 2,720 m
Horombo Hut: 3,720 m
Distance: 12 km
Hiking time: 5-7 hours
Habitat: Moorland and heath
The trail gradually leaves the forest and enters open moorland and heath. As you climb, views of Mawenzi and Kibo become more prominent. You continue to Horombo Hut, where you spend the night.
Overnight: Horombo Hut.
Day 3: Horombo Acclimatization Day
Elevation: 3,720 m to around 4,400 m and back
Distance: About 5 km
Hiking time: 2-3 hours
Purpose: Acclimatization
Today gives your body extra time to adjust to the altitude. You hike toward Mawenzi Ridge, gaining elevation before returning to Horombo Hut. After the hike, you have time to rest, eat, and prepare for the next stages of the climb.
Overnight: Horombo Hut.
Day 4: Horombo Hut to Kibo Hut
Starting elevation: 3,720 m
Kibo Hut: About 4,720 m
Distance: 10 km
Hiking time: 5-6 hours
Habitat: Alpine desert
You leave Horombo and cross the Saddle, the open alpine area between Mawenzi and Kibo. Vegetation becomes increasingly sparse as you approach Kibo Hut. After arriving, you rest and prepare for the summit attempt, which starts during the night.
Overnight: Kibo Hut.
Day 5: Kibo Hut to Uhuru Peak and Horombo Hut
Kibo Hut: About 4,720 m
Uhuru Peak: 5,895 m
Distance: About 22 km total
Hiking time: 10–13 hours
Route: Kibo to Gilman’s Point to Uhuru Peak to Kibo to Horombo
You start around midnight and climb toward Gilman’s Point on the crater rim. From there, you continue toward Uhuru Peak, the highest point in Africa at 5,895 m.
After reaching the summit, you descend to Kibo Hut for a short rest before continuing down to Horombo Hut. This is the longest and most demanding day of the itinerary because of the altitude, steep summit section, and long descent.
Overnight: Horombo Hut.
Day 6: Horombo Hut to Marangu Gate
Starting elevation: 3,720 m
Marangu Gate: 1,860 m
Distance: About 20 km
Hiking time: 5-7 hours
Habitat: Moorland and rainforest
Your final day takes you downhill through the moorland and rainforest to Marangu Gate. After completing the park exit procedures, you finish your Kilimanjaro climb and transfer back to your hotel.
6-Day Marangu Route at a Glance
Marangu Gate to Mandara to Horombo to Horombo acclimatization to Kibo to Uhuru Peak to Horombo to Marangu Gate
The Marangu Route covers approximately 64-72 km (40-45 miles) round trip, depending on the itinerary and the route measurements used. The trail starts at around 1,870 m at Marangu Gate and climbs to Uhuru Peak at 5,895 m.
The biggest elevation gains happen in stages rather than all at once:
Marangu Gate to Mandara Hut: 1,870 m to 2,700 m. The trail climbs steadily through the rainforest.
Mandara to Horombo Hut: 2,700 m to 3,720 m. This is another significant gain as you move into the moorland.
Horombo to Kibo Hut: 3,720 m to about 4,703 m. The trail crosses the Saddle into the alpine desert, with less vegetation and thinner air.
Kibo Hut to Uhuru Peak: about 4,703 m to 5,895 m. This is the most demanding elevation gain, especially because you make it during the night and climb on steep, rocky terrain toward Gilman’s Point before continuing to Uhuru Peak.
Marangu Route Camps and Huts
The Marangu Route uses three main mountain huts: Mandara Hut, Horombo Hut, and Kibo Hut. Each hut gives you a different experience as you move from the rainforest toward the summit.
Mandara Hut – 2,700 m
Mandara Hut is the first overnight stop, reached after hiking through Kilimanjaro’s rainforest from Marangu Gate. The huts provide shared sleeping accommodation, so you do not need to sleep in a tent.
After arriving, you can rest, eat, and enjoy the surrounding forest before the next day’s climb toward Horombo.
Horombo Hut – 3,720 m
Horombo Hut is where you spend the most time on the 6-day itinerary. You stay here after hiking from Mandara and return here after the summit.
On the 6-day route, Horombo also serves as the acclimatization base. You spend an extra day hiking to higher elevation and returning to Horombo to sleep, giving your body more time to adjust before you continue toward Kibo.
Kibo Hut – 4,703 m
Kibo Hut is the final overnight stop before the summit. It sits in the alpine desert between Mawenzi and Kibo, where the landscape becomes dry, rocky, and much colder.
You arrive here on the afternoon before summit night. After an early meal and a short rest, you prepare for the midnight summit attempt toward Gilman’s Point and Uhuru Peak.
What to Expect in the Huts
Expect shared mountain-hut accommodation rather than private hotel-style rooms. The huts provide a place to sleep, eat, and rest between hiking days, but conditions become more basic as you climb higher.
The important difference is that Marangu gives you hut accommodation throughout the route, while most other Kilimanjaro routes use tents.
How Difficult Is the Marangu Route?
The Marangu Route is physically manageable for regular hikers, but the high altitude and demanding summit night make it a serious trek. The difficulty comes from three different challenges.
Physical Difficulty
The trail has a gradual profile for much of the ascent, so you do not need technical climbing skills. However, you still walk several hours each day, with longer distances on the summit and descent days.
The final approach to Kibo becomes steeper and more demanding. Good walking fitness helps you handle the daily distances, uneven ground, and long summit day.
Altitude Difficulty
Altitude is the main challenge on Marangu. The route climbs from about 1,870 m at Marangu Gate to 5,895 m at Uhuru Peak, where the air contains much less available oxygen.
The 5-day itinerary gives less time to acclimatize because it moves from Horombo toward Kibo without a dedicated acclimatization day. The 6-day itinerary adds a day at Horombo, allowing you to hike higher and return to sleep lower before continuing upward.
Common altitude symptoms can include headache, nausea, tiredness, dizziness, and loss of appetite. Your guide should monitor how you feel and respond appropriately if symptoms become serious.
Summit-Night Difficulty
Summit night is the hardest part of the Marangu Route. You normally leave Kibo Hut around midnight and climb through the darkness toward Gilman’s Point before continuing along the crater rim to Uhuru Peak.
The combination of steep terrain, cold temperatures, darkness, limited oxygen, and several hours of continuous hiking makes the summit push demanding even for fit trekkers.
After reaching Uhuru Peak, you still have a long descent to Kibo and then Horombo. This makes summit day a test of endurance, pacing, hydration, and altitude management, not simply fitness.
Marangu Route Success Rate
There is no reliable official percentage for the Marangu Route success rate that applies to every climber. Summit success depends on factors such as the itinerary, acclimatization, fitness, weather, altitude response, pacing, and guide support. For this reason, a single percentage can give a misleading picture of your chances.
The main difference is between the 5-day and 6-day Marangu Route. The 5-day itinerary moves from Marangu Gate to the summit with less time for your body to adjust to altitude. The 6-day itinerary adds an acclimatization day at Horombo, where you climb to a higher elevation and return to sleep lower. This gives your body more time to adapt before the summit attempt.
Why the 6-Day Route Can Have Better Outcomes
The extra day does not guarantee that you will reach Uhuru Peak, but it improves the acclimatization profile of the climb. Your body gets more time at altitude before the demanding summit night.
Other factors also affect the outcome:
Acclimatization: Gradual altitude gain gives your body more time to adjust.
Pacing: Walking slowly helps conserve energy and manage altitude.
Altitude response: People react differently to high altitude.
Fitness: Good endurance helps with long hiking days and summit night.
Guide support: Experienced guides can monitor symptoms and adjust the pace when necessary.
Weather and trail conditions: Cold, rain, wind, and poor visibility can make the trek harder.
Summit preparation: Resting properly at Kibo before the midnight summit attempt matters.
Marangu Route Success Rate
The Marangu Route does not have one official success rate for every climber. Results vary because operators use different groups, trip lengths, and ways of measuring summit success.
The 5-day route gives less time for acclimatization, while the 6-day route adds an acclimatization day at Horombo before the summit attempt. This extra time can help your body adjust to altitude.
However, more days do not guarantee reaching Uhuru Peak. Your response to altitude, preparation, pacing, rest, and overall condition also affect your summit attempt.
At WeWild Travel, we focus on proper acclimatization, steady pacing, daily monitoring, and safe decisions rather than promising a fixed success percentage.
Altitude and Acclimatization
Altitude is one of the biggest challenges on the Marangu Route. You start at Marangu Gate at about 1,860 m, then climb to Horombo Hut at around 3,720 m and Kibo Hut at about 4,703 m. The summit, Uhuru Peak, stands at 5,895 m.
As you climb higher, the air contains less available oxygen, so your body needs time to adjust. Some climbers may experience headache, nausea, dizziness, tiredness, or loss of appetite. These symptoms can become serious if they worsen.
A slow and steady pace gives your body more time to adapt. Drink regularly, rest when needed, and avoid pushing yourself when you feel unwell.
The 6-day Marangu Route adds an acclimatization day at Horombo. You can hike toward Mawenzi Ridge and return to Horombo to sleep at the same altitude. This extra day gives your body more time to adjust before summit night.
Your mountain guide should monitor how you feel throughout the climb. If altitude symptoms become severe or continue to worsen, descent may become necessary. Reaching the summit matters, but getting down safely matters more.
Marangu Route Scenery and Wildlife
The Marangu Route takes you through several distinct landscapes as you climb higher. You begin on the cultivated lower slopes before entering the montane rainforest, where tall trees, moss and dense vegetation surround the trail. The forest also provides habitat for black-and-white colobus monkeys, blue monkeys and forest duikers, although wildlife sightings are never guaranteed. (Tanzania Parks)
Around Mandara Hut, the forest starts to open into higher vegetation. From Horombo, the landscape changes again to moorland, with giant lobelias and senecios adding a distinctive Kilimanjaro character. You also get clearer views toward the rugged peaks of Mawenzi.
Above Horombo, vegetation becomes much thinner as you cross the Kibo-Mawenzi Saddle. The trail reaches an alpine desert with open volcanic terrain and very little shelter. Near Kibo, the landscape feels completely different from the green forest below.
The final section leads toward Uhuru Peak, where the scenery becomes rocky, cold and exposed. At the summit, you can look across Kibo’s volcanic landscape and, when conditions allow, see the surrounding plains and clouds far below.
Best Time to Climb the Marangu Route
The best time to climb the Marangu Route is during the drier months from January to mid-March and June to October. These periods usually offer better trail conditions, clearer views, and more comfortable trekking weather.
January to mid-March: This period offers warm conditions and generally good visibility. You may still experience some rain in the rainforest, but the route often feels quieter than during the main mid-year season.
June to October: These months bring generally drier conditions and good visibility. July and August are popular, so expect more climbers on the trail and busier huts.
April and May: These months fall within the long-rain period. Rain can make the lower trail wet and slippery, while clouds can reduce mountain views.
November to December: The short rains can bring wet sections and changing weather, although conditions can vary from day to day.
For Marangu, the weather matters because you sleep in mountain huts rather than tents. The huts provide shelter, but good timing still helps you enjoy the trail and summit attempt.
Marangu Route Cost
The cost of climbing the Marangu Route depends mainly on the number of days, group size, and services included in your package. A 5-day climb normally costs less than a 6-day climb because the 6-day itinerary includes an additional mountain day.
For an accurate price, WeWild Travel should show the current 5-day and 6-day prices directly on the page rather than using a general industry estimate.
What Your Marangu Price Should Include
A complete WeWild package can include:
Kilimanjaro National Park fees
Mountain hut accommodation
Professional mountain guides
Porters and cook
Meals during the trek
Drinking water
Rescue and park-related fees
Airport or hotel transfers, if included in your package
Pre-climb briefing
Extra Costs to Plan For
Your personal budget may also need to cover:
International flights
Visa
Travel insurance
Personal mountain equipment
Equipment rental, if needed
Tips for the mountain crew
Hotel nights before or after the climb
Personal expenses
Important: The cheapest Marangu package is not always the easiest price to understand. Before booking, check exactly what the operator includes, what you pay separately, and whether the quoted price covers the full trek.
What to Pack for Marangu
Marangu is different from most Kilimanjaro routes because you sleep in mountain huts instead of tents. However, you still need a proper sleeping bag, warm clothing, and reliable hiking gear because temperatures can drop sharply at higher elevations.
Clothing
Pack clothes that you can layer as temperatures change. Bring moisture-wicking base layers, hiking trousers, a fleece or warm mid-layer, a waterproof jacket and trousers, warm gloves, a hat, and comfortable hiking socks. For summit night, pack extra warm layers because temperatures can fall below freezing.
Sleeping
Although Marangu provides hut accommodation, you still need your own warm sleeping bag suitable for cold mountain conditions. A sleeping bag liner can add warmth and make the hut sleeping setup more comfortable. You do not need to carry a tent.
Hiking Gear
Bring comfortable, broken-in hiking boots with good grip. You should also have trekking poles, a headlamp with spare batteries, a water bottle or hydration system, sunglasses, sunscreen, and a small backpack for daily essentials. A waterproof cover or dry bags can protect your belongings from rain.
Health and Personal Items
Pack personal medication, basic first-aid supplies, lip balm, toiletries, hand sanitizer, tissues, and any altitude-related medication prescribed by your doctor. Sunscreen and sunglasses remain important even when the weather feels cold.
Documents and Electronics
Keep your passport, Tanzania visa, travel insurance details, emergency contacts, and other important documents in a waterproof pouch. For electronics, bring your phone, charging cables, a power bank, and a camera if you want to take photos. Power availability at mountain huts can be limited, so charge your devices before starting the trek.
Daypack Essentials
Your daypack should carry the items you may need while walking: water, snacks, rain jacket, sunscreen, sunglasses, phone, camera, tissues, and an extra warm layer. Keep heavier luggage with the mountain crew when your package includes porter support.
The goal is to pack for changing mountain conditions, not to bring everything you own. Choose reliable equipment, keep your daypack manageable, and make sure your most important items stay easy to reach.
Marangu vs Machame
Marangu and Machame are two established routes up Mount Kilimanjaro, but they provide different trekking experiences. The main differences involve accommodation, route shape, scenery, duration, and acclimatization opportunities.
Feature
Marangu
Machame
Accommodation
Huts
Camping
Typical duration
5-6 days
6-7+ days
Route profile
Out-and-back
More varied route
Scenery
Forest, moorland, alpine desert
Forest, moorland, alpine terrain
Summit approach
Kibo
Barafu
Descent
Marangu
Mweka
Camping required
No
Yes
Acclimatization options
More limited on 5-day
Depends on itinerary
Main consideration
Hut comfort + altitude
Camping + longer route
Accommodation
Marangu uses mountain huts, so climbers sleep indoors each night. Machame uses tents, meaning climbers need to be comfortable with camping at different elevations and in changing mountain weather.
Route Profile
Marangu follows the same general trail for the ascent and descent. Machame takes a different descent route, creating a more varied overall trekking circuit.
Duration and Acclimatization
Marangu commonly takes 5 or 6 days. The 6-day option adds an acclimatization day at Horombo. Machame commonly takes 6 or 7 days or longer, depending on the itinerary and operator. The extra days can provide additional time for gradual acclimatization.
Scenery
Both routes pass through Kilimanjaro’s major vegetation zones, including rainforest, moorland, and higher alpine terrain. Machame follows a more varied trail, while Marangu provides a more direct route toward Kibo.
Summit and Descent
Marangu climbers normally approach the summit from Kibo Hut and descend through the Marangu route. Machame climbers usually spend the final night before the summit at Barafu Camp and descend through Mweka.
The choice therefore comes down to the experience you want: hut accommodation and a more direct route with Marangu, or camping and a more varied route with Machame.
A WeWild Marangu climb includes the main services you need from the start of the trek to your return from the mountain. Because Marangu uses mountain huts, your package includes hut accommodation rather than camping. WeWild also provides a professional mountain crew, meals, drinking water, park fees, transport, and mountain safety support.
Professional Mountain Guide
A professional mountain guide leads your climb, manages the daily route, supports your pace, and monitors your condition as you gain altitude. WeWild lists professional guides licensed by Kilimanjaro National Park as part of its climbing packages.
Porters
Porters support the expedition by carrying group equipment, food, and other mountain supplies. This allows you to focus on walking with a manageable daypack.
Cook and Meals
Your mountain food is prepared by the climbing crew. The package includes breakfast, lunch, and dinner during the trek, along with drinking water.
Kilimanjaro National Park Fees
The package includes the required Kilimanjaro National Park fees applicable to the climb, including the official mountain charges listed by WeWild.
Mountain Hut Accommodation
Marangu is the only Kilimanjaro route that uses mountain huts throughout the main trekking itinerary. WeWild includes hut accommodation at the route’s mountain stops rather than tent camping.
Rescue and Safety Support
WeWild includes the required mountain rescue fees and provides emergency safety support. Its wider Kilimanjaro package information also lists emergency oxygen, first-aid equipment, and health monitoring as part of its mountain support.
Transportation
Transportation to and from the Kilimanjaro trailhead forms part of WeWild’s listed climbing services. Airport and hotel transfers can also be included depending on the selected package.
Pre-Climb Briefing
Before starting the trek, WeWild provides pre-trek preparation and route briefing. This gives you an opportunity to review the itinerary, equipment, and important preparations before entering the mountain.
Equipment Support
WeWild provides the mountain equipment required for the expedition, while personal climbing equipment and clothing remain the climber’s responsibility. Equipment rental may be available when needed, depending on the package.
Before booking, check the exact 5-day or 6-day package with WeWild Travel because individual inclusions can vary by itinerary and package. This helps you understand exactly what your quoted price covers before you travel.
Why Climb Marangu With WeWild Travel?
Choosing a Marangu operator is not only about the price. You also want to know how the company communicates before the trek, organizes the mountain team, monitors your condition, and handles the practical details of the climb.
Pre-Climb Communication
WeWild provides preparation support before you reach the mountain. You can discuss the itinerary, packing requirements, arrival arrangements, and equipment before the trek. A pre-climb briefing helps you understand the route, daily hiking plan, safety procedures, and what to expect on the mountain.
Experienced Mountain Team
Your Marangu climb is supported by professional mountain guides, porters, and cooks. The guide leads the trek and manages the group, while the support crew handles food, supplies, and other mountain logistics.
Daily Health Monitoring
Altitude requires attention throughout the climb. WeWild describes daily health monitoring, including oxygen saturation checks and monitoring how climbers respond to altitude. Your guide can adjust the pace, recommend rest, or arrange a descent when a climber’s condition requires it.
Food and Hut Organization
Marangu uses mountain huts instead of tents. WeWild organizes the mountain accommodation, meals, drinking water, and crew support needed during the trek. This lets you focus on walking rather than managing the daily mountain logistics yourself.
Safety Procedures
WeWild includes mountain safety and emergency support in its Kilimanjaro services. Its published climbing information also lists rescue fees, medical kits, oxygen and oximeters as part of its mountain safety arrangements.
Porter Welfare
The mountain crew plays an important role in every organized climb. WeWild publishes information about responsible porter treatment, including reasonable loads, food and water, suitable equipment, safe sleeping conditions, and fair working practices.
Airport and Hotel Coordination
WeWild can coordinate transportation between Kilimanjaro International Airport, your hotel, and the mountain trailhead when those services form part of your selected package. The team also handles the practical preparation at the route gate before the trek begins.
Post-Climb Support
Your support does not necessarily end when you reach Uhuru Peak. Depending on your package, WeWild can arrange the return transfer and any included hotel accommodation after the climb. Check your specific quotation to confirm exactly what your package covers.
The main difference is the organization behind the trek. With WeWild, the aim is to keep communication, mountain logistics, health monitoring, crew support, and safety arrangements connected from your preparation in Tanzania through your return from Kilimanjaro.
Frequently Asked Questions
Is Marangu Route suitable for beginners?
Yes. Marangu has a gradual trail in many sections and hut accommodation, which can make it practical for first-time Kilimanjaro climbers. Altitude remains the main challenge.
Is Marangu Route the easiest route on Kilimanjaro?
Marangu is often considered one of the more straightforward routes because of its established trail and huts. However, reaching 5,895 m still requires good preparation and acclimatization.
Is 5 days enough for Marangu?
Five days is the shortest standard itinerary, but it gives you less time to acclimatize. Your response to altitude can strongly affect the climb.
Is 6 days better for acclimatization?
The 6-day itinerary adds an acclimatization day at Horombo, with a hike toward Mawenzi Ridge before returning to the hut.
Do you sleep in huts on Marangu?
Yes. Marangu uses mountain huts instead of tents throughout the main route.
How far do you walk each day?
Daily distances vary by itinerary. Most days involve several hours of walking, while summit day is considerably longer.
How difficult is summit night?
Summit night is the toughest part for many climbers because you walk for hours in darkness, cold temperatures, and high altitude.
Can I climb Marangu without camping?
Yes. Marangu is the only Kilimanjaro route that uses huts rather than camping throughout the trek.
What is the best month for Marangu Route?
January to mid-March and June to October generally offer better climbing conditions, although weather can change quickly.
How much does the Marangu Route cost?
The price depends on the number of days, group size, and services included. Ask WeWild for the current 5-day or 6-day quotation.
What is the difference between Marangu and Machame?
Marangu uses huts and follows an out-and-back route. Machame uses tents and follows a more varied route with a different descent.
What happens if I get altitude sickness?
Your guide should assess your symptoms and monitor your condition. Serious or worsening symptoms may require immediate descent rather than continuing toward the summit.
Conclusion
The Marangu Route offers a different way to climb Mount Kilimanjaro, with mountain huts, a direct trail, and a 5 or 6-day itinerary. The 5-day option gives you a shorter schedule, while the 6-day route adds an acclimatization day at Horombo before the summit attempt.
Although Marangu has hut accommodation, reaching Uhuru Peak at 5,895 metres still requires preparation, suitable equipment, and careful attention to altitude. Your pace, physical condition, acclimatization, and guide support all matter during the climb.
If you are considering Marangu, start by choosing the itinerary that matches your available time and altitude experience. WeWild Travel can help you prepare your climb, organize the mountain crew, arrange the required logistics, and support you throughout the trek.
Ready to plan your Marangu climb? Contact WeWild Travel to discuss your dates, itinerary, and current package price.
Machame Route Kilimanjaro: Complete Guide to the Whiskey Route
Estimated reading time: 28 minutes
The Machame Route is a 6- or 7-day Kilimanjaro climb that leads from the southern slopes of Mount Kilimanjaro to Uhuru Peak at 5,895 meters. It combines demanding hiking, dramatic mountain scenery and several different landscapes, making it one of the most varied routes on the mountain.
The climb begins at Machame Gate in the rainforest and gradually moves through moorland, the Shira Plateau and high-altitude volcanic terrain. Along the way, you cross Lava Tower, climb the Barranco Wall and pass Karanga before reaching Barafu Camp, where you prepare for the summit attempt.
Choosing between 6 days and 7 days is an important part of planning your climb. The 6-day itinerary covers the route in less time, while the 7-day itinerary spreads the trek over an additional day. That extra time gives your body more opportunity to adjust to increasing altitude before summit night.
Machame is not a technical climb, but it is physically demanding. You will walk for several hours each day, sleep at increasing elevations and face a long summit night. Good preparation, a steady pace and proper acclimatization can make a major difference on the mountain.
This complete Machame Route guide explains exactly what to expect, including the 6-day and 7-day itineraries, distance, elevation, difficulty, acclimatization, Barranco Wall, camps, scenery, costs, best time to climb, packing requirements and summit night. We also explain the practical differences between the two itineraries so you can plan your climb with a clear understanding of what lies ahead.
The Machame Route is one of Kilimanjaro’s most scenic trekking routes, combining rainforest, high moorland, alpine desert, and the final climb to Uhuru Peak. Most climbers choose a 6- or 7-day itinerary, with the longer option giving more time to adjust to the altitude.
Quick Fact
Machame Route
Mountain
Mount Kilimanjaro
Route
Machame Route
Typical duration
6 or 7 days
Distance
About 62 km (38 miles), depending on the itinerary
Starting point
Machame Gate
Summit
Uhuru Peak, 5,895 m (19,341 ft)
Descent route
Mweka Route
Accommodation
Mountain camping
Difficulty
Challenging
Highest camp
Barafu Camp
Key feature
Great Barranco Wall
Best for
Trekkers who want a scenic route with a gradual approach to the summit
What Makes Machame Different?
Machame stands out for its changing landscapes and varied trail. You start in the lush rainforest and gradually move through moorland and high-altitude terrain before reaching the summit zone. The route also follows a climb-high, sleep-lower pattern on several days, which supports acclimatization.
The route uses tents rather than mountain huts, so camping is part of the experience from the first night on the mountain.
The 7-day Machame Route gives you an additional acclimatization day compared with the 6-day option. If you have enough time, this longer itinerary can provide a more gradual experience on the mountain.
Machame is also known for the Great Barranco Wall, a steep section that requires careful footing and some scrambling but does not normally require technical climbing equipment.
If you are comparing Machame with other Kilimanjaro routes, the right choice depends on your available days, hiking experience, preferred scenery, camping expectations, and approach to altitude.
What Is the Machame Route?
The Machame Route is a trekking route that approaches the summit of Mount Kilimanjaro from the mountain’s southern side. It starts at Machame Gate and takes climbers through rainforest, moorland, alpine desert, and high-altitude terrain before reaching Uhuru Peak, the highest point in Africa.
The route is known for its changing landscapes and challenging trail. Unlike the Marangu Route, which uses mountain huts, Machame uses tented camps throughout the trek. The trail also includes the famous Barranco Wall, where climbers tackle a steep but non-technical section of the route.
Machame usually takes 6 or 7 days, although longer itineraries can give trekkers more time for acclimatization. The route follows a varied elevation profile, allowing climbers to gain altitude gradually before the final summit attempt.
After reaching Uhuru Peak, climbers descend through the Mweka Route, creating a different experience on the way down.
For trekkers who want a route with varied scenery, mountain camping, and a challenging approach to the summit, Machame offers one of the most established ways to climb Kilimanjaro.
Why Is Machame Called the Whiskey Route?
Machame is often known as the “Whiskey Route”, a nickname that reflects the route’s more rugged trekking character compared with the Marangu Route, commonly called the “Coca-Cola Route.” The names are informal nicknames rather than official route names.
Why the Name Stuck
The comparison comes from the different experiences these two routes traditionally offer. Marangu uses permanent mountain huts and follows a relatively direct trail, while Machame involves tented camping, steeper sections, and more varied terrain.
The “Whiskey” nickname therefore became a simple way to describe Machame as the more demanding and adventurous option. It does not mean that climbers need technical climbing skills or that the route involves alcohol. The name simply describes the character people associate with the trail.
Machame also has several sections that make the trek feel more challenging, including the Barranco Wall, rocky paths, and repeated changes in elevation. Climbers need to walk steadily and manage their energy throughout the route.
Today, the Whiskey Route name remains widely used by guides, climbers, and Kilimanjaro operators. If you see “Whiskey Route” when researching Kilimanjaro, it refers to the Machame Route.
How Difficult Is the Machame Route?
The Machame Route is a challenging Kilimanjaro trek. It does not require technical climbing skills, but you need good stamina, steady walking ability, and enough time to adjust to high altitude. The trail includes long hiking days, steep sections, uneven ground, and a demanding summit night.
Physical Difficulty
Machame becomes harder as you gain elevation. The trail starts gently through the rainforest, then becomes steeper and more rocky as you move toward the higher camps. Some days involve several hours of walking, while summit day requires a long night of hiking followed by a descent.
You do not need to be an experienced mountaineer. Regular hiking, walking, and endurance training can help you prepare for the demands of the route.
Altitude and Acclimatization
Altitude creates a bigger challenge than the trail itself for many climbers. As you climb higher, the air contains less available oxygen, so your body needs time to adjust.
The 7-day Machame itinerary gives you more time on the mountain than the 6-day option. Your guide should also monitor how you feel during the trek and adjust the pace when necessary.
Barranco Wall
The Barranco Wall is one of the most memorable sections of Machame. It looks intimidating from the camp below, but it does not require ropes or technical climbing equipment under normal conditions.
You use your hands for balance in some places and follow your guide through the rocky sections. A steady pace and careful footing matter more than speed.
Who Should Choose Machame?
Machame suits trekkers who want varied scenery, mountain camping, and a more challenging trekking experience. It works well for people with reasonable fitness who can handle several consecutive days of hiking.
If you want a shorter climb, you can choose the 6-day itinerary. If you have more time and want a more gradual approach to altitude, the 7-day itinerary gives you an extra day on the mountain.
You should prepare properly before choosing Machame, especially if you have little experience with long-distance hiking or high-altitude trekking.
Machame Route Distance and Elevation
The Machame Route covers about 62 km (38 miles) from Machame Gate to Mweka Gate, although the exact distance can vary slightly by itinerary. The route starts at around 1,800 m (5,900 ft) and climbs to Uhuru Peak at 5,895 m (19,341 ft). Your daily elevation gain changes as you move through different parts of Mount Kilimanjaro.
Total Hiking Distance
Most Machame Route itineraries cover approximately 62 km (38 miles) of hiking. The distance includes the climb from Machame Gate to the summit and the descent through the Mweka Route.
The 6-day and 7-day routes follow the same general trail, but the 7-day itinerary spreads the hiking over more days. This gives you more time on the mountain without adding a completely different route.
Highest Point
The highest point on the Machame Route is Uhuru Peak, at 5,895 m (19,341 ft) above sea level. It is also the highest point of Mount Kilimanjaro and the final summit goal.
You reach Uhuru Peak during the summit night, usually after starting the climb from Barafu Camp around midnight. The summit section combines high altitude, cold temperatures, darkness, and a long hiking day, so climbers need steady pacing and proper preparation.
Daily Elevation
Elevation changes significantly from day to day on Machame. You start in the rainforest at lower altitude and gradually move through moorland, alpine desert, and the high summit zone.
Section
Approximate Elevation
Machame Gate
1,800 m
Machame Camp
3,000 m
Shira Camp
3,845 m
Barranco Camp
3,960 m
Karanga Camp
4,035 m
Barafu Camp
4,640 m
Uhuru Peak
5,895 m
Mweka Gate
1,640 m
The elevation does not increase steadily every day. Some sections gain altitude gradually, while others include climbs and descents before reaching the next camp. This changing profile makes the route physically demanding and gives your body more opportunities to adjust before summit day.
Machame Route 7-Day Itinerary
The 7-day Machame Route covers about 62 km (38 miles) and gives you seven days to move from the rainforest to Uhuru Peak and back to the mountain gate. The itinerary includes gradual altitude gain, a climb-high-sleep-low section, and an extra day compared with the 6-day option.
Day 1: Machame Gate to Machame Camp
Distance: 11 km (7 miles) Hiking Time: 5-7 hours Starting Elevation: 1,800 m (5,905 ft) Camp Elevation: 3,000 m (9,840 ft) Accommodation: Machame Camp Habitat: Montane rainforest
Your Kilimanjaro trek begins at Machame Gate. After registration and a short preparation, you enter the rainforest and follow a steadily rising trail toward Machame Camp.
The forest provides shade, fresh mountain air, and the first views of Kilimanjaro’s natural environment. Walk at a comfortable pace because the goal today is to start the climb steadily, not to finish quickly.
Day 2: Machame Camp to Shira Camp
Distance: 5 km (3 miles) Hiking Time: 4-6 hours Starting Elevation: 3,000 m (9,840 ft) Camp Elevation: 3,845 m (12,615 ft) Accommodation: Shira Camp Habitat: Moorland and heath
Today you leave the rainforest and enter the moorland zone. The trail becomes more open as you climb toward the Shira Plateau.
The shorter hiking distance gives you time to settle into the higher altitude. Take slow, steady steps and drink regularly as your body adjusts to the change in elevation.
Day 3: Shira Camp to Lava Tower to Barranco Camp
Distance: 10 km (6 miles) Hiking Time: 6-8 hours Starting Elevation: 3,845 m (12,615 ft) Highest Point: 4,630 m (15,190 ft) Camp Elevation: 3,960 m (12,990 ft) Accommodation: Barranco Camp Habitat: Alpine desert
Day 3 brings an important acclimatization section. You climb from Shira toward Lava Tower at about 4,630 m before descending toward Barranco Camp.
This climb-high, sleep-lower pattern gives you time at a higher elevation while you finish the day at a lower camp. The trail also introduces the dramatic volcanic landscape that surrounds the upper slopes of Kilimanjaro.
Day 4: Barranco Camp to Karanga Camp
Distance: 5 km (3 miles) Hiking Time: 3-5 hours Starting Elevation: 3,960 m (12,990 ft) Camp Elevation: 4,035 m (13,238 ft) Accommodation: Karanga Camp Habitat: Alpine desert
The day starts with the famous Barranco Wall. Although it looks steep from the camp, you can climb it without technical climbing equipment. Your guide will show you where to place your feet and how to move safely through the rocky sections.
After the wall, the trail crosses several ridges and valleys before reaching Karanga Camp. The shorter day gives you time to rest and prepare for the higher camps ahead.
Day 5: Karanga Camp to Barafu Camp
Distance: 4 km (2.5 miles) Hiking Time: 3-4 hours Starting Elevation: 4,035 m (13,238 ft) Camp Elevation: 4,640 m (15,223 ft) Accommodation: Barafu Camp Habitat: Alpine desert
You leave Karanga and continue toward Barafu Camp, the starting point for your summit attempt.
The landscape becomes increasingly rocky and exposed as you climb higher. Once you reach Barafu, your team prepares for the summit night. Eat, drink, organize your summit gear, and rest as much as possible before the midnight start.
Day 6: Barafu Camp to Uhuru Peak and Mweka Camp
Distance: About 5 km to Uhuru Peak, then 12 km to Mweka Camp Hiking Time: 7-8 hours to the summit, followed by 4-6 hours of descent Starting Elevation: 4,640 m (15,223 ft) Uhuru Peak: 5,895 m (19,341 ft) Accommodation: Mweka Camp Habitat: Arctic zone to rainforest
This is the longest and most demanding day of the trek. You normally begin around midnight and climb slowly toward Stella Point on the crater rim.
From Stella Point, continue along the crater rim toward Uhuru Peak, the highest point on Mount Kilimanjaro. After reaching the summit, take time to enjoy the achievement and views before beginning the descent.
You return toward Barafu and then continue down the Mweka trail to Mweka Camp, where you spend your final night on the mountain.
Day 7: Mweka Camp to Mweka Gate
Distance: 10 km (6 miles) Hiking Time: 3-4 hours Starting Elevation: About 3,100 m (10,170 ft) Mweka Gate: 1,640 m (5,380 ft) Accommodation: Hotel after the trek Habitat: Montane rainforest
Your final hiking day takes you back through the rainforest to Mweka Gate. The descent feels different after the summit because you can finally relax and enjoy the lower altitude.
At the gate, you complete the final registration and receive your summit certificate. Your WeWild team then transfers you to your hotel in Moshi or Arusha, depending on your travel plan.
The 6-day Machame Route follows the same general trail as the 7-day version but removes the overnight stop at Karanga Camp. You climb from Barranco Camp directly to Barafu Camp on Day 4, making that day longer and more demanding.
The route still passes through the rainforest, moorland, alpine desert, and high summit zone before reaching Uhuru Peak. Because you spend one less night on the mountain, the 6-day option gives your body less time to adjust to altitude than the 7-day itinerary.
Day 1: Machame Gate to Machame Camp
Start at Machame Gate and hike through the montane rainforest toward Machame Camp. The trail gradually becomes steeper as you leave the lower slopes behind.
Distance: About 11 km Hiking time: 5-7 hours Elevation: 1,800 m to about 3,000 m Accommodation: Machame Camp
Day 2: Machame Camp to Shira Camp
The trail leaves the rainforest and enters the moorland zone. You climb across open ridges toward the Shira Plateau, where the landscape becomes wider and more exposed.
Distance: About 5 km Hiking time: 4-6 hours Elevation: About 3,000 m to 3,845 m Accommodation: Shira Camp
Day 3: Shira Camp to Lava Tower to Barranco Camp
Today provides an important acclimatization climb. You first gain elevation toward Lava Tower before descending to Barranco Camp.
Distance: About 10 km Hiking time: 6-8 hours Highest point: About 4,630 m at Lava Tower Accommodation: Barranco Camp
Day 4: Barranco Camp to Barafu Camp
This is one of the most demanding days on the 6-day itinerary. You begin with the Barranco Wall and then continue across the southern slopes toward Barafu Camp without an overnight stop at Karanga.
Distance: About 9 km Hiking time: 6-8 hours Elevation: About 3,960 m to 4,640 m Accommodation: Barafu Camp
Arrive at Barafu with enough time to eat, organize your summit equipment, and rest before the midnight summit attempt.
Day 5: Barafu Camp to Uhuru Peak and Mweka Camp
You begin the summit climb around midnight and ascend toward Stella Point before continuing along the crater rim to Uhuru Peak at 5,895 m.
After reaching the summit, descend through the upper slopes and continue toward Mweka Camp for your final night on the mountain.
Summit elevation: 5,895 m Accommodation: Mweka Camp
Day 6: Mweka Camp to Mweka Gate
Your final day follows the trail through the rainforest toward Mweka Gate. After completing the park formalities, you can collect your summit certificate before transferring to your hotel.
Distance: About 10 km Hiking time: 3-4 hours Elevation: About 3,100 m to 1,640 m Accommodation: Hotel after the trek
The main difference comes from Day 4. The 6-day route combines Barranco and Karanga into one longer hiking day, while the 7-day route spends a night at Karanga before continuing to Barafu.
The 7-day option gives you one additional day on the mountain, which creates a more gradual schedule. The 6-day option suits trekkers who want a shorter itinerary and feel comfortable with longer hiking days.
Machame Route Camps
The Machame Route uses mountain camps rather than permanent huts. Each camp marks an important stage of the climb and provides a place to sleep, eat, and prepare for the next day’s hike.
Machame Camp
Machame Camp sits at about 3,000 m (9,840 ft) above sea level. It provides the first overnight stop after leaving Machame Gate.
The camp lies within the transition from the rainforest toward higher vegetation zones, so the surroundings still feel green compared with the upper mountain.
Shira Camp
Shira Camp sits at approximately 3,845 m (12,615 ft) on the Shira Plateau.
The environment becomes more open here, with wide mountain views and fewer trees. It also marks an important step into the higher-altitude section of the route.
Barranco Camp
Barranco Camp stands at roughly 3,960 m (12,990 ft) beneath the dramatic Barranco Wall.
Its location makes it one of the most memorable camps on Machame. Climbers wake up close to the wall and begin the next day with the famous climb over it.
Karanga Camp
Karanga Camp sits at about 4,035 m (13,238 ft) and appears on the 7-day Machame itinerary.
The camp provides an additional overnight stop between Barranco and Barafu. The 6-day itinerary does not spend the night here because it continues directly from Barranco to Barafu.
Barafu Camp
Barafu Camp sits at approximately 4,640 m (15,223 ft) and serves as the main staging point for the summit attempt.
The camp sits in a rocky, exposed environment with little vegetation. Climbers usually arrive here in the afternoon, prepare their summit equipment, eat, and rest before beginning the night climb.
Mweka Camp
Mweka Camp sits at about 3,100 m (10,170 ft) on the descent side of Kilimanjaro.
After reaching Uhuru Peak, climbers descend through the upper slopes toward Mweka Camp. It provides the final overnight stop before the descent to Mweka Gate.
Machame Route Success Rate
The Machame Route has a strong summit record, but your chance of reaching Uhuru Peak depends on more than the route name. The 7-day itinerary generally gives climbers more time to adjust to altitude than the 6-day itinerary, which can make a meaningful difference in summit performance.
6-Day Machame
The 6-day Machame Route can have a lower summit success rate than the 7-day version because it gives you less time to acclimatize. The schedule also combines Barranco and Barafu into one demanding day.
A commonly quoted planning range for 6-day Machame is around 80-85%, but this should not serve as a guarantee for every group. Different operators use different methods when calculating success rates, and some only count climbers who reach a particular point on the mountain.
7-Day Machame
The 7-day Machame Route usually provides better conditions for acclimatization because it adds an overnight stop at Karanga Camp before Barafu.
A commonly quoted planning range is around 85-90%. However, actual results can vary between groups and operators, so you should treat any published percentage as an estimate rather than a promise.
What Affects Summit Success?
Several factors can influence whether you reach Uhuru Peak:
Acclimatization: Your body needs time to adjust to lower oxygen levels at altitude. A gradual schedule can help your body adapt.
Pacing: Walking slowly and maintaining a steady rhythm helps conserve energy, especially at higher elevations.
Fitness and preparation: Regular walking, hiking, and endurance training can prepare you for consecutive days on the mountain.
Altitude response: People respond differently to high altitude. Good fitness does not guarantee that someone will avoid altitude-related problems.
Weather: Cold, rain, wind, snow, or poor visibility can make parts of the climb more difficult.
Guide support: An experienced mountain team can monitor your condition, manage the pace, and respond when a climber develops altitude-related symptoms.
Rest, food, and hydration: Enough sleep, regular meals, and adequate fluid intake help you maintain energy throughout the trek.
For these reasons, the number of days matters, but it does not determine summit success on its own. Your preparation, acclimatization, health on the mountain, weather, and decisions made during the trek all contribute to the final outcome.
Machame Route Safety
Safety on the Machame Route depends on careful pacing, regular health checks, experienced guides, and a clear response plan for problems on the mountain. The main concern involves altitude, especially during the higher sections and summit attempt.
Altitude Monitoring
Your mountain team should check how you feel throughout the trek and pay close attention to symptoms such as headache, nausea, dizziness, unusual tiredness, or difficulty sleeping.
As you climb higher, your guide can assess your condition and decide whether you should continue, rest, descend, or stop the climb. Tell your guide about any symptoms early instead of trying to hide them.
A slower pace also gives your body more time to adjust to the increasing altitude.
Guide Support
Your guide leads the group, controls the walking pace, checks climbers during the day, and helps the team make safe decisions.
On difficult sections such as the Barranco Wall and summit climb, the guide shows you the safest way through the terrain. The crew also helps manage breaks, meals, water, and communication during the trek.
Choose an operator that uses trained mountain guides and has a clear emergency plan before starting your climb.
Emergency Procedures
A professional mountain team should have a plan for injuries, serious altitude problems, sudden illness, or other emergencies.
If a climber develops a serious problem, the guide can stop the ascent and arrange a descent to a safer elevation. The team may also use emergency communication and mountain rescue procedures when the situation requires further assistance.
Before your trek, ask your operator how they handle emergencies, what communication equipment they carry, and how they arrange evacuation when necessary.
What Happens If You Get Altitude Sickness?
If you develop mild altitude sickness symptoms, your guide will normally stop further ascent and assess your condition. You may need to rest at the same elevation and avoid climbing higher until your symptoms improve.
If symptoms become severe or continue to worsen, descent becomes the main treatment. Your guide may take you to a lower elevation and arrange medical or emergency support when necessary.
Do not continue toward the summit if you develop serious symptoms. Severe altitude illness can become life-threatening, so early reporting and quick action matter.
If you feel unwell at any point, tell your guide immediately. Do not wait until symptoms become severe.
Machame Route Scenery and Wildlife
The Machame Route offers some of Kilimanjaro’s most varied scenery, changing from dense rainforest to open moorland, volcanic landscapes, and the stark high-altitude summit zone. Wildlife becomes less common as you gain elevation, but the lower forest can still provide opportunities to see birds and small animals.
Rainforest
The trek begins in the montane rainforest, where tall trees, ferns, moss, and thick vegetation create a cool and shaded environment. You may hear birds and spot small forest animals along the trail.
Moorland and Shira Plateau
Higher on the mountain, the forest gives way to moorland and heath. Giant heathers, grasses, volcanic rocks, and wide views replace the dense trees.
The Shira Plateau offers some of the best open views on the route, including views toward the higher slopes of Kilimanjaro.
Barranco Valley
The area around Barranco provides dramatic volcanic scenery. The towering Barranco Wall, deep valleys, rocky ridges, and views toward the Southern Icefields make this one of the most memorable parts of the trek.
Alpine Desert
Above the vegetation zones, the landscape becomes much more barren. You see volcanic rocks, dark soil, and wide open slopes with very little plant life.
This environment creates a strong contrast with the green forest where your trek begins.
Summit Zone
Near Barafu and Uhuru Peak, vegetation almost disappears. The surroundings become rocky, cold, and exposed, with views across Kilimanjaro’s crater and surrounding landscape when weather conditions allow.
Wildlife on the Machame Route
Wildlife sightings become less frequent as you climb. In the lower forest, you may encounter colobus monkeys, blue monkeys, small mammals, and many bird species. Some climbers may also notice signs of larger animals, although sightings remain unpredictable.
The main attraction of the Machame Route is the changing mountain environment rather than guaranteed wildlife encounters. Each elevation zone offers a different landscape, making the trek feel like a journey through several natural environments in one climb.
Best Time to Climb Machame
The best time to climb the Machame Route is during January to mid-March and June to October, when Kilimanjaro usually experiences its more favorable trekking conditions. These periods generally bring better trail conditions, clearer views, and less rain than the main wet seasons.
January to Mid-March
This period offers a good balance between weather and quieter trails. Days can provide clear mountain views, while temperatures remain comfortable at lower elevations.
You may encounter some cloud, rain, or snow at higher elevations, so prepare for changing conditions. January and February often provide good climbing conditions before the wetter period arrives.
June to October
This is the most popular climbing period because the weather usually stays drier and the skies often remain clearer. Dry trails can make walking more comfortable, especially on rocky and steep sections.
The main disadvantage is higher demand. Machame can become busy during the busiest months, particularly around July, August, and September. Booking early helps you secure your preferred dates and accommodation.
April and May
April and May bring the long rains, which can create wetter, muddier, and more slippery trails. Clouds can also reduce mountain views.
You can still climb during these months, but changing weather can make the trek less predictable. Climbers who choose this period should prepare carefully for wet conditions.
November to December
The short rains usually arrive around November and can continue into December. Rain does not necessarily continue all day, but afternoon showers and cloud can affect trail conditions and visibility.
This period can suit climbers who prefer fewer crowds and accept a greater chance of rain.
Which Months Should You Choose?
Choose June to October if you want the most consistently dry trekking conditions and do not mind busier trails.
Choose January to mid-March if you want favorable conditions with generally fewer climbers than the main mid-year season.
Whichever month you choose, weather on Kilimanjaro can change quickly. Good clothing, waterproof protection, and flexible planning remain important throughout the climb.
Machame Route Cost
The cost of climbing the Machame Route usually ranges from about $1,500 to $4,000+ per person. Your final price depends mainly on whether you choose a 6- or 7-day trek, private or group climbing, the number of trekkers, and the services included in your package.
A very low price may leave out important services, so compare the full package rather than looking at the headline price alone.
6-Day Cost
A 6-day Machame climb commonly costs around $1,500-$2,500 per person for a well-organized trip. Private climbs, smaller groups, upgraded accommodation, and additional services can increase the price.
The 6-day option costs less than the 7-day itinerary because you spend one fewer day on the mountain. However, the shorter schedule does not mean you should choose an operator based only on price.
When comparing quotes, check whether the price includes park fees, crew wages, meals, camping equipment, transfers, and pre- or post-climb accommodation.
7-Day Cost
A 7-day Machame climb commonly costs around $1,800-$3,000+ per person, depending on the group size and package.
The extra day adds another night on the mountain and additional park and camping costs. It also creates a more gradual itinerary than the 6-day option, with an overnight stop at Karanga Camp.
Private climbs and higher service levels can push the price above this range. Ask your operator for a detailed quotation before booking so you know exactly what you are paying for.
Airport or local transfers, when included in the package
Hotel accommodation before and/or after the trek, when included
First-aid equipment and basic mountain safety equipment
Park and crew registration
The exact inclusions vary between operators, so always check your quotation carefully.
What’s Not Included?
Most Machame packages do not include:
International flights
Tanzania visa
Travel insurance
Personal trekking equipment
Personal sleeping bag, unless the operator provides or rents one
Tips for guides, porters, and cooks
Personal drinks and snacks outside the provided meals
Medical or evacuation costs that your insurance does not cover
Extra hotel nights or transfers outside the agreed itinerary
Crew tips deserve separate planning. The amount depends on group size, trek length, and your experience with the crew. Your operator should explain its tipping guidelines before the climb so you can budget properly.
When comparing Machame prices, look at the total value of the package, not just the cheapest quote. A clear quotation should show what you receive, what you pay separately, and any additional costs you may face during the trip.
What Is Camping Like on Machame?
Camping on the Machame Route means sleeping in mountain tents at designated campsites along the trail. Your crew sets up the tents, prepares meals, and helps keep the camp organized.
You usually sleep in a tent with a sleeping bag and sleeping mat. Some operators provide a dining tent where you eat meals and relax after hiking. Camps also have basic toilet facilities.
Evenings can feel cold, especially at higher camps, so warm clothing and a good sleeping bag matter. After dinner, most trekkers rest early because the next hiking day starts early.
Machame camping gives you a simple mountain experience while keeping you close to Kilimanjaro’s changing landscapes.
What to Pack for the Machame Route
Pack light but prepare for changing temperatures, rain, cold nights, and high altitude. Your main gear should include:
Hiking boots with good grip
Waterproof jacket and rain trousers
Warm fleece and insulated jacket
Hiking trousers and moisture-wicking shirts
Warm hat, gloves, and extra socks
Headlamp with spare batteries
Sunglasses, sunscreen, and lip balm
Sleeping bag suitable for cold mountain nights
25-35L daypack
Duffel bag for your main gear
Water bottles or hydration system
Trekking poles
Personal toiletries and medication
Basic first-aid items
Passport and travel documents
Keep important items such as your passport, phone, camera, medication, and valuables in waterproof bags. Your operator can provide or arrange camping equipment such as tents, sleeping mats, and dining equipment, depending on the package.
What Happens on Summit Night?
Summit night starts around midnight at Barafu Camp. You hike slowly in the dark toward Stella Point before continuing to Uhuru Peak at 5,895 m.
The climb takes several hours, with short breaks for water and rest. The cold, darkness, steep terrain, and high altitude make this the most demanding part of the trek.
After reaching Uhuru Peak, you spend a short time enjoying the summit and taking photos before starting the descent. You then return toward Barafu and continue down to Mweka Camp for the night.
Wear warm layers, gloves, a warm hat, and a headlamp. Follow your guide’s pace, drink regularly, and tell your guide immediately if you feel unwell.
Machame vs Lemosho vs Rongai vs Marangu
Each Kilimanjaro route offers a different experience. Machame suits trekkers who want varied scenery and a challenging camping trek. Lemosho gives a longer approach with more time for acclimatization. Rongai approaches from the quieter northern side, while Marangu uses mountain huts instead of tents.
Route
Typical Days
Camping
Main Character
Machame
6-7 days
Tents
Scenic, challenging, popular
Lemosho
7-8 days
Tents
Longer approach, varied scenery
Rongai
6-7 days
Tents
Quieter, northern approach
Marangu
5-6 days
Huts
Direct route, hut accommodation
Which Route Fits You?
Choose Machame if you want a scenic trek with camping and a challenging trail.
Choose Lemosho if you prefer a longer itinerary with more time to adjust to altitude.
Choose Rongai if you want a quieter approach and a different view of Kilimanjaro.
Choose Marangu if you prefer sleeping in mountain huts rather than tents.
The best route depends on your preferred hiking days, accommodation style, scenery, and approach to altitude.
Why Climb Machame With WeWild Travel?
WeWild Travel helps you climb the Machame Route with experienced mountain guides, clear planning, and support from the first day to the summit.
Our team focuses on:
Experienced mountain guides who understand the Machame trail and changing altitude.
Safety-focused trekking with regular checks, careful pacing, and clear emergency procedures.
Good route planning that matches your trekking days, fitness, and travel plans.
Quality camping support with reliable meals, tents, and an organized mountain crew.
Clear communication before and during your climb, so you know what to expect each day.
Responsible trekking with respect for the mountain, local crew, and environment.
We keep the experience personal and organized, helping you focus on the trail, the scenery, and reaching Uhuru Peak.
Machame Route FAQs
How many days does the Machame Route take?
Most trekkers choose 6 or 7 days. The 7-day option gives you more time to adjust to altitude and breaks the trek into more manageable hiking days.
Is Machame Route difficult?
Yes. Machame offers a challenging trek with steep sections, long hiking days, and a demanding summit night. You do not need technical climbing skills.
What is the Machame Route success rate?
Commonly quoted estimates range around 80-85% for 6 days and 85-90% for 7 days. Results vary between operators and depend on acclimatization, preparation, weather, and individual response to altitude.
Where does Machame Route start?
The trek starts at Machame Gate on the southern side of Mount Kilimanjaro. After reaching the summit, you descend through the Mweka Route.
Do I sleep in tents?
Yes. Machame uses mountain camping rather than permanent huts. Your trekking crew normally provides and sets up the camping equipment.
Is the Barranco Wall dangerous?
The Barranco Wall looks steep but does not require technical climbing. You use your hands for balance in some sections while your guide helps you move carefully.
What is the best month to climb Machame?
January to mid-March and June to October generally offer favorable trekking conditions. Weather can still change quickly on the mountain.
How much does Machame Route cost?
Prices vary by itinerary, group size, operator, and included services. A 6-day climb often costs less than a 7-day climb because of the extra night and services.
Can beginners climb Machame?
Yes. Beginners can climb Machame with proper preparation, a suitable itinerary, and experienced guides. Fitness and altitude preparation matter more than previous climbing experience.
Why choose WeWild Travel?
WeWild Travel provides route planning, experienced mountain guides, safety support, clear communication, and organized camping support throughout your climb.
Conclusion
The Machame Route offers a challenging Kilimanjaro experience with changing landscapes, mountain camping, and a direct approach to Uhuru Peak. You can complete the route in 6 or 7 days, but your choice should match your preparation, hiking experience, and time available.
Good pacing, proper acclimatization, suitable equipment, and experienced guides can make your climb more organized and enjoyable.
If you are ready to climb Machame, WeWild Travel can help you plan the right itinerary, prepare for the mountain, and support you from Machame Gate to Uhuru Peak.
We are a team of seasoned African travel experts with over a decade of combined experience in the safari industry designing the best affordable safari adventures in Tanzania, without compromising on quality.